摘要:
本文主要描述使用Spring.DM2.0,创建OSGi的HelloWorld演示程序,理解Spring.DM的OSGi框架实现机制。
环境描述:
| 项目 | 版本 |
| Eclipse | 3.7.x |
| JDK | 1.6.x |
| Sprng.DM | spring-osgi-2.0.0.M1-with-dependencies 下载地址 |
一、环境准备
将spring-osgi-2.0.0.M1-with-dependencies ,解压到一个文件夹中,你能看到以下目录:
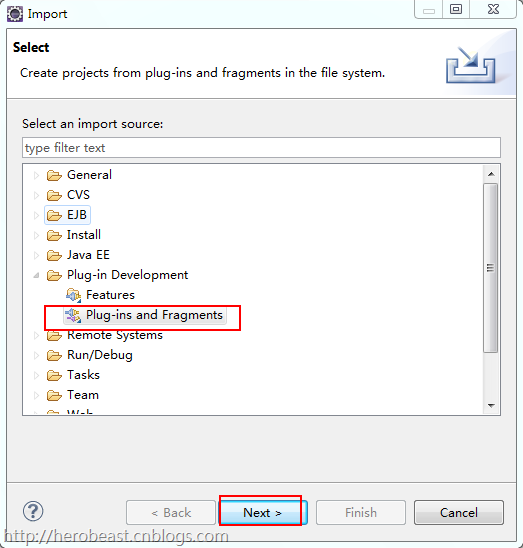
在Eclipse中点击菜单:File->Import,就会出现导入的对话框,如下图
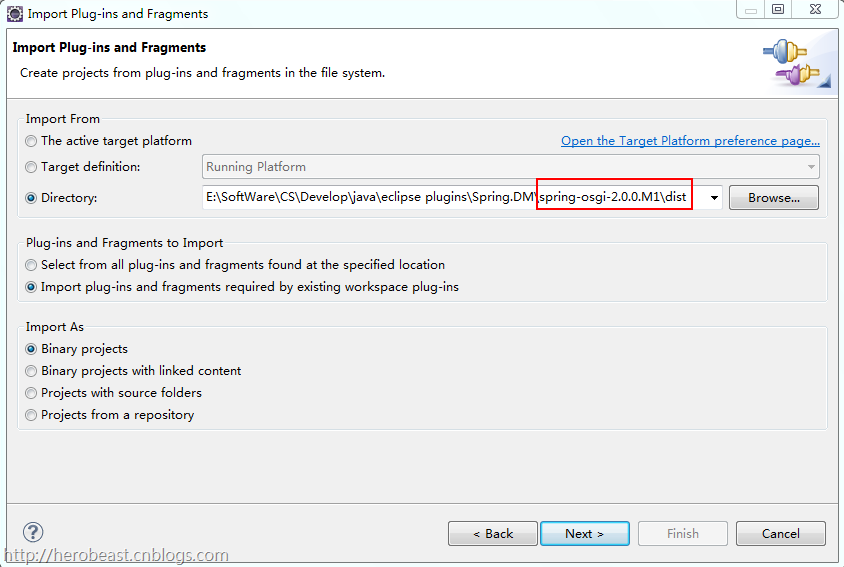
选中“Plug-ins and Fragments”,点击“Next>”,就会出现导入选项对话框,如下图
在"Import From”中选择“Directory”,点及后面的”Browse”浏览我们刚才解压spring.dm的文件夹目录中的"dist“文件夹,然后点”Next>”,
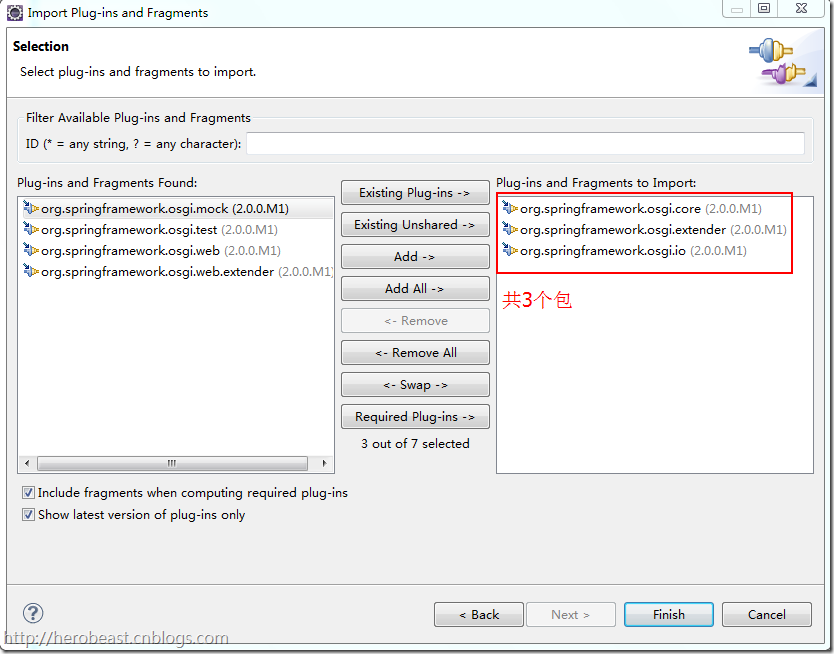
会出现导入对话框,导入如下图选中的jar包,点击“finish”,如图所示
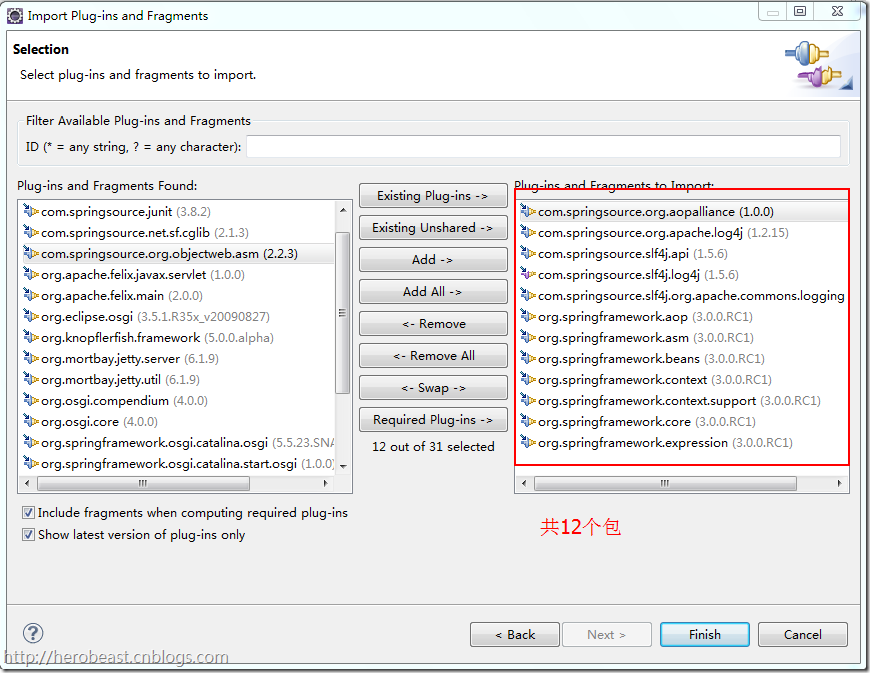
然后同上面的步骤,导入spring-osgi-2.0.0.M1-with-dependencies 解压目录中的lib,选择的jar包如下图所示,点击“finish”完成导入
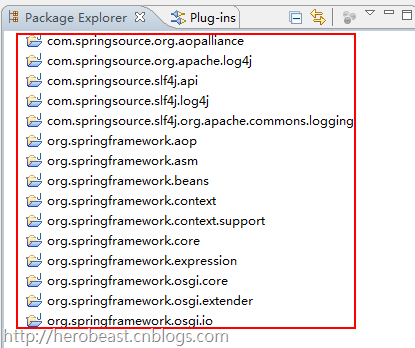
一共从dist和lib目录里面导入了15个包,
- org.springframeork.osgi.bundle.core
- org.springframeork.osgi.bundle.extender
- org.springframeork.osgi.bundle.io
这3个包是spring.dm的核心包,extender包完成了服务的发布和注入的功能,它会在META-INF下的spring目录里面找xml文件,来完成配置工作;
这几个包是org.apache.commons.logging的依赖包,否则会提示如下错误:
Reason: Missing Constraint: Import-Package: org.apache.commons.logging; version="[1.1.1,2.0.0)"
最后你能看到在Package Explorer视图里面看到如下的结果:
到这里就准备好了包引用环境
二、配置OSGi运行配置
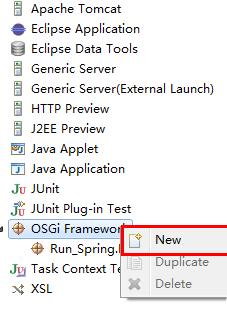
在eclipse菜单操作:Run->Run Configurations…,就会出现运行配置的窗口,在左面的面板中右键点击“OSGi Framework”,点击“New”,如下图所示
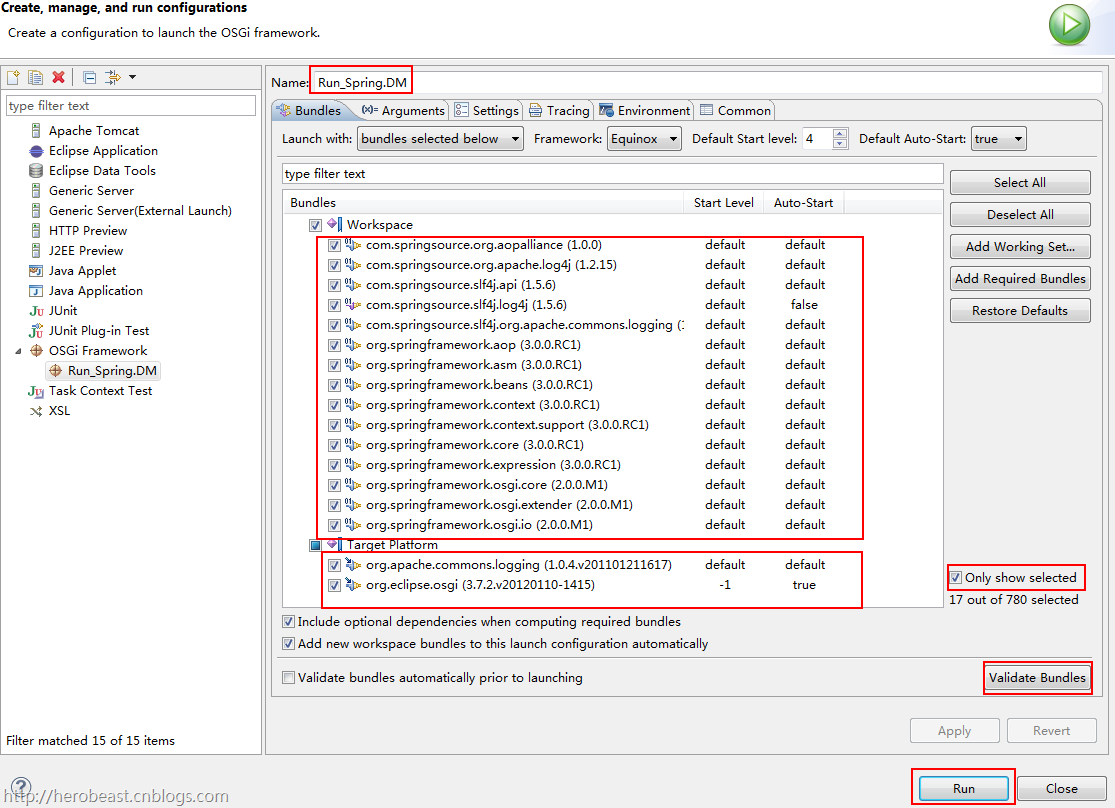
会出现运行配置对话框,如下图所示;
在上图中Workspace中选择运行spring.dm所需要的bundle,所上图所示那个打的红色矩形框,在Target Platform中选择一个osgi和一个loggin包,如上图所示,点击checkbox”Only show selected”,应该和上图一样,点击”Validate Bundles”验证绑定是否正确,我们先把这个run configuration的name设置为:Run_Spring.DM,点击”Apply”按钮保存,最后点击“Run”按钮,运行配置,在Console窗口中能够看到,如下图:
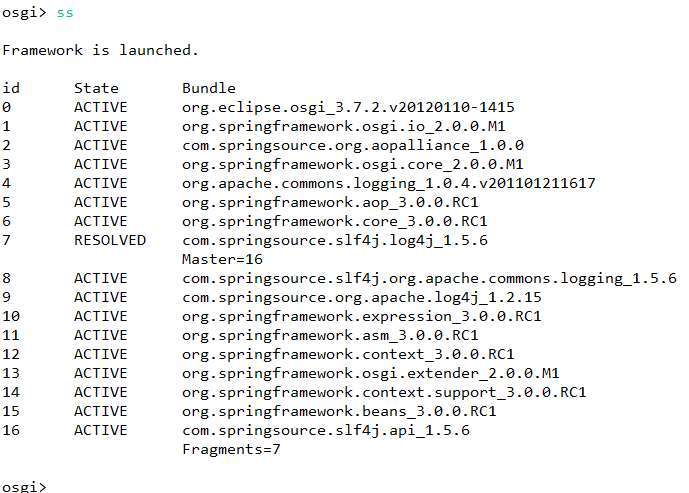
有一个警告(要解决警告问题请查看:Spring.DM web 开发环境搭建 中注意事项章节),先忽略,在控制台按回车键,然后输入:ss,查看插件运行状态,如下图所示
这表示,我们的spring.dm环境已经配置好了,接下来我们就要来个HelloWorld了!
三、创建Helloworld演示
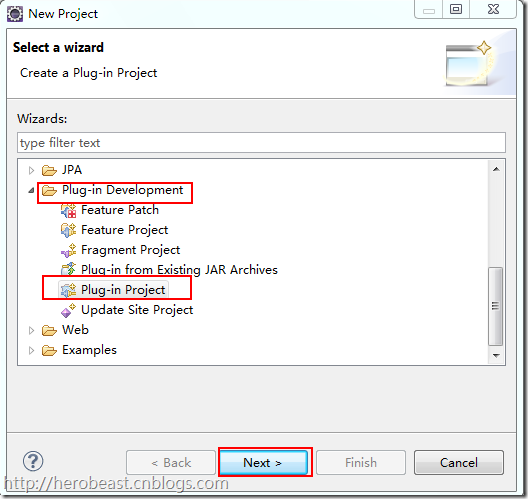
在Eclipse菜单中:File->New->Project…,在New Project对话框中选择如下图所示(plug-in project)
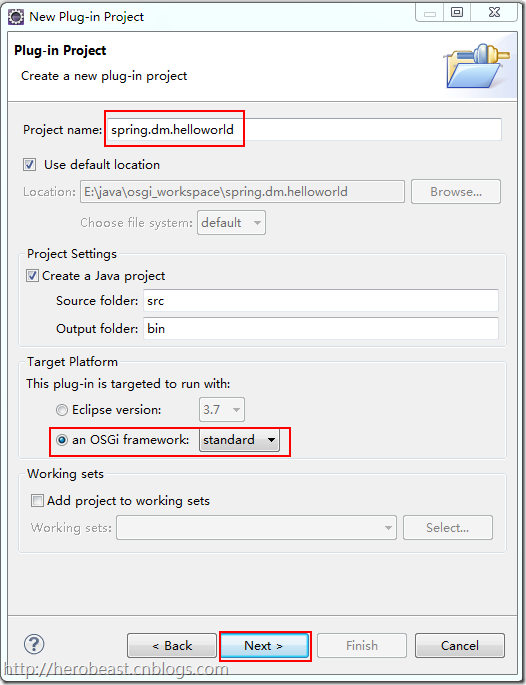
在上图中点击“Next>”就会出现新建工程对话框,选择如下图所示
在上图中把项目名称改为:spring.dm.helloworld,在“Target Platform”中选择”an OSGi framework:standard”,点击“Next>”
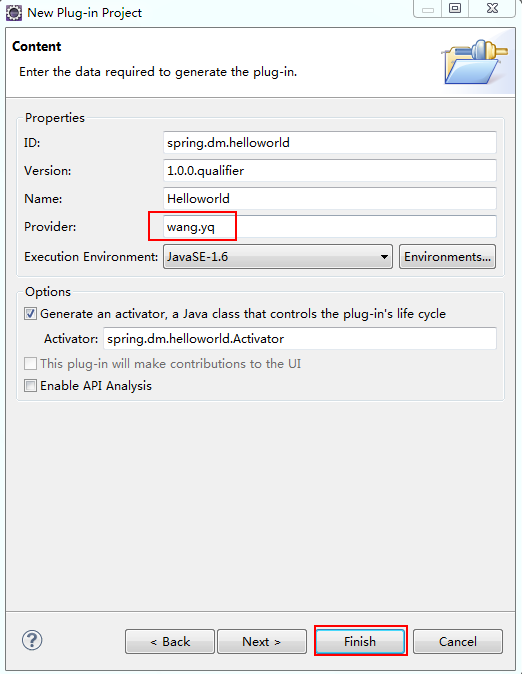
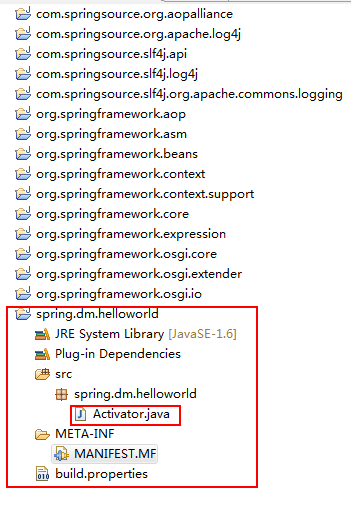
在上图中设置:Provider,然后点击“Finish”完成项目的创建,新项目创建好后,如下图中红框所示
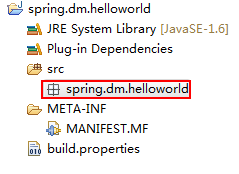
由于我们开发spring.dm不需要Activator,所以要把src下面包“spring.dm.helloworld”中的“Activator.java”删除掉,删除后如下图所示
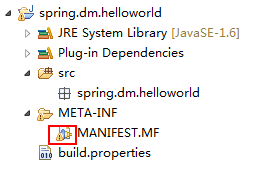
在上图中的META-INF中的MANIFEST.MF文件中出现了一个警告,我们双击打开MANIFEST.MF文件,选择MANIFEST标签,如下图所示
在上图中出现了一个警告标志,如长红色矩形框所示,我们把这一行删除掉,然后保存;否则会出现找不到Activator的错误。目前项目如下图所示:
在上图中src下面包spring.dm.helloworld包下面创建一个HelloWorld的java类文件,如下图所示
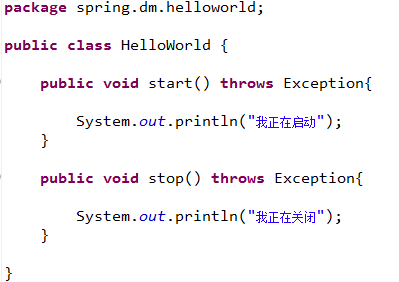
在HelloWorld类中写start和stop两个方法,打印出下面的状态,如下所示,
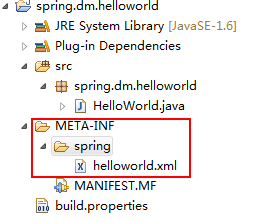
在工程中META-INF文件夹中,新建“spring”文件夹,并在spring文件夹中新建一个helloworld.xml文件,如下图所示:
helloworld.xml文件的内容如下:
<?xml version="1.0" encoding="UTF-8"?>
<beans xmlns="http://www.springframework.org/schema/beans"
  xmlns:xsi="http://www.w3.org/2001/XMLSchema-instance"
  xsi:schemaLocation="http://www.springframework.org/schema/beans http://www.springframework.org/schema/beans/spring-beans.xsd">

  <!--Bean定义 -->
  <bean name="hello" class="spring.dm.helloworld.HelloWorld" init-method="start" destroy-method="stop" >
  </bean>

</beans>
这个bean的配置和我们在使用spring的配置的时候一样,当我们启动helloworld的时候会调用start方法,控制台会出现“我正在启动”,当我们停止helloworld的时候,会调用stop方法,在控制台会打印出“我正在关闭”。
好了,我们的helloworld已经完成了
四、运行HelloWorld
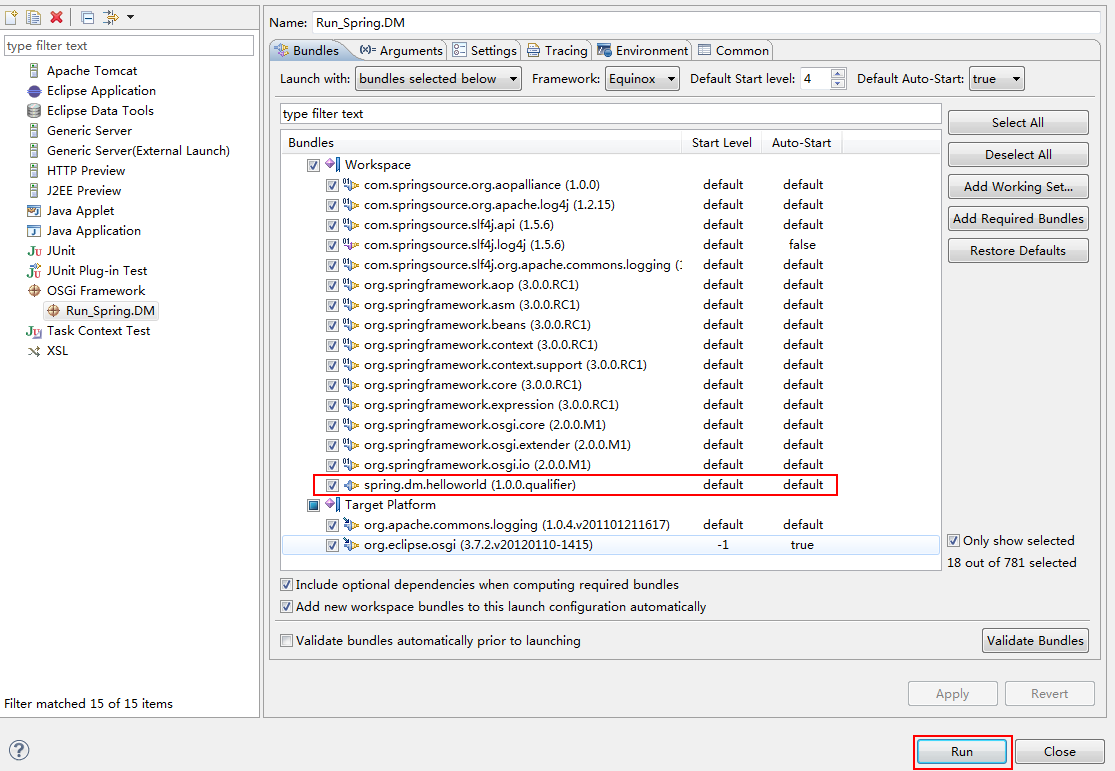
在eclipse菜单中:Run->Run Configurations…,就会出现以下界面,如下图所示
在上图中Workspace中把我们新建的helloworld包选中,如上图所示,点击“Run”按钮,运行,我可以看到如下结果,如下图所示:
我们在控制台中回车,然后输入:ss ,回车,对状态进行查询,结果如下
在上图中我们helloworld已经启动了,我们用命令来停止helloworld,在控制台输入stop 23,回车
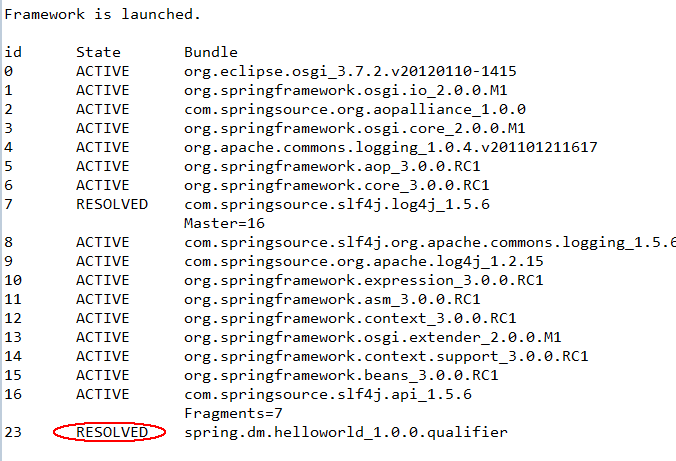
我们在控制台可以看到,输出了“我正在关闭”,输入ss再查询状态,如下图所示:
在上图中可以看到,我们helloworld已经处于resolved状态了。
目前我们已经成功地helloworld出来了!
想了解更多OSGi方面的内容,请持续关注我在博客园的博客.http://herobeast.cnblogs.com.谢谢

