从零开始,搭建一个简单的购物平台(九):
https://blog.csdn.net/time_____/article/details/105465499
项目源码(持续更新):https://gitee.com/DieHunter/myCode/tree/master/shopping
拖更时间较长,公司这几个月项目高峰期,请见谅
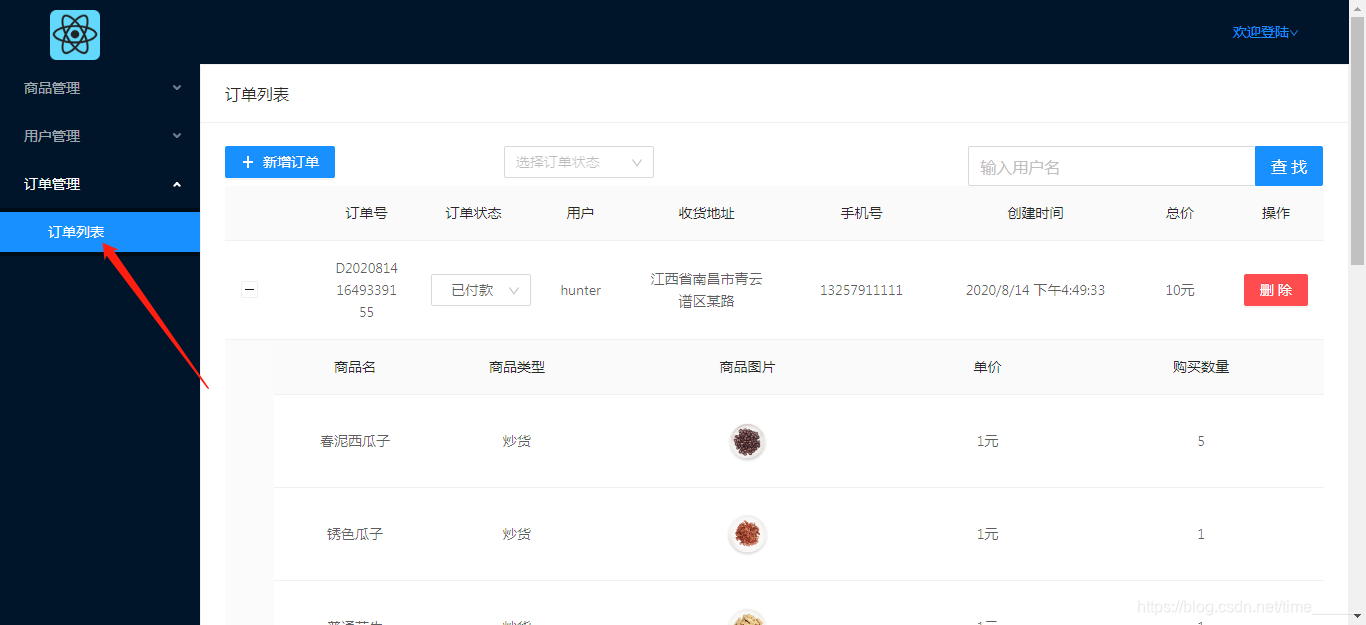
这篇文章主要讲述后端管理系统新增的订单模块的部分内容(前端在之前的计划下稍稍改动,引入了订单的功能,但不包含支付功能),由于与用户管理和商品管理稍有不同,所以单独拎出来介绍一下
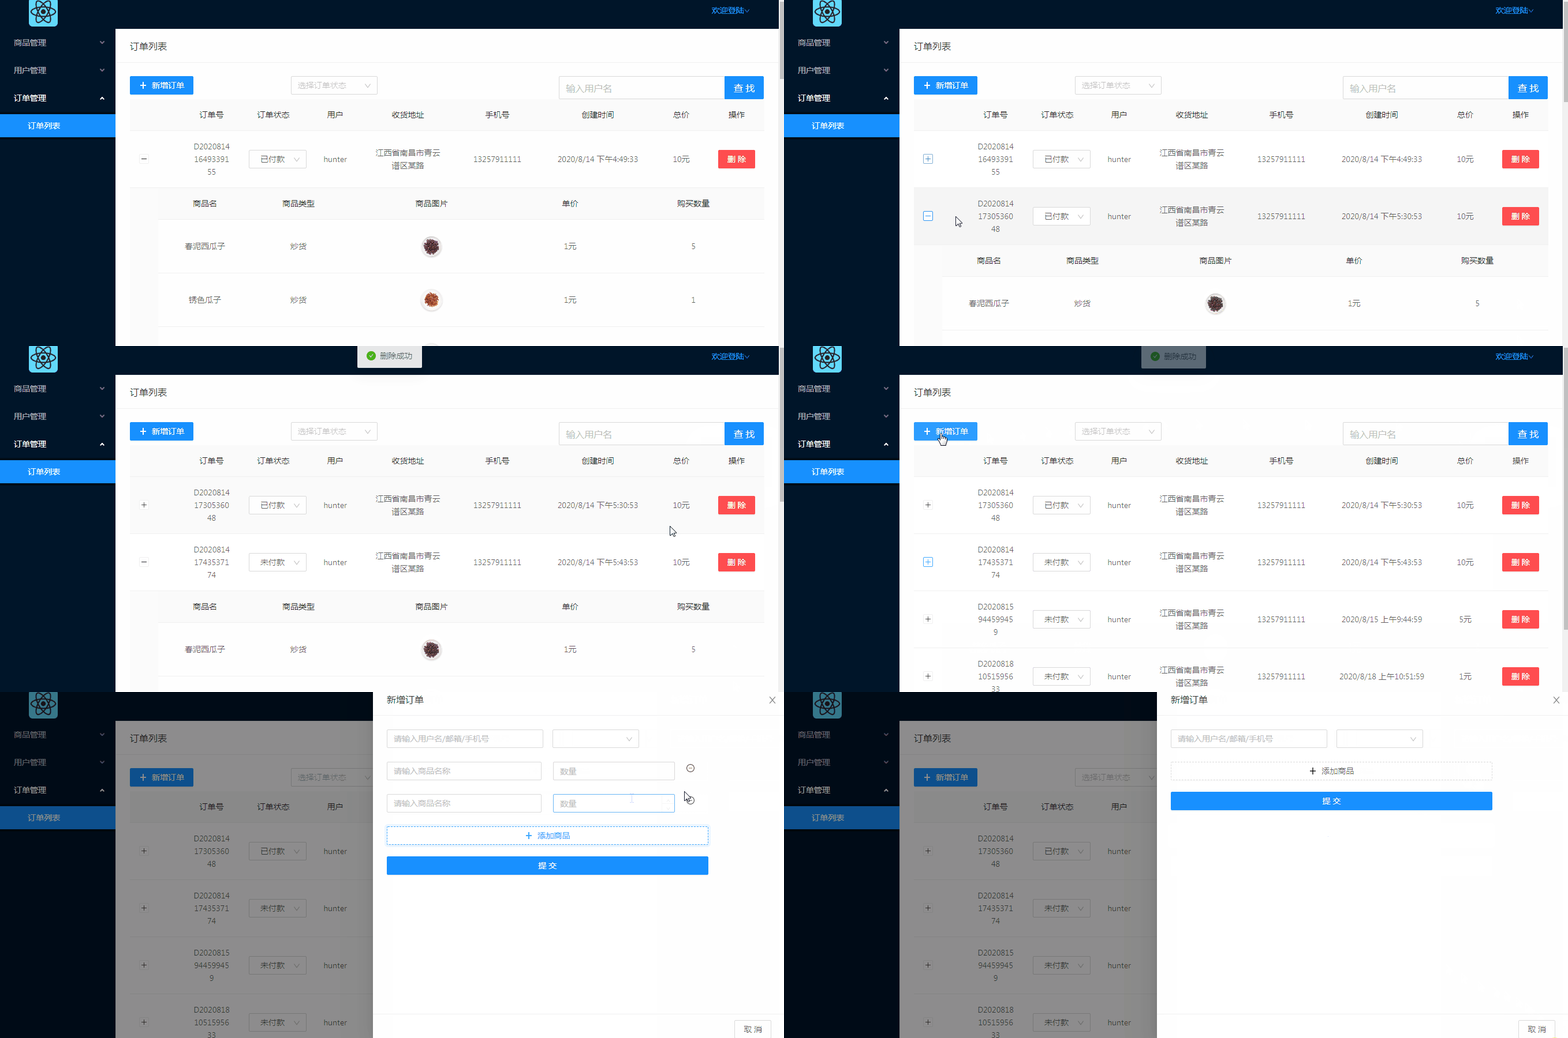
前端效果:


对于订单模块,主要功能有订单列表显示,订单状态修改(不涉及订单状态外其他数据修改),删除订单,新增订单(新增订单方面只做了简单的通过商品名索引来添加,考虑到管理系统的订单新增不是主要的功能,几乎用不上,所以没有细化功能),这篇文章主要介绍后端订单管理实现,接口对接。
服务端:
- 首先我们需要在服务端配置一下数据库表结构,主要包含以下几个字段
Order: { modelName: "orders", data: { orderId: { // 订单号 type: String, required: true, }, username: { //用户名 type: String, required: true, }, phoneNum: { //手机号 type: String, required: true, }, address: { //具体地址 type: String, required: true, }, orderState: { //订单状态 type: String, required: true, }, orderPrice: { // 订单总价 type: String, required: true, }, shopList: { //商品列表 type: Array, required: true, }, orderTime: { //订单创建时间 type: String, required: true, }, }, }, - 使用npm start启动server
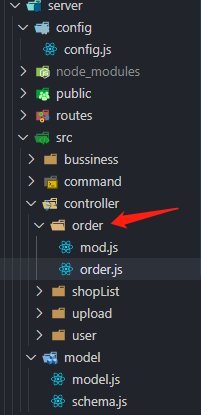
- 然后在src目录下controller目录中新建order文件夹,用于订单接口,逻辑的实现,mod文件和之前一样,新建order表


- 在order中引入依赖包,要注意的是,新增订单不仅仅是需要order一个表,还需要和user和shop表进行联动,因此我们需要调用其他接口逻辑中的方法,引入的包名如下
const router = require("express").Router();//路由 const UserMod = require("../user/mod");//user表联动 const ShopMod = require("../shopList/mod");//shop表联动 const Mod = require("./mod");//order表 const Util = require("../../../utils/utils");//工具类 const Config = require("../../../config/config");//配置文件 const Bussiness = require("../../bussiness/bussiness");//接口逻辑 const { addData, updateData, findData } = require("../../command/command");//数据库操作 -
首先是新增订单接口,这个接口也是需要注意的和坑最多的地方,以下是检测用户,用户地址,商品是否存在
let userFindRes = await Bussiness.hasUser(req, res, UserMod);//检测用户及地址是否存在
  if (!userFindRes) {
    return;
  }
  if (!userFindRes[0].alladdress || !userFindRes[0].address) {
    res.send({
      result: -1,
      msg: "添加失败,请完善收货地址",
    });
    return;
  }
  let shopFindRes = await findData(ShopMod, {//检测商品是否存在
    shopName: {
      $in: res._data.shopList.map((item) => {
        return item.shopName;
      }),
    },
  });
  if (
    !shopFindRes ||
    !shopFindRes.length ||
    shopFindRes.length != res._data.shopList.length
  ) {
    res.send({
      result: -2,
      msg: "有商品不存在",
    });
    return;
  }
下一步,将取出数据库信息(注意:数据库信息是只读,只能用数据库命令修改,所以不能用常规的堆内存存取需要用一个简单的堆变量复制)
static deepCopy(org) {
    //简单的对象复制
    return JSON.parse(JSON.stringify(org));
  }
使用拷贝函数,将数据库信息取出并进行后续修改
let _shopFindRes = Util.deepCopy(shopFindRes); //解决数据库对象只读属性在返回前端之前,计算出总价和订单添加时间
let _orderPrice;//初始化商品总价 let _shopFindRes = Util.deepCopy(shopFindRes); //解决数据库对象只读属性 _shopFindRes.forEach((item, index) => {//合计总费用 if (index == 0) { _orderPrice = 0; } _shopFindRes[index].shopCount = res._data.shopList[index].shopCount; _orderPrice += _shopFindRes[index].shopCount * _shopFindRes[index].shopPrice; }); res._data = { ...res._data, username: userFindRes[0].username, phoneNum: userFindRes[0].phoneNum, address: userFindRes[0].alladdress.join("") + userFindRes[0].address, orderId: Util.createOrderNo(), orderTime: Util.joinDate(), shopList: _shopFindRes, orderPrice: _orderPrice, }; let addRes = await addData(Mod, res._data); if (!addRes || !addRes.length) { res.send({ result: 0, msg: "添加失败", }); return; } res.send({ result: 1, msg: "添加成功", orderId: res._data.orderId, }); -
与订单查询,删除,修改相比新增订单是个逻辑不同的功能,代码能复用的地方较少,其余三个功能均可仿照商品和用户接口写法实现
-
获取订单列表
router.get(Config.ServerApi.orderList, Util.checkToken, async (req, res) => { Bussiness.findInfo( req, res, Mod, { orderTime: res._data.sort,//时间排序 }, { orderId: new RegExp(res._data.orderId, "i"),//orderId(订单号)模糊过滤 username: new RegExp(res._data.keyWord, "i"),//订单用户名模糊过滤 orderState: new RegExp(res._data.orderState, "i"),//订单状态模糊过滤 } ); }); -
删除订单
router.get(Config.ServerApi.delOrder, Util.checkToken, async (req, res) => { if (!Bussiness.isAdmin(res)) { return; } Bussiness.delInfo(req, res, Mod); }); -
修改订单状态
router.post(Config.ServerApi.updateOrder, Util.checkToken, async (req, res) => {
  let updateRes = await updateData(Mod, res._data._id, res._data);
  if (updateRes) {
    res.send({
      result: 1,
      msg: "修改成功",
    });
    return;
  }
  res.send({
    result: 0,
    msg: "修改失败",
  });
});
以上就是订单管理服务端接口和逻辑部分
总结:
编写面向对象代码与实现其功能时,尽量减少函数之间的耦合度(函数与函数之间的联系),使其复用性增强,大大节省开发效率