目录:
在微信小程序中,若需要向远程服务器请求数据,使用wx.request接口即可。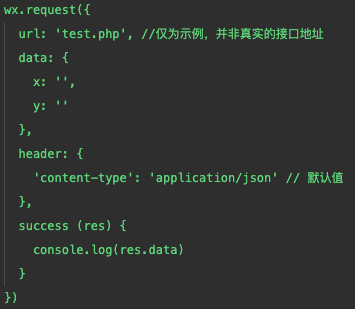
那么在鸿蒙js开发中,请求远程服务器需要如下几步:
1、在config.json配置网络权限和信任域名。
网络权限的配置是在module.reqPermissions中,配置以下三个权限。工具有提示,还是比较友好的。
  "module": {
    "reqPermissions": [
      {
        "name": "ohos.permission.GET_NETWORK_INFO"
      },
      {
        "name": "ohos.permission.SET_NETWORK_INFO"
      },
      {
        "name": "ohos.permission.INTERNET"
      }
    ],
......
信任域名的配置是在deviceConfig中,默认是一个空对象,需配置成如下形式。
  "deviceConfig": {
    "default": {
      "network": {
        "usesCleartext": true,
        "securityConfig": {
          "domainSettings": {
            "cleartextPermitted": true,
            "domains": [
              {
                "subdomains": true,
                "name": "apis.juhe.cn"
              },
              {
                "subdomains": true,
                "name": "api.seniverse.com"
              },
              {
                "subdomains": true,
                "name": "v.juhe.cn"
              },
              {
                "subdomains": true,
                "name": "api.tianapi.com"
              }
            ]
          }
        }
      }
    }
  },
在domains数组中,subdomains为是否信任下级域名,name为域名,无需填写协议。如果请求的服务器域名未配置,是无法请求成功的,且工具不会报错。这里一定记得配置服务器域名。
2、在js文件中引入fetch模块。
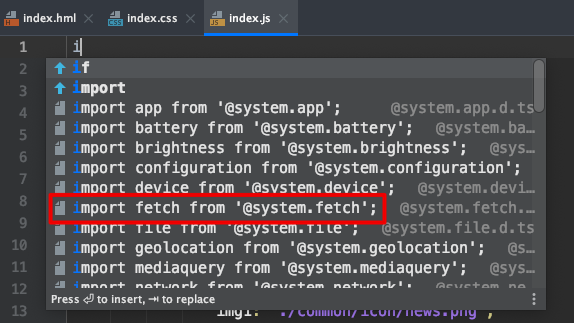
鸿蒙js请求远程服务器的模块为fetch,在js文件的最上方需引入该模块。
import fetch from '@system.fetch';这里也是有提示的。
3、调用fetch.fetch发送请求。
来看一下fetch模块的封装,请求的参数,响应的类型,回调函数都可在对象中定义,和wx.request()基本一致。
export default class Fetch {
  /**
   * Obtains data through the network.
   * @param options
   */
  static fetch(options: {
    /**
     * Resource URL.
     */
    url: string;

    /**
     * Request parameter, which can be of the string type or a JSON object.
     */
    data?: string | object;

    /**
     * Request header, which accommodates all attributes of the request.
     */
    header?: Object;

    /**
     * Request methods available: OPTIONS, GET, HEAD, POST, PUT, DELETE and TRACE. The default value is GET.
     */
    method?: string;

    /**
     * The return type can be text, or JSON. By default, the return type is determined based on Content-Type in the header returned by the server.
     */
    responseType?: string;

    /**
     * Called when the network data is obtained successfully.
     */
    success?: (data: IFetch) => void;

    /**
     * Called when the network data fails to be obtained.
     */
    fail?: (data: any, code: number) => void;

    /**
     * Called when the execution is completed.
     */
    complete?: () => void;
  }): void;
}
比如我在页面初始化执行的方法onInit()中请求聚合数据的天气预报接口,就可以这样写:
  onInit() {
        // 加载天气预报
        fetch.fetch({
            url: 'http://apis.juhe.cn/simpleWeather/query?city=%E5%8D%97%E4%BA%AC&key=xxxxxxxxx',
            responseType: 'json',
            success: res => {
                ......
            }
        });
    }
4、处理返回数据需调用JSON.parse()。
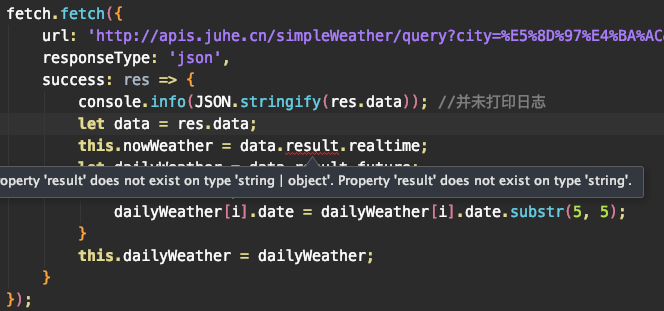
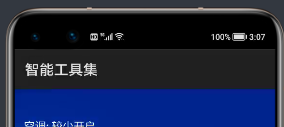
鸿蒙js开发目前调试功能尚不方便,虽有console.log(), console.info()等方法用于打印日志,但实际运行时并未找到日志的打印。所以我只能在视图中划出一小块区域用于调试。
这里看到虽然responseType已设置为json,但用' . '取其中属性时仍会红线报错,且页面中可以看出并未取到值,可以猜测此时的res.data仍为string类型,需调用JSON.parse()将其转为json类型,随后问题解决。
    onInit() {
        // 加载天气预报
        fetch.fetch({
            url: 'http://apis.juhe.cn/simpleWeather/query?city=%E5%8D%97%E4%BA%AC&key=e4b4e30c713b6e2a24f4a851258c8457',
            responseType: 'json',
            success: res => {
                console.info(JSON.stringify(res.data)); //并未打印日志
                let data = JSON.parse(res.data); //必须要加上
                this.nowWeather = data.result.realtime;
                let dailyWeather = data.result.future;
                for(let i in dailyWeather) {
                    dailyWeather[i].date = dailyWeather[i].date.substr(5, 5);
                }
                this.dailyWeather = dailyWeather;
            }
        });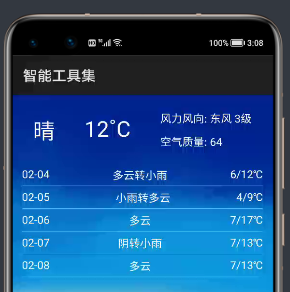
附上天气预报这一部分的代码:
        <!-- 天气 -->
        <div class="weather">
            <div class="now" if="{{ nowWeather }}">
                <text class="nowPhe">
                    {{ nowWeather.info }}
                </text>
                <text>
                    {{ nowWeather.temperature }}˚C
                </text>
                <div class="nowOther">
                    <text>
                        风力风向: {{ nowWeather.direct }} {{ nowWeather.power }}
                    </text>
                    <text>
                        空气质量: {{ nowWeather.aqi }}
                    </text>
                </div>
            </div>
            <div class="daily" if="{{ dailyWeather }}">
                <block for="{{ dailyWeather }}">
                    <div class="dailyItem">
                        <text>
                            {{ $item.date }}
                        </text>
                        <text>
                            {{ $item.weather }}
                        </text>
                        <text>
                            {{ $item.temperature }}
                        </text>
                    </div>
                </block>
            </div>
        </div>
        <!-- 天气end -->
/*天气*/
.weather {
background-image: url('./common/weatherbg.jpg');
background-size: contain;
}
.weather text {
color: #fdfdfd;
}
.now {
100%;
height: 260px;
margin-top: 30px;
display: flex;
align-items: center;
justify-content: space-around;
}
.now>text {
font-size: 60px;
}
.nowPhe {
margin-left: 20px;
}
.nowOther {
margin-right: 20px;
display: flex;
flex-direction: column;
height: 220px;
justify-content: space-around;
}
.daily{
margin-top: 30px;
display: flex;
flex-direction: column;
}
.dailyItem{
margin: 0 30px 0 30px;
height: 120px;
border-bottom: 1px solid #bbbbbb;
display: flex;
justify-content: space-between;
align-items: center;
}
作者:Chris.
想了解更多内容,请访问: 51CTO和华为官方战略合作共建的鸿蒙技术社区https://harmonyos.51cto.com