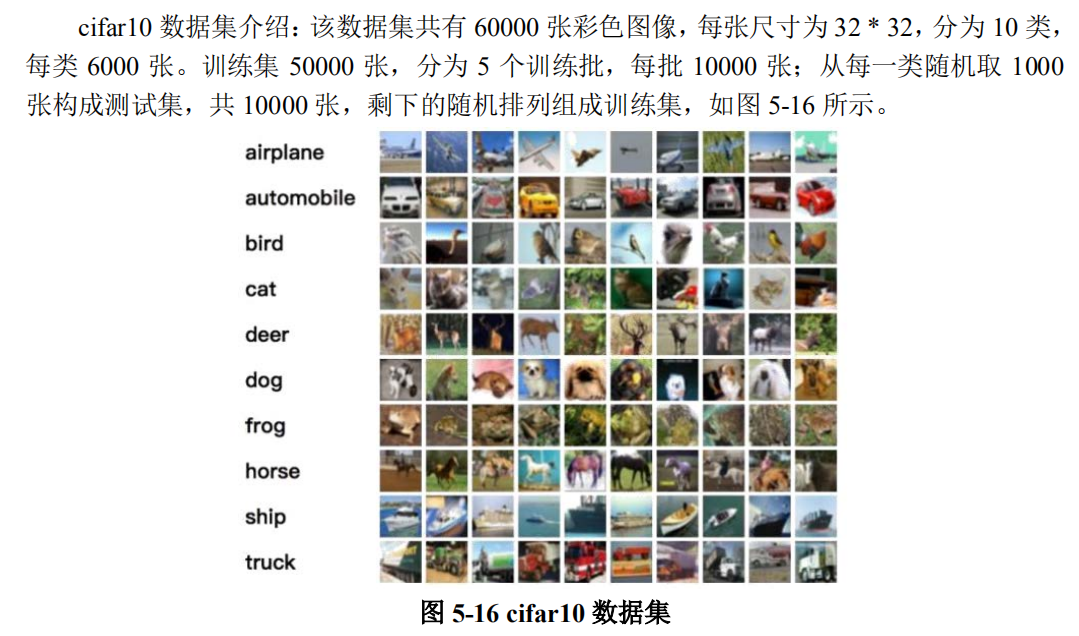
1.cifar10数据集介绍
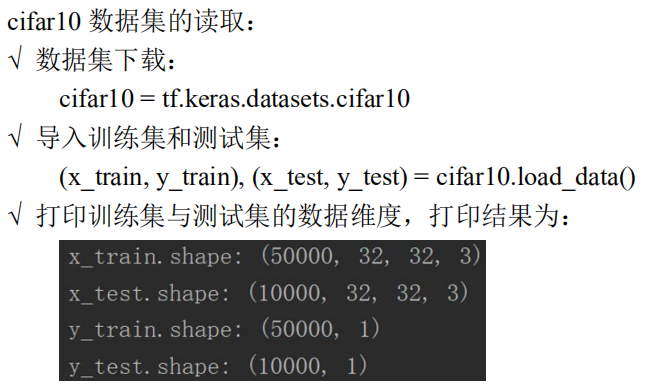
2.cifar10数据集读取
3.卷积神经网络搭建
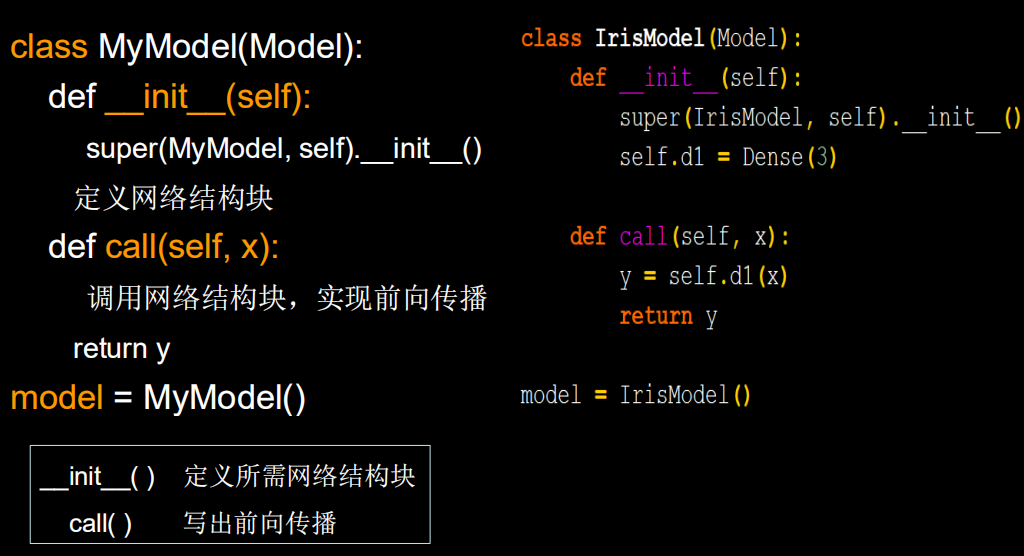
3.1使用class声明网络结构
使用 Sequential 可以快速搭建网络结构,但是如果网络包含跳连等其他复杂网络结构,Sequential 就无法表示了。这就需要使用 class 来声明网络结构。
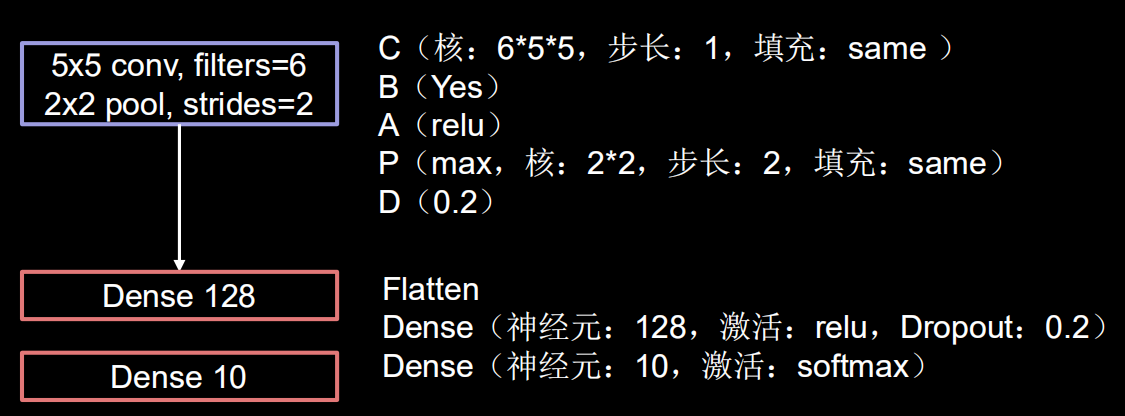
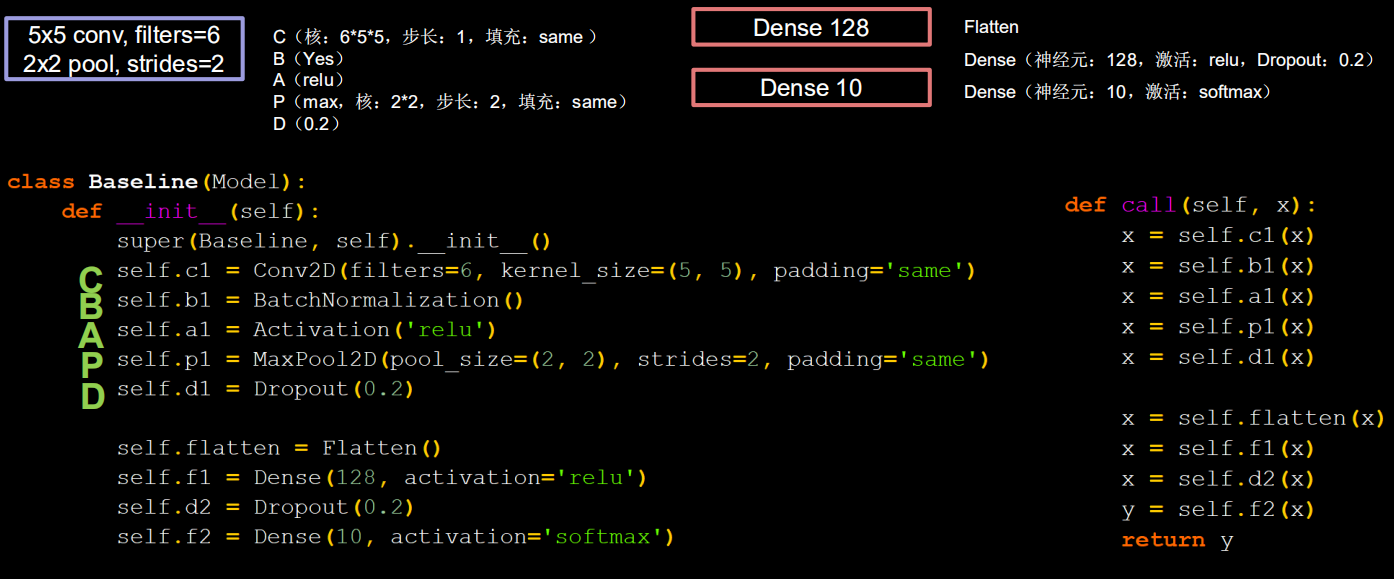
3.2卷积神经网络搭建
代码
import tensorflow as tf
import os
import numpy as np
from matplotlib import pyplot as plt
from tensorflow.keras.layers import Conv2D, BatchNormalization, Activation, MaxPool2D, Dropout, Flatten, Dense
from tensorflow.keras import Model

np.set_printoptions(threshold=np.inf)

cifar10 = tf.keras.datasets.cifar10
(x_train, y_train), (x_test, y_test) = cifar10.load_data()
x_train, x_test = x_train / 255.0, x_test / 255.0


class Baseline(Model):
    def __init__(self):
        super(Baseline, self).__init__()
        self.c1 = Conv2D(filters=6, kernel_size=(5, 5), padding='same')  # 卷积层
        self.b1 = BatchNormalization()  # BN层
        self.a1 = Activation('relu')  # 激活层
        self.p1 = MaxPool2D(pool_size=(2, 2), strides=2, padding='same')  # 池化层
        self.d1 = Dropout(0.2)  # dropout层

        self.flatten = Flatten()
        self.f1 = Dense(128, activation='relu')
        self.d2 = Dropout(0.2)
        self.f2 = Dense(10, activation='softmax')

    def call(self, x):
        x = self.c1(x)
        x = self.b1(x)
        x = self.a1(x)
        x = self.p1(x)
        x = self.d1(x)

        x = self.flatten(x)
        x = self.f1(x)
        x = self.d2(x)
        y = self.f2(x)
        return y


model = Baseline()

model.compile(optimizer='adam',
              loss=tf.keras.losses.SparseCategoricalCrossentropy(from_logits=False),
              metrics=['sparse_categorical_accuracy'])

checkpoint_save_path = "./checkpoint/Baseline.ckpt"
if os.path.exists(checkpoint_save_path + '.index'):
    print('-------------load the model-----------------')
    model.load_weights(checkpoint_save_path)

cp_callback = tf.keras.callbacks.ModelCheckpoint(filepath=checkpoint_save_path,
                                                 save_weights_only=True,
                                                 save_best_only=True)

history = model.fit(x_train, y_train, batch_size=32, epochs=5, validation_data=(x_test, y_test), validation_freq=1,
                    callbacks=[cp_callback])
model.summary()

# print(model.trainable_variables)
file = open('./weights.txt', 'w')
for v in model.trainable_variables:
    file.write(str(v.name) + '
')
    file.write(str(v.shape) + '
')
    file.write(str(v.numpy()) + '
')
file.close()

###############################################    show   ###############################################

# 显示训练集和验证集的acc和loss曲线
acc = history.history['sparse_categorical_accuracy']
val_acc = history.history['val_sparse_categorical_accuracy']
loss = history.history['loss']
val_loss = history.history['val_loss']

plt.subplot(1, 2, 1)
plt.plot(acc, label='Training Accuracy')
plt.plot(val_acc, label='Validation Accuracy')
plt.title('Training and Validation Accuracy')
plt.legend()

plt.subplot(1, 2, 2)
plt.plot(loss, label='Training Loss')
plt.plot(val_loss, label='Validation Loss')
plt.title('Training and Validation Loss')
plt.legend()
plt.show()