重要的!较新的 Mac 硬件(例如 T2/M1 芯片)不能很好地运行 Linux,或者根本不能运行。这对于一般的 Linux来说是正确的,而不仅仅是 Kali Linux。
设备的型号和年份将决定您体验的成功程度。
本指南将向您展示如何使用rEFInd引导管理器在 Kali Linux 上双引导 macOS/OS X。如果您想完全替换 macOS/OS X,请参阅我们的单启动 Kali on Mac 硬件指南。
通过使用 3rd 方引导管理器rEFInd (rEFIt的一个分支),我们能够在通过 macOS/OS X OS 的默认选项引导时增加我们的控制。这使得它非常适合双启动,因为每次启动设备时都不需要使用键盘快捷键来启动 Kali Linux。rEFInd 还具有帮助旧硬件从其他方式无法启动的 USB 设备(例如非 EFI)启动的优势。安装 Kali Linux 后,可以将 rEFInd 自定义为在启动期间隐藏或完全删除。
在我们的示例中,我们将使用 macOS High Sierra (10.13) 在 Mac Mini(2011 年中)上安装 Kali Linux。相同的程序也在使用 macOS Catalina (10.15) 的 Mac Book Air(2014 年初)上进行了测试。
安装先决条件
本指南将做出以下假设:
- 您已阅读我们的单引导 Kali Linux 安装指南,因为它具有相同的安装先决条件(系统要求和设置假设)。
- 下载 Kali Linux时,选择live image,而不是安装程序选项。
- 要安装到的单个磁盘(而不是每个操作系统的专用磁盘)。
- 当前运行 macOS/OS X 10.7 或更高版本(更高版本更受欢迎),因为这意味着硬件是 Intel(而不是 PowerPC CPU)。
- 根据 Mac 硬件型号和年份,您可能会发现:
- 尝试使用 CD/DVD或USB 驱动器启动时会出现不同的结果。
- 通过预先安装rEFInd,您可以增加从USB 驱动器启动(尤其是旧硬件和非 EFI)的机会。
- 使用图形安装程序时,您可能会注意到跟踪板不起作用(但在安装 Kali Linux 后会起作用)。
- 内置无线可能无法正常工作,因为默认图像
firmware-b43-installer中不包含此功能。
- 尝试使用 CD/DVD或USB 驱动器启动时会出现不同的结果。
我们需要使用与单引导 Kali Linux 安装指南不同的镜像,因为我们需要实时镜像。这是因为我们需要在不挂载任何分区的情况下编辑磁盘结构(否则它们将被使用)。修改完磁盘布局后,我们仍然可以使用 live 镜像安装 Kali Linux,但会有一些不同,例如:
这两个都可以在安装后解决,因为它可以节省到安装程序映像的交换(因为您将需要多个 CD/DVD/USB 或在中途重新映像)。
此安装很容易出错,因为它涉及编辑现有分区。请注意您正在修改的分区以及将 Kali Linux 安装到的位置。
如果出现问题,最好备份 macOS/OS X 文件。
调整大小 macOS/OS X 过程
在我们安装 Kali Linux 之前,硬盘上需要有空间。根据 macOS/OS X 分区的格式,将取决于您需要执行的方法。
- 如果是 macOS/OS X Sierra (10.12) 和更早版本,它将是 Mac OS Extended (HFS+)。
- 您可以在 Kali Linux 实时会话中使用 GParted 调整大小
- 从 macOS/OS X High Sierra (10.13) 及更高版本开始,默认为 Apple 文件系统 (APFS)。
- 您可以在正常的 macOS/OS X 会话中或在恢复模式下调整大小(推荐)。
HFS+/GParted
- 要开始调整大小,请确保插入 Kali Linux 安装介质并打开设备电源。立即按住Option(或 Alt)⌥键,直到看到启动菜单(如果已安装,则为 rEFInd,否则为默认的 macOS/OS X)。根据您的 macOS/OS X 设置,您可能有也可能没有Recovery HD 。

- 当启动菜单出现时,如果一切正常,您应该会看到两个卷:
- EFI Boot -支持UEFI的较新硬件。使用GUID 分区表 (GPT)分区是很常见的。
- Windows - “非 EFI”启动。这在使用BIOS的旧硬件上使用。您经常在这里看到主引导记录 (MBR)分区表。
如果您只看到一个卷(EFI 引导),则该设备不支持安装介质。这可能是因为设备上固件的年龄。
您可能希望安装rEFInd,因为它是一个引导管理器,然后再试一次。
即使 Kali Linux基于 Debian,macOS/OS X 总是将非 EFI 引导媒体检测为 Windows。我们建议您选择EFI Boot卷以继续。但是,如果此时安装挂起,请重启电源并选择 Windows (Being Kali Linux non-EFI/BIOS)。成功取决于 Mac 硬件的型号和年份。
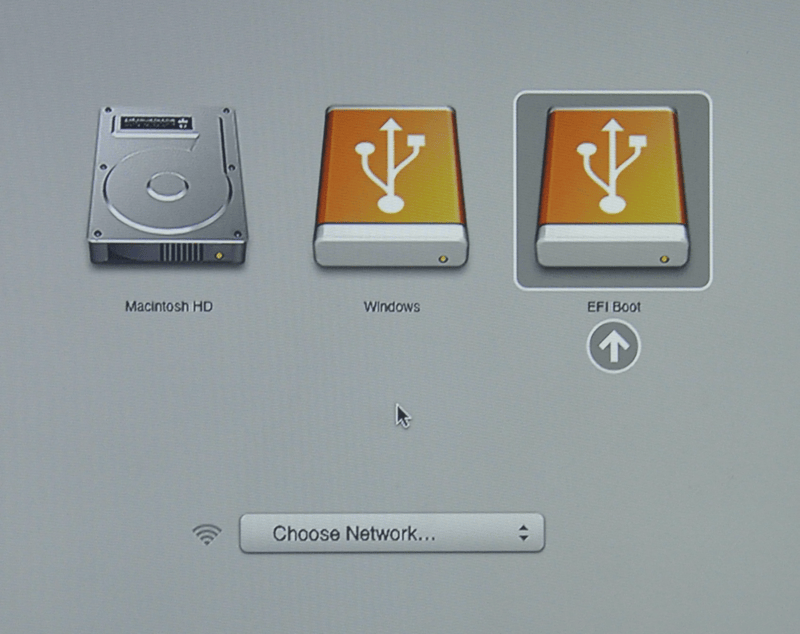
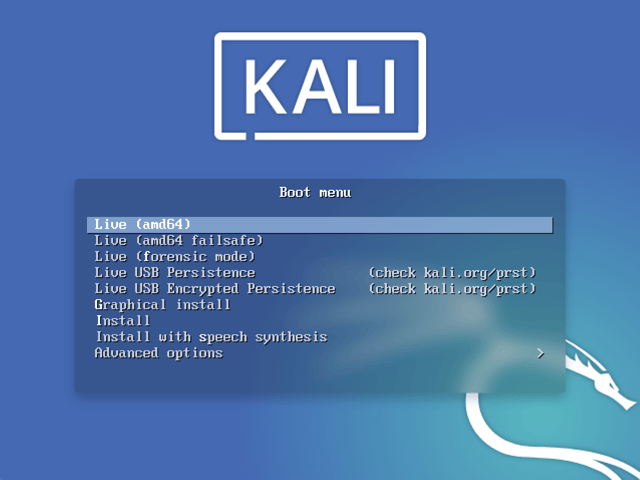
- 你应该会看到 Kali Linux启动屏幕。选择Live,你应该会被引导到 Kali Linux 默认桌面。
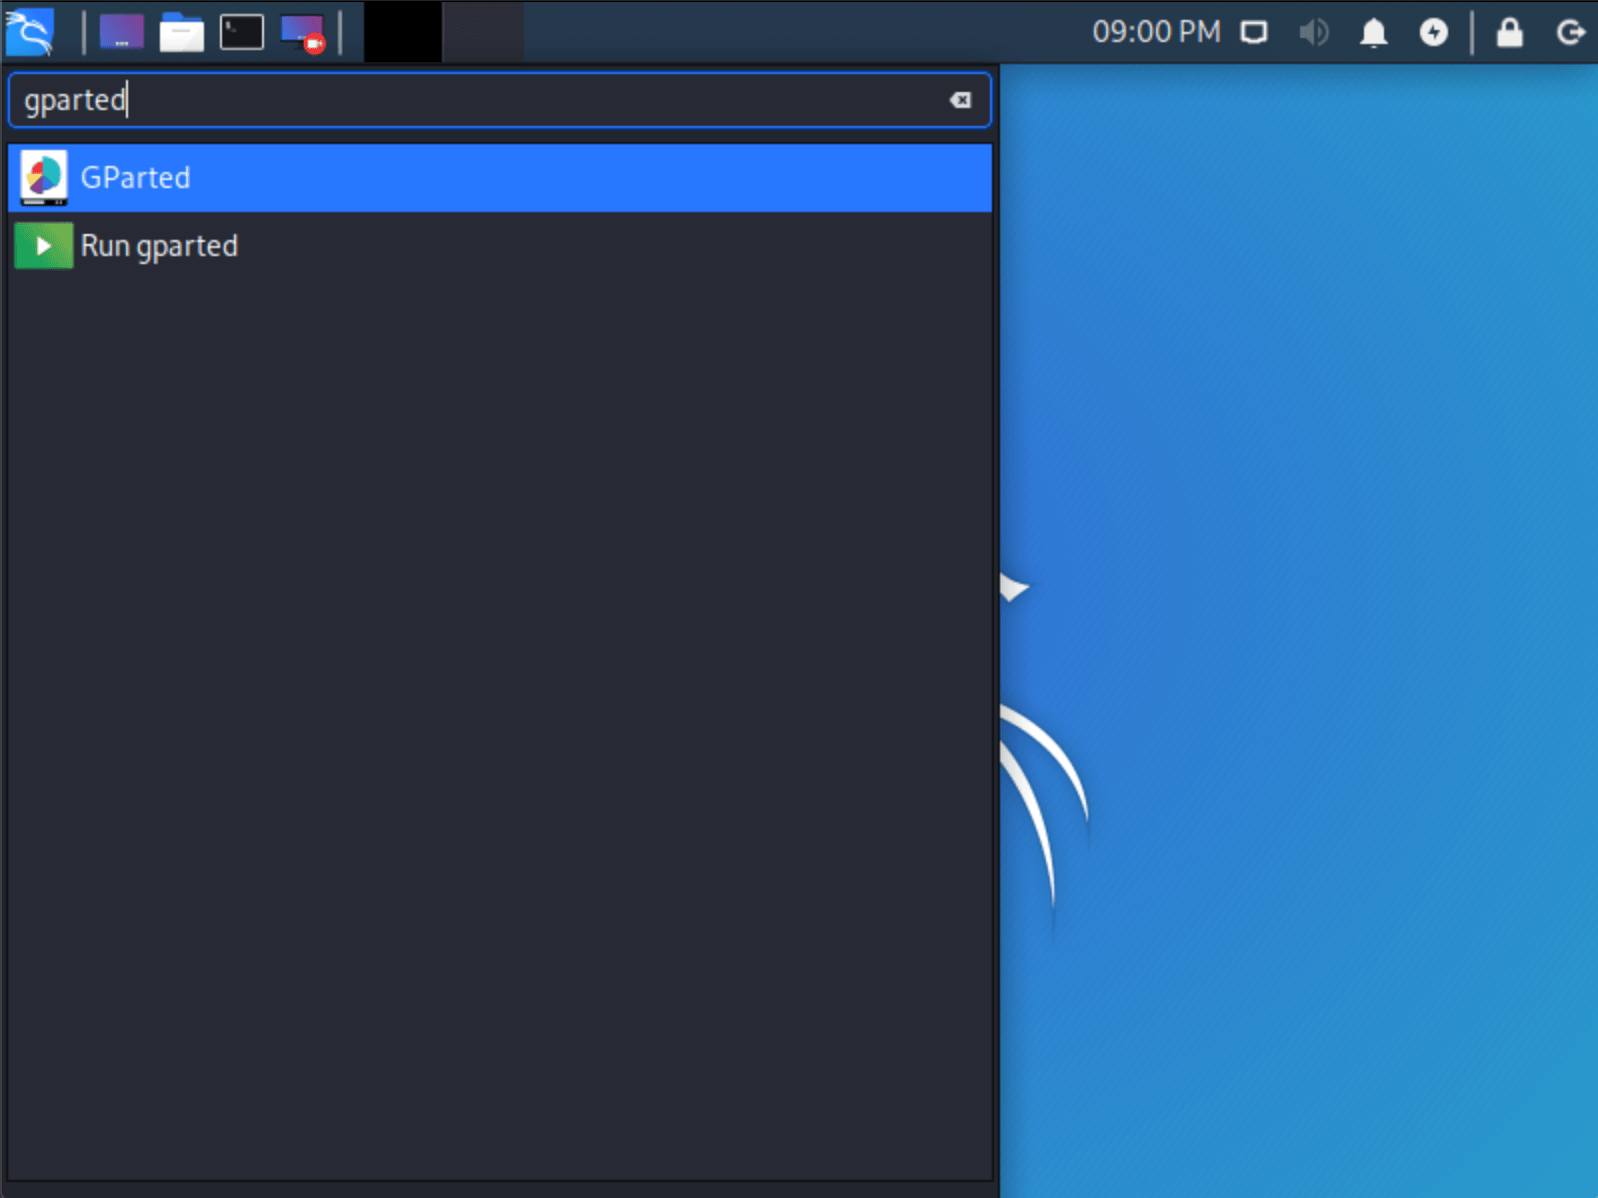
- 现在启动GParted,我们将使用它来缩小现有的 macOS/OS X 分区,为我们提供足够的空间来在可用空间中安装 Kali Linux。
- GParted 打开后,选择您的 macOS/OS X 分区并调整其大小,为 Kali Linux 安装留出足够的空间(我们建议至少 20 GB)。
根据您的设置,它通常是第二个选项(最大的分区)。在我们的示例中,有三个分区:
- EFI 升级分区 (
/dev/sda1) - macOS/OS X 的主要操作系统(
/dev/sda2) - 系统恢复 (
/dev/sda3)
如果您要进入分区中的任何非白色区域,则您正在编辑正在使用的部分。
仅从不使用的分区区域中移除。
可以留下第三个分区(/dev/sda3),只收缩实际安装(/dev/sda2)。
如果您希望组织分区以将所有 macOS/OS X 分区组合在一起,将可用空间放在最后,您可以这样做。
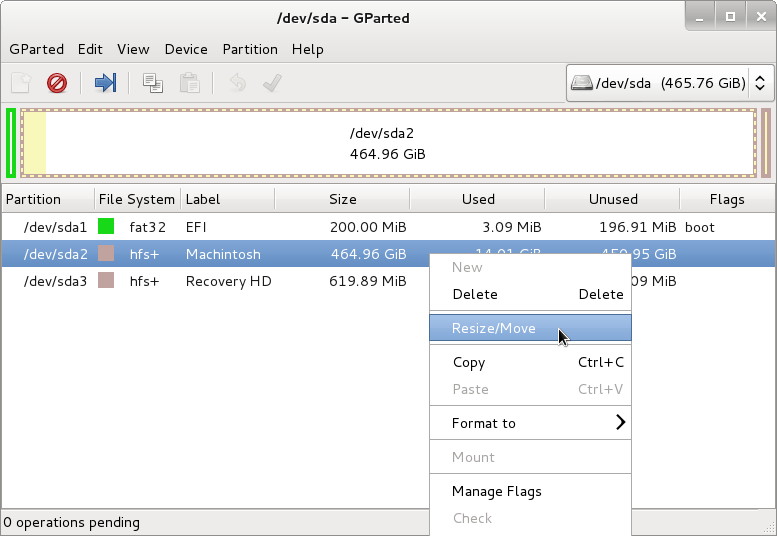
- 调整 macOS/OS X 分区的大小后,请确保在硬盘上“应用所有操作”。退出 gparted 并重新启动。
APFS/恢复
这可以使用命令行或图形(使用磁盘工具)来完成。这两个选项都支持在“正常”会话中调整大小,或启动到恢复模式。使用恢复模式,意味着驱动器未在使用中,因此会减少出现问题的机会。我们还建议使用命令行方法,因为它允许创建一个空分区,从而简化以后的设置过程。
-
进入命令行访问:Spotlight->Terminal
-
通过使用
diskutil list,我们可以看到我们要调整大小的磁盘是disk0s2,它是~500GB。
$ diskutil list
/dev/disk0 (internal, physical):
   #:                       TYPE NAME                    SIZE       IDENTIFIER
   0:      GUID_partition_scheme                        *500.1 GB   disk0
   1:                        EFI EFI                     209.7 MB   disk0s1
   2:                 Apple_APFS Container disk1         499.9 GB   disk0s2

/dev/disk1 (synthesized):
   #:                       TYPE NAME                    SIZE       IDENTIFIER
   0:      APFS Container Scheme -                      +499.9 GB   disk1
                                 Physical Store disk0s2
   1:                APFS Volume Macintosh HD            16.6 GB    disk1s1
   2:                APFS Volume Preboot                 21.4 MB    disk1s2
   3:                APFS Volume Recovery                516.2 MB   disk1s3
   4:                APFS Volume VM                      20.5 KB    disk1s4

$
- 我们希望将 500GB 减少到 400GB。这会给 Kali Linux 100GB(我们建议至少 20GB)。
$ sudo diskutil apfs resizeContainer disk0s2 400g
Password:
Started APFS operation
Aligning shrink delta to 99,898,105,856 bytes and targeting a new physical store size of 400,000,000,000 bytes
Determined the minimum size for the targeted physical store of this APFS Container to be 17,949,245,440 bytes
Resizing APFS Container designated by APFS Container Reference disk1
The specific APFS Physical Store being resized is disk0s2
Verifying storage system
Using live mode
Performing fsck_apfs -n -x -l /dev/disk0s2
Checking volume
Checking the container superblock
Checking the EFI jumpstart record
Checking the space manager
Checking the object map
Checking the APFS volume superblock
Checking the object map
Checking the fsroot tree
Checking the snapshot metadata tree
Checking the extent ref tree
Checking the snapshots
Checking the APFS volume superblock
Checking the object map
Checking the fsroot tree
Checking the snapshot metadata tree
Checking the extent ref tree
Checking the snapshots
Checking the APFS volume superblock
Checking the object map
Checking the fsroot tree
Checking the snapshot metadata tree
Checking the extent ref tree
Checking the snapshots
Checking the APFS volume superblock
Checking the object map
Checking the fsroot tree
Checking the snapshot metadata tree
Checking the extent ref tree
Checking the snapshots
Verifying allocated space
The volume /dev/disk0s2 appears to be OK
Storage system check exit code is 0
Shrinking APFS Physical Store disk0s2 from 499,898,105,856 to 400,000,000,000 bytes
Shrinking APFS data structures
Shrinking partition
Modifying partition map
Finished APFS operation
$
- 快速
diskutil list再次检查,我们可以看到它已经成功了。
$ diskutil list
/dev/disk0 (internal, physical):
   #:                       TYPE NAME                    SIZE       IDENTIFIER
   0:      GUID_partition_scheme                        *500.1 GB   disk0
   1:                        EFI EFI                     209.7 MB   disk0s1
   2:                 Apple_APFS Container disk1         400.0 GB   disk0s2

/dev/disk1 (synthesized):
   #:                       TYPE NAME                    SIZE       IDENTIFIER
   0:      APFS Container Scheme -                      +400.0 GB   disk1
                                 Physical Store disk0s2
   1:                APFS Volume Macintosh HD            16.6 GB    disk1s1
   2:                APFS Volume Preboot                 21.4 MB    disk1s2
   3:                APFS Volume Recovery                516.2 MB   disk1s3
   4:                APFS Volume VM                      20.5 KB    disk1s4
$
Kali Linux 安装程序
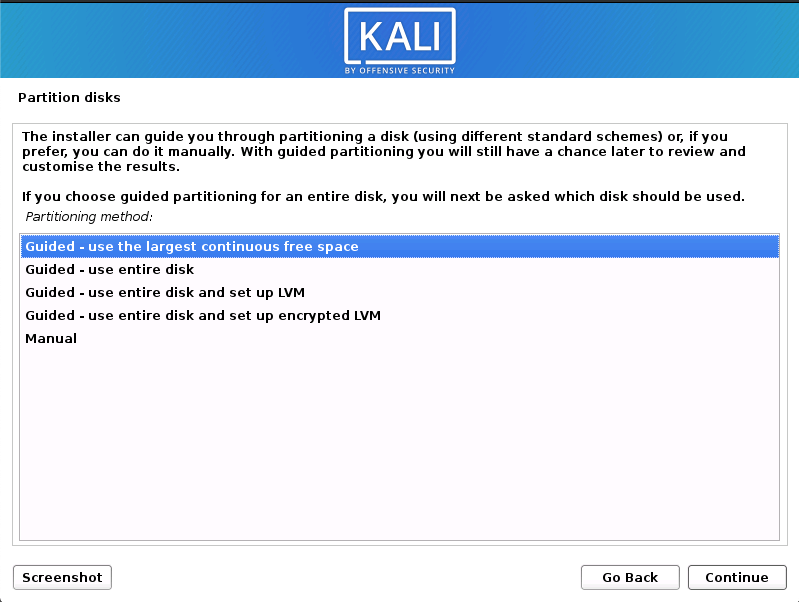
- 从这里开始的安装过程类似于Kali Linux 硬盘安装,直到分区。此时,您需要选择之前使用gparted创建的“ Guided - 使用最大的连续可用空间” (而不是“Guided - 整个磁盘”)。
不要忘记您可能需要在启动过程中按住Option(或 Alt)⌥键才能看到启动菜单(除非您安装了 rEFInd)。
- 您可以继续遵循单启动 Kali Linux 安装指南,但在使用实时映像时,您将无法选择桌面环境或元包。安装完成后,重启。
默认情况下,macOS/OS X 将自行启动,而不是任何其他操作系统/安装媒体。正如我们已经做过几次一样,您需要按住Option(或 Alt)⌥ 键。虽然这“有效”,但它并不理想,因为它很容易不引导除 macOS/OS X 以外的任何东西。输入 rEFInd,一个替代引导管理器(也可以应用主题)。

安装 rEFInd
rEFInd 是一个引导管理器,用 macOS/OS X 代替了限制性的默认设置,允许更多的选择。它可以在安装 Kali Linux 之前或之后安装,也可以从 macOS/OS X 或 Kali Linux 安装。
自macOS/OS X El Capitan (10.11)发布以来,引入了一项额外的安全功能,即系统完整性保护(SIP)。要使用 macOS/OS X 安装 rEFInd,首先需要一次性绕过(推荐)或禁用。或者,可以使用 Kali Linux 安装 rEFInd (我们建议在安装 Kali Linux 之后这样做,而不是使用实时模式)。

使用 macOS/OS X 安装 rEFInd
rEFInd 在恢复模式下无法轻松下载,因为可用空间和工具/库有限(例如 curl 不支持 https)。因此,我们将在正常的 macOS/OS X 会话中下载 rEFInd,然后重新启动到恢复模式进行安装。
在撰写本文时,最新版本的rEFInd是0.12.0。
- 我们将从下载 rEFInd 开始,检查其有效的 zip 文件,然后解压缩。
$ curl -s -L https://sourceforge.net/projects/refind/files/0.12.0/refind-bin-0.12.0.zip -o ~/Downloads/refind.zip
$
$ file Downloads/refind.zip
Downloads/refind.zip: Zip archive data, at least v1.0 to extract
$
$ unzip -q -d Downloads/ Downloads/refind.zip
$
$ ls Downloads/
refind-bin-0.12.0 refind.zip
$
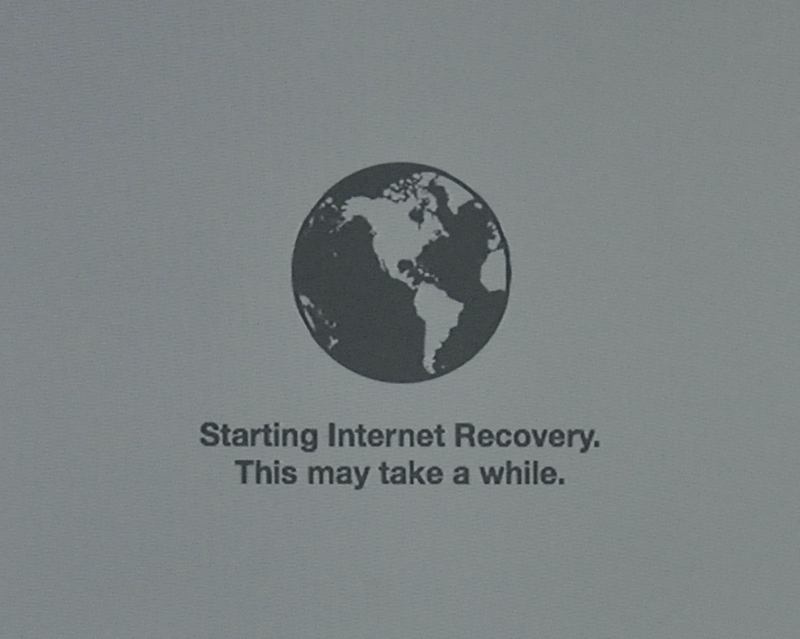
- 我们将重新启动 macOS/OS X,并同时按Command (⌘)和R键,直到您看到启动徽标。此时,如果有固件密码,您需要输入它才能继续。
这将通过使用固件内置的 macOS/OS X 的恢复系统版本绕过 SIP(因此不需要互联网连接)。
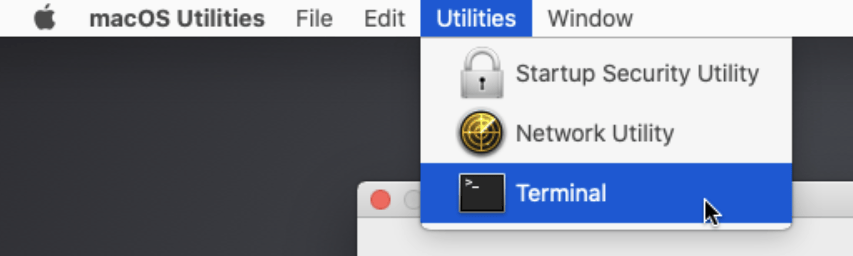
- 当恢复模式完全加载时,从菜单中:Utilities->Terminal。
- 之后,我们需要导航到提取的文件夹。
路径会有所不同,因为它基于硬盘的标签(在我们的例子中是Macintosh HD)和用户名(username)以及 rEFInd 的版本(0.12.0)
# cd /Volumes/Macintosh\ HD/Users/username/Downloads/refind-bin-0.12.0/
#
# pwd
/Volumes/Macintosh HD/Users/username/Downloads/refind-bin-0.12.0
#
- 执行外壳脚本
refind-install。
即使我们处于恢复中,SIP 没有运行,rEFInd 仍然相信它是。我们将覆盖它。
# ./refind-install
ShimSource is none
Installing rEFInd on macOS....
Installing rEFInd to the partition mounted at /Volumes/ESP

**** ALERT: SIP ENABLED! ****

rEFInd cannot be installed because System Integrity Protection (SIP) seems
to be enabled! You must install rEFInd from your Recovery installation or
from another OS. To install from the Recovery system:

  1. Reboot
  2. Hold down Command+R as the chime sounds
  3. When the OS has booted, select Utilities->Terminal
  4. Change to this directory with the 'cd' command; it will probably be under
     /Volumes/Macintosh HD/Users/username/Downloads/refind-bin-0.12.0
  5. Re-run this script.

If you believe SIP is NOT enabled, you may attempt an installation anyhow,
but it may fail.

For more on this subject, see http://www.rodsbooks.com/refind/sip.html

Do you want to attempt installation (Y/N)? y
Copied rEFInd binary files

Copying sample configuration file as refind.conf; edit this file to configure
rEFInd.

#
- 重新启动 macOS/OS X。从菜单中:Apple->Restart。
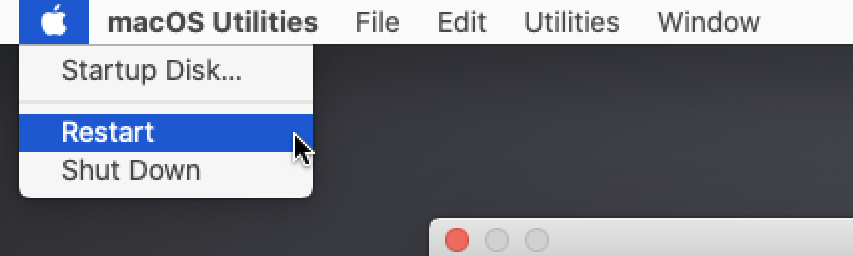
- 重新启动后,您应该会看到新的引导管理器 rEFInd。
使用 Kali Linux 安装 rEFInd
rEFInd也包含在 Kali Linux 中。我们可以通过执行以下操作来快速安装它:
kali@kali:~$ sudo apt update
kali@kali:~$
kali@kali:~$ sudo apt install -y refind
在安装过程中,您将收到有关自动运行 rEFInd 的提示。我们建议您按yes,否则之后您将需要运行sudo dpkg-reconfigure refind(或sudo refind-install)。
 ┌────────────────────────┤ Configuring refind ├────────────────────────┐
 │                                                                      │
 │ It is necessary to install rEFInd to the EFI System Partition (ESP)  │
 │ for it to control the boot process.                                  │
 │                                                                      │
 │ Not installing the new rEFInd binary on the ESP may leave the        │
 │ system in an unbootable state. Alternatives to automatically         │
 │ installing rEFInd include running /usr/sbin/refind-install by hand   │
 │ or installing the rEFInd binaries manually by copying them from      │
 │ subdirectories of /usr/share/refind-{version}.                       │
 │                                                                      │
 │ Automatically install rEFInd to the ESP?                             │
 │                                                                      │
 │                   <Yes>                      <No>                    │
 │                                                                      │
 └──────────────────────────────────────────────────────────────────────┘

[...]

ShimSource is none
Installing rEFInd on Linux....
ESP was found at /boot/efi using vfat
Installing driver for ext4 (ext4_x64.efi)
Copied rEFInd binary files

Copying sample configuration file as refind.conf; edit this file to configure
rEFInd.

Creating new NVRAM entry
rEFInd is set as the default boot manager.
Creating //boot/refind_linux.conf; edit it to adjust kernel options.
kali@kali:~$
重新启动后,您应该会看到新的引导管理器 rEFInd。
配置 rEFInd
如果您愿意,您现在可以通过各种方式更改 rEFInd,包括:
- 默认操作系统选择
- 菜单选择超时
- 直接启动到默认操作系统(注意,在启动过程中按Option(或 Alt)⌥键,您将获得一个一次性启动菜单)。
- 添加自定义图标/主题。
重新查找.conf
macOS/OS X 埃尔卡皮坦
如果您希望进行任何这些更改,可以通过编辑 rEFInd 的配置文件来完成。如果您使用的是 macOS/OS X El Capitan (10.11) 或更高版本,则需要先挂载 EFI 启动卷才能访问该文件。这是通过执行以下操作来完成的。
$ cd ~/Downloads/refind-bin-*/
$
$ sudo ./mountesp
The ESP has been identified as /dev/disk0s1; attempting to mount it....
The ESP is mounted at /Volumes/ESP
username@Usernames-Mac refind-bin-0.12.0 %

$
$ vim /Volumes/ESP/EFI/refind/refind.conf
$
macOS/OS X 优胜美地
如果您使用的是 macOS/OS X Yosemite (10.10) 或更早版本,则配置文件位于此处,因为不需要安装。
$ sudo vim /EFI/refind/refind.conf
$ s
卡利 Linux
在 Kali Linux 上,配置文件位于以下位置。
kali@kali:~$ sudo vim /boot/efi/EFI/refind/refind.conf
kali@kali:~$
安装后
现在你已经完成了 Kali Linux 的安装,是时候定制你的系统了。
一般使用部分有更多信息,您还可以在我们的用户论坛中找到有关如何充分利用 Kali Linux 的提示。
更新日期:2022 年 7 月 26 日
作者: g0tmi1k