在经过这么久的铺垫,FunTester测试框架分布式版本的工作正式开始了,我首先写了一个单节点的版本,通过HTTP协议接口进行任务上传,而非像之前设想中的,定时去master节点进行pull任务。
此版本为单节点部署,可本地部署,预计下个月开源,主要是考虑到版本不稳定,肯定会进行多轮更改。
当前服务只是针对之前设想的方案(一)(基于HttpRequestBase对象)进行实践,感兴趣的童鞋可以翻看旧文章:
至于方案(二)(基于jar包方法模板)和方案(三)(基于Java/Groovy测试脚本)的设想、验证以及实现,后续会慢慢推出。PS:没看错,我已经找找了执行Java测试脚本的方法。
欢迎大家在使用过程中,多提提意见,多提提需求,当然多多宣传也行。
自费服务器,大家以体验为主。以后实际使用以本地部署为主,公网依然以体验为主,这个服务器费用还是有点贵的。
内测阶段,访问密钥请联系FunTester作者本人,改接口文档可能会有所变化,请及时关注FunTester,获取最新动态。我用postman导出了一份测试Demo(含测试密钥),有兴趣的同学请联系作者本人获取。
接口文档
接口地址:http://124.70.188.11:8080/test/post
请求方式:POST
传参格式:JSON(application/json)
参数
| 参数 | 类型 | 限制 | 备注 |
|---|---|---|---|
| times | int | ||
| thread | int | ||
| mode | String | 默认ftt | |
| desc | String | 任务描述 | |
| runup | int | 软启动时间 | |
| key | String | 访问秘钥,找FunTester作者要 | |
| request | String | 被测请求,格式如下 |
非Java语言补充
request也可以通过JSON对象上传参数,文档如下:
| 参数 | 类型 | 限制 | 备注 |
|---|---|---|---|
| requestType | String | 请求类型,目前GET/POST | |
| uri | String | 请求地址 | |
| args | JSON | GET请求参数 | |
| json | JSON | POST请求JSON参数 | |
| params | JSON | POST请求form表单参数 | |
| headers | JSONarray | 请求headers(key-value) |
postman截图
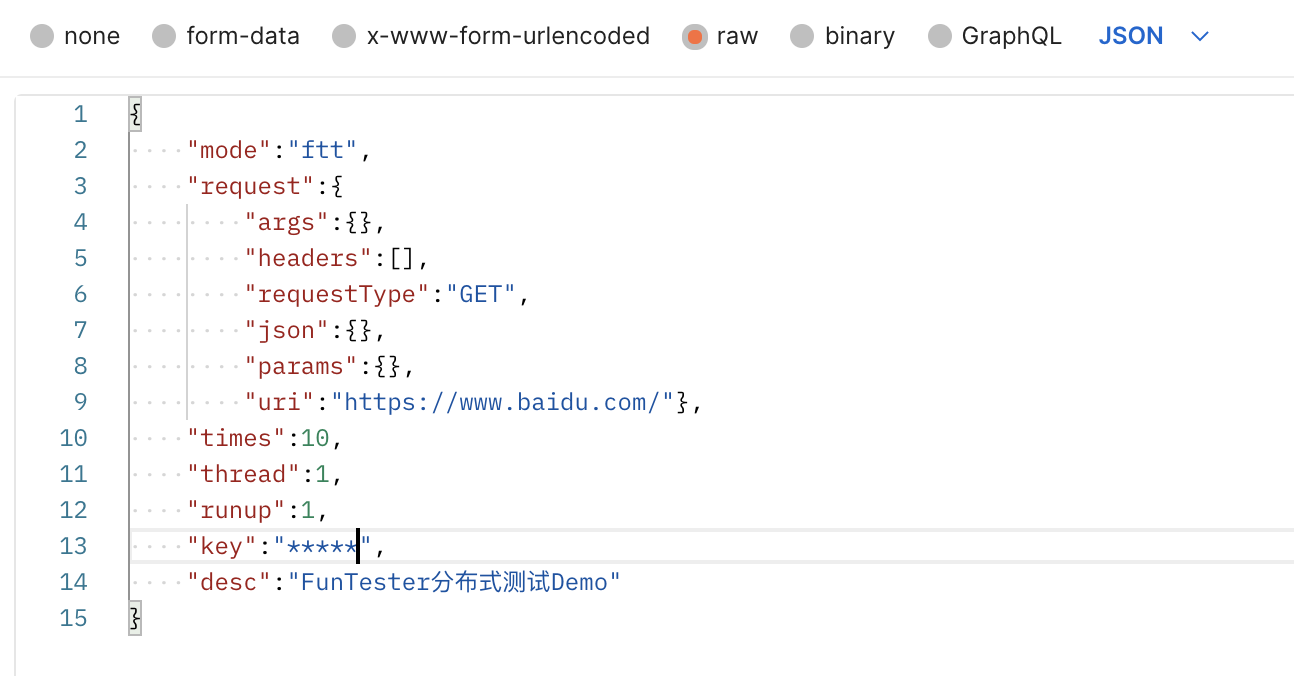
请求参数Demo
{
    "mode":"ftt",
    "request":{
        "args":{},
        "headers":[],
        "requestType":"GET",
        "json":{},
        "params":{},
        "uri":"待测接口地址"},
    "times":10,
    "thread":1,
    "runup":1,
    "key":"funtester2021",
    "desc":"FunTester分布式测试Demo"
}
Java版本--基于FunTester
这个版本用了com.funtester.httpclient.FunRequest类,所以需要下载FunTester测试框架的主git项目,地址如下:https://gitee.com/fanapi/tester,分支oker。
import com.alibaba.fastjson.JSONObject;
import com.funtester.httpclient.ClientManage;
import com.funtester.httpclient.FunLibrary;
import com.funtester.httpclient.FunRequest;
import com.funtester.utils.DecodeEncode;
import org.apache.http.client.methods.HttpGet;
import org.apache.http.client.methods.HttpPost;

public class PerSerTest extends FunLibrary {

    public static void main(String[] args) {
        ClientManage.init(100, 100, 0, EMPTY, 0);
        JSONObject res = new JSONObject();
        res.put("times", 100);
        res.put("thread", 10);
        res.put("key", "");
        res.put("mode", "ftt");
        res.put("desc", "FunTester分布式测试Demo");
        res.put("runup", 10);
        String url = "http://待测接口";
        HttpGet get = FunLibrary.getHttpGet(url);
        FunRequest request = FunRequest.initFromRequest(get);
        res.put("request", request.toJson());
        HttpPost httpPost = getHttpPost("http://124.70.188.11:8080/test/post", res.toString());
        JSONObject response = getHttpResponse(httpPost);
        output(response);
        String table = response.getJSONObject("data").getString("table");
        output(DecodeEncode.unzipBase64(table));
    }

}
Java版本--通用版
这个版本将所有的参数都用JSON格式,Python版本的也参考这个构建请求参数。我Python已经生疏,由于时间关系,我等其他大佬实现了之后会做分享。
import com.alibaba.fastjson.JSONArray;
import com.alibaba.fastjson.JSONObject;
import com.funtester.httpclient.ClientManage;
import com.funtester.httpclient.FunLibrary;
import com.funtester.utils.DecodeEncode;
import org.apache.http.client.methods.HttpPost;

public class PerSerTest2 extends FunLibrary {

    public static void main(String[] args) {
        ClientManage.init(100, 100, 0, EMPTY, 0);
        JSONObject res = new JSONObject();
        res.put("times", 10);
        res.put("thread", 10);
        res.put("key", "");
        res.put("mode", "ftt");
        res.put("desc", "FunTester分布式测试Demo");
        res.put("runup", 10);
        JSONObject re = new JSONObject();
        re.put("requestType", "GET");
        re.put("uri", "http://待测接口");
        re.put("args", new JSONObject());
        re.put("json", new JSONObject());
        re.put("params", new JSONObject());
        re.put("headers", new JSONArray());
        res.put("request", re);
        HttpPost httpPost = getHttpPost("http://124.70.188.11:8080/test/post", res.toString());
        JSONObject response = getHttpResponse(httpPost);
        output(response);
        String table = response.getJSONObject("data").getString("table");
        output(DecodeEncode.unzipBase64(table));

    }

}
Groovy版本
我给Groovy的一个定义就是快速构建测试脚本,这里非常明显差异,对比以上两种Java版本的代码,Groovy非常简单。
import com.alibaba.fastjson.JSONObject
import com.funtester.httpclient.ClientManage
import com.funtester.httpclient.FunLibrary
import com.funtester.httpclient.FunRequest

class PerSerTest extends FunLibrary {

    public static void main(String[] args) {
        ClientManage.init(100,100,0,EMPTY,0)
        def res = new JSONObject()
        res.times = 100
        res.thread = 10
        res.key = ""
        res.mode = "ftt"
        res.desc = "FunTester分布式测试Demo"
        res.runup = 10
        String url = "http://"
        def get = FunLibrary.getHttpGet(url)
        def request = FunRequest.initFromRequest(get)
        res.request = request.toJson()
        def get1 = getHttpPost("http://124.70.188.11:8080/test/post",res.toString())
        def response = getHttpResponse(get1)
        output(response)


    }

}
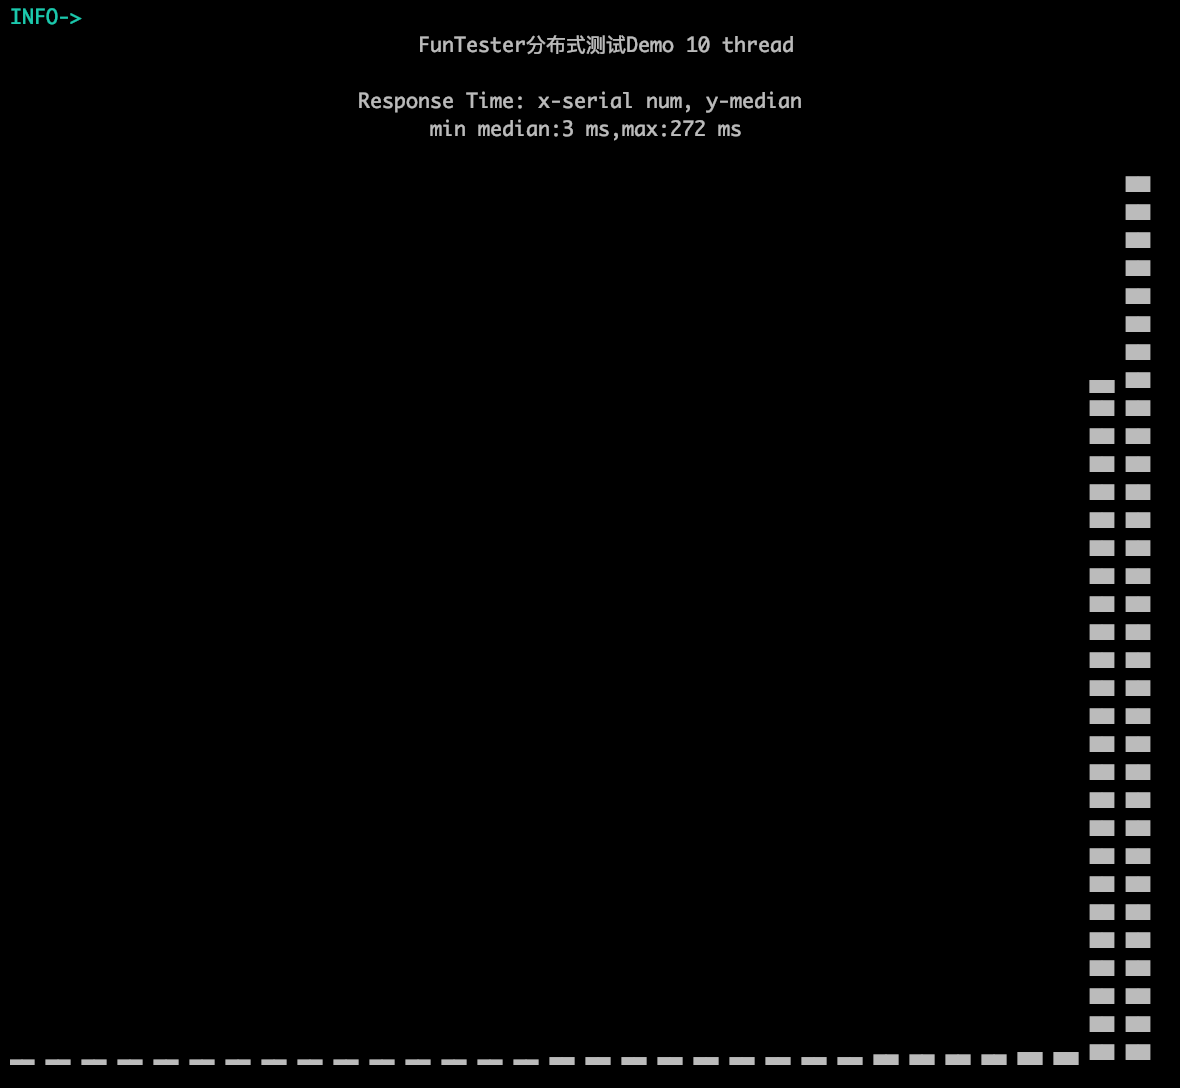
接口响应
接口响应是一个JSON对象,也是一个com.funtester.base.bean.PerformanceResultBean对象,后面我会奉上代码,这里先看见控制台输出。
INFO-> 请求uri:http://124.70.188.11:8080/test/post , 耗时:14217 ms , HTTPcode: 200
INFO->
~☢~~☢~~☢~~☢~~☢~~☢~~☢~~☢~~☢~~☢~ JSON ~☢~~☢~~☢~~☢~~☢~~☢~~☢~~☢~~☢~~☢~
>  {
>  ① . "code":0,
>  ① . "data":{
>  ② . . . "rt":18,
>  ② . . . "failRate":0.0,
>  ② . . . "threads":10,
>  ② . . . "deviation":"53.29%",
>  ② . . . "qps2":259.4752186588921,
>  ② . . . "errorRate":0.0,
>  ② . . . "executeTotal":801,
>  ② . . . "total":1801,
>  ② . . . "qps":555.5555555555555,
>  ② . . . "startTime":"2021-06-01 18:09:17",
>  ② . . . "endTime":"2021-06-01 18:09:20",
>  ② . . . "mark":"FunTester分布式测试Demo011809",
>  ② . . . "table":"eJzj5VIgCNxK80JSi0tSi552tD3d0fx0T/+zrd0v1k91Sc3NVzA0UCjJKEpNTCFsDi8XL37bglKLC/LzilMVQjJzU60UKnSLU4syE3MU8kpzdRQqdXNTUzIT8wjZQdgdCrmZeQoQw6yMFXKLdXITK6yMzI2ATCI0E/QFpeDRtA4gIs4no7aM2jJIbXk0rRWI6GMT2IpRm0ZtGrVp1KZRm0ZtGrVp1KZRm7DY9GhaExAp0INqBiIKqBYgwkVBW5bIDUy4DwEIcgne"
>  ① . },
>  ① . "FunTester":200
>  }
~☢~~☢~~☢~~☢~~☢~~☢~~☢~~☢~~☢~~☢~ JSON ~☢~~☢~~☢~~☢~~☢~~☢~~☢~~☢~~☢~~☢~
其中最外层的FunTester是框架加上去的,并非真正的响应。data中的内容就是性能测试的结果,也就是com.funtester.base.bean.PerformanceResultBean对象。其中如果想看table内容的话,需要添加两行代码:
        String table = response.getJSONObject("data").getString("table");
        output(DecodeEncode.unzipBase64(table));
控制台输出如下:
com.funtester.base.bean.PerformanceResultBean
package com.funtester.base.bean

import com.funtester.db.mysql.MySqlTest
import com.funtester.frame.Output
import com.funtester.utils.DecodeEncode

/**
 * 性能测试结果集
 */
class PerformanceResultBean extends AbstractBean implements Serializable {

    private static final long serialVersionUID = -1595942562342357L;

    /**
     * 测试用例描述
     */
    String mark

    /**
     * 开始时间
     */
    String startTime

    /**
     * 结束时间
     */
    String endTime

    /**
     * 表格信息
     */
    String table

    /**
     * 线程数
     */
    int threads

    /**
     * 总请求次数
     */
    int total

    /**
     * 平均响应时间
     */
    int rt

    /**
     * 吞吐量,公式为QPS=Thead/avg(time)
     */
    double qps

    /**
     * 通过QPS=count(r)/T公式计算得到的QPS,在固定QPS模式中,这个值来源于预设QPS
     */
    double qps2

    /**
     * 理论误差,两种统计模式
     */
    String deviation

    /**
     * 错误率
     */
    double errorRate

    /**
     * 失败率
     */
    double failRate

    /**
     * 执行总数
     */
    int executeTotal

    PerformanceResultBean(String mark, String startTime, String endTime, int threads, int total, int rt, double qps, double qps2, double errorRate, double failRate, int executeTotal, String table) {
        this.mark = mark
        this.startTime = startTime
        this.endTime = endTime
        this.threads = threads
        this.total = total
        this.rt = rt
        this.qps = qps
        this.qps2 = qps2
        this.errorRate = errorRate
        this.failRate = failRate
        this.executeTotal = executeTotal
        this.table = DecodeEncode.zipBase64(table)
        this.deviation = com.funtester.frame.SourceCode.getPercent(Math.abs(qps - qps2) * 100 / Math.max(qps, qps2))
        Output.output(this.toJson())
        Output.output(table)
        MySqlTest.savePerformanceBean(this)
    }

}