最近帮别人做了个东西,这里分享一下pcm原始数据绘图的思路
1、pcm数据采样位数,根据采样位数选取适合自己绘图的采样点的数量
2、计算出最大最小的的采样点的值差
3、根据要显示pcm数据的控件宽高,根据pcm原始数据的在pcm数据的偏移计算出x坐标,根据pcm数据采样的数值大小计算出y坐标
4、绘图,依次进行相邻数据点绘图
以下是在Duilb中绘图的代码:
 1     std::vector<char> pcm_buffer;
 2     FILE * file = NULL;
 3     file = fopen("pcm\20180601155322.pcm", "rb");
 4
 5     if (file != NULL) {
 6         //
 7         pcm_buffer.clear();
 8         pcm_buffer.shrink_to_fit();
 9
10         fseek(file, 0, SEEK_END);
11         unsigned int size_byte = ftell(file);
12         fseek(file, 0, SEEK_SET);
13         pcm_buffer.resize(size_byte);
14         fread(&pcm_buffer[0], size_byte, 1, file);
15         fclose(file);
16         size_byte /= 2;
17         int step = 1, len = size_byte;
18         if (size_byte > 20000) {
19             len = 20000;
20             step = (int)(size_byte / len);
21         }
22         short * pcm_16 = (short*)(&pcm_buffer[0]);
23         std::vector<float> pcm_float;
24         pcm_float.resize(20000);
25         for (int i = 0, n = 0; n < len; i += step, n++) {
26             pcm_float[n] = pcm_16[i];
27         }
28
29         float max = pcm_float[0], min = pcm_float[0];
30         for (int i = 1; i< pcm_float.size(); i++){
31             if (max < pcm_float[i]){
32                 max = pcm_float[i];
33             }
34             if (min > pcm_float[i]){
35                 min = pcm_float[i];
36             }
37         }
38         int w = m_rcItem.right - m_rcItem.left;
39         int h = m_rcItem.bottom - m_rcItem.top;
40         std::vector<PointF> points;
41         float diffVal = max - min;
42         for (int i = 0; i < pcm_float.size(); i++){
43             points.push_back(PointF(i * w / pcm_float.size(), h - (pcm_float[i] - min) / diffVal * h));
44         }
45
46         const DWORD backColor = 0xFFC9C9C9;
47         CRenderEngine::DrawColor(hDC, m_rcItem, backColor);
48         const DWORD backLineColor = 0xFF0000FF;
49         for (int i = 0; i < points.size() - 1; i++){
50             RECT rect;
51             rect.left = points[i].X;
52             rect.top = points[i].Y + m_rcItem.top;
53             rect.right = points[i + 1].X;
54             rect.bottom = points[i + 1].Y + m_rcItem.top;
55             CRenderEngine::DrawLine(hDC, rect, 1, backLineColor);
56         }
57     }
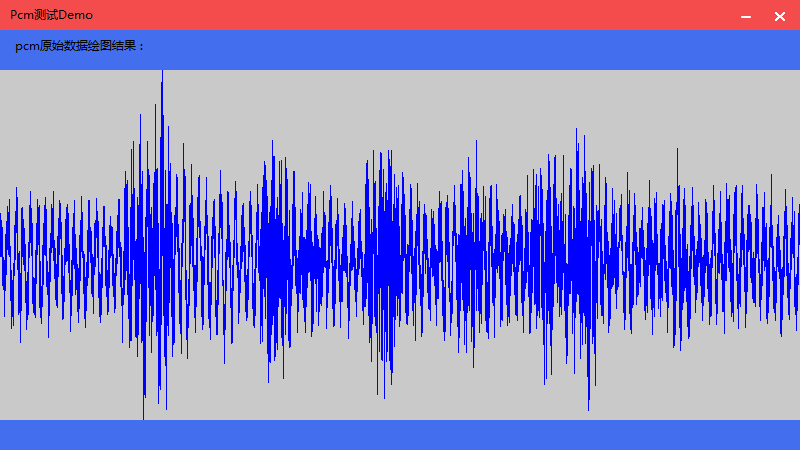
绘图效果:
测试绘图代码: https://github.com/karllen/cef3-duilib-YDDemo/tree/master/PcmMediaDemo