我们都知道,在最新的Android N系统中,加入了一个新的功能,就是多窗口模式。多窗口模式允许我们在屏幕上显示两个窗口,每个窗口显示的内容不同,也就是说,我们可以一遍看电视剧,一边聊微信。
这里我们通过官方提供的一个Demo来了解一下,作为开发者,怎么给我们的App也适配多窗口模式。
这里给出代码github地址,需要的话可以clone下来边看边了解:
https://github.com/googlecodelabs/getting-ready-for-android-n
根据指导文档这里分为几个部分:
1. 多窗口模式的开关
2. 多窗口模式适配
3. 多窗口模式中打开新的窗口处理
我们一个一个来了解下:
1. 多窗口模式的开关
默认情况下,我们的App都是允许多窗口的,但是,如果没有进行属性的设置,会系统会抛出一个提示这个应用可能不支持多窗口模式
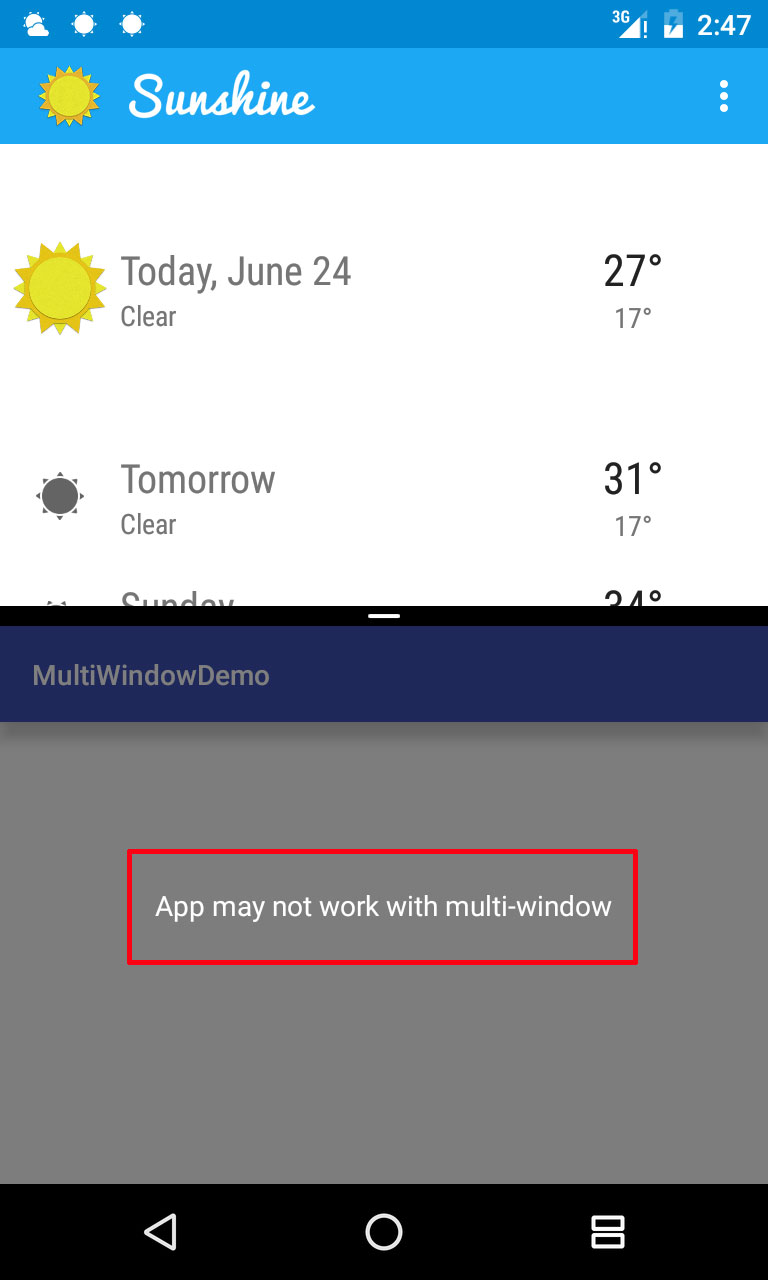
那么,如果我们的应用要支持这个模式并且不让这个消息弹出来,要怎么做呢?
很简单,只需要在Activity声明的时候加入一个属性resizeableActivity,并且设置其值为true即可:
<activity
    android:name=".MainActivity"
    android:resizeableActivity="true">
    <intent-filter>
       <action android:name="android.intent.action.MAIN"/>
    <category android:name="android.intent.category.LAUNCHER"/>
    </intent-filter>
</activity>
这个属性的设置会导致三种情况:
① 如果不声明这个属性,那么默认允许进入多窗口模式,但是会有上面图片的提示(第一次运行的时候)
② 如果声明了这个属性,并设置值为true,那么允许进入多窗口模式,并且不会提示
③ 如果声明了这个属性,并设置值为false,那么不允许进入多窗口模式,只允许全屏显示
2. 多窗口模式的适配
当我们允许App进入多窗口模式之后,App只能占据屏幕的一部分,假设我们的App运行的界面如下(官方Demo):

可以看到,在App的上半部分是一个蓝色的图片背景,在上面显示了当前的天气状况,但是如果我们不进行适应,那么进入了多窗口模式之后,这个部分的内容就会几乎占满整个窗口,这个时候我们就需要进行一下适配,当进入多窗口模式之后更换掉这一个布局,将内容进行重新排版,以便显示更多的内容。
默认情况下的布局:
 1 <LinearLayout xmlns:android="http://schemas.android.com/apk/res/android"
 2     android:layout_width="match_parent"
 3     android:layout_height="wrap_content"
 4     android:gravity="center_vertical"
 5     android:minHeight="?android:attr/listPreferredItemHeight"
 6     android:orientation="horizontal"
 7     android:background="@drawable/today_touch_selector">
 8
 9     <LinearLayout
10         android:layout_height="wrap_content"
11         android:layout_width="0dp"
12         android:layout_weight="7"
13         android:layout_marginTop="16dp"
14         android:layout_marginBottom="16dp"
15         android:layout_marginLeft="60dp"
16         android:orientation="vertical">
17
18         <TextView
19             android:id="@+id/list_item_date_textview"
20             android:layout_width="match_parent"
21             android:layout_height="wrap_content"
22             android:textAppearance="?android:textAppearanceLarge"
23             android:fontFamily="sans-serif-condensed"
24             android:textColor="@color/white" />
25
26         <TextView
27             android:id="@+id/list_item_high_textview"
28             android:layout_width="match_parent"
29             android:layout_height="wrap_content"
30             android:textSize="72sp"
31             android:fontFamily="sans-serif-light"
32             android:textColor="@color/white" />
33
34         <TextView
35             android:id="@+id/list_item_low_textview"
36             android:layout_width="match_parent"
37             android:layout_height="wrap_content"
38             android:textColor="@color/white"
39             android:textSize="36sp"
40             android:layout_marginLeft="8dp"/>
41     </LinearLayout>
42
43     <LinearLayout
44         android:layout_height="wrap_content"
45         android:layout_width="0dp"
46         android:layout_weight="5"
47         android:layout_marginRight="16dp"
48         android:orientation="vertical"
49         android:gravity="center_horizontal|bottom">
50
51         <ImageView
52             android:id="@+id/list_item_icon"
53             android:layout_width="wrap_content"
54             android:layout_height="wrap_content"
55             android:layout_gravity="center_horizontal"/>
56
57         <TextView
58             android:id="@+id/list_item_forecast_textview"
59             android:layout_width="wrap_content"
60             android:layout_height="wrap_content"
61             android:fontFamily="sans-serif-condensed"
62             android:layout_gravity="center_horizontal"
63             android:textAppearance="?android:textAppearanceLarge"
64             android:textColor="@color/white"/>
65     </LinearLayout>
这里主要看到,根布局中设置了背景图,这个图片就是那个我们看到蓝色的那一张,里面定义了一些TextView来显示信息,定义了一个ImageView来显示天气的图标,简单了解下布局即可。
因为这里用到Fragment,可能直接看工程不会很清晰,我们打开res下的values-sw400dp,然后打开里面的refs.xml文件,内容如下:
<resources>
    <item type="layout" name="fragment_detail">@layout/fragment_detail_wide</item>
    <item type="layout" name="list_item_forecast_today">@layout/list_item_forecast_today_big</item>
</resources>
我们将光标移动到第二个Item的name属性的值中,然后按下Alt+F7找到项目中用到这个value的地方:

可以看到,只有一个地方使用了这个value,我们点进去可以看到,这个布局其实是被用在了一个CursorAdapter中,这里应该就知道了,这个布局是被当作一个ListView的头部来使用。
我们先不管工程是如何实现的,我们只需要知道这个布局会被用在界面中的ListView中的头部中就可以了。这个时候我们再看看这个folder的文件名values-sw400dp,sw400dp就表明了这个value是在屏幕最短边大于等于400dp的时候生效(前提是有其他不同的value文件夹)。
因为在多窗口模式的情况下,每个窗口分的大小是允许用户控制的(可以通过中间的滑动来改变两个窗口的大小),而当用户将滑块向上滑动,有可能会会导致最短边小于400dp,因此,我们可以在工程的res下创建一个更小的values文件名为values-sw220dp,接着再创建一个布局文件(里面的控件id必须和上面的布局一致,这里Demo中已经给出了一个布局,名字是list_item_forecast),接着在values-sw220dp下创建一个refs.xml的文件,文件内容如下:
<resources>
    <item type="layout" name="list_item_forecast_today">@layout/list_item_forecast</item>
</resources>
运行的效果如下所示,可以看到,当屏幕最短边大于220dp而小于400dp的时候,会显示如右图的布局:
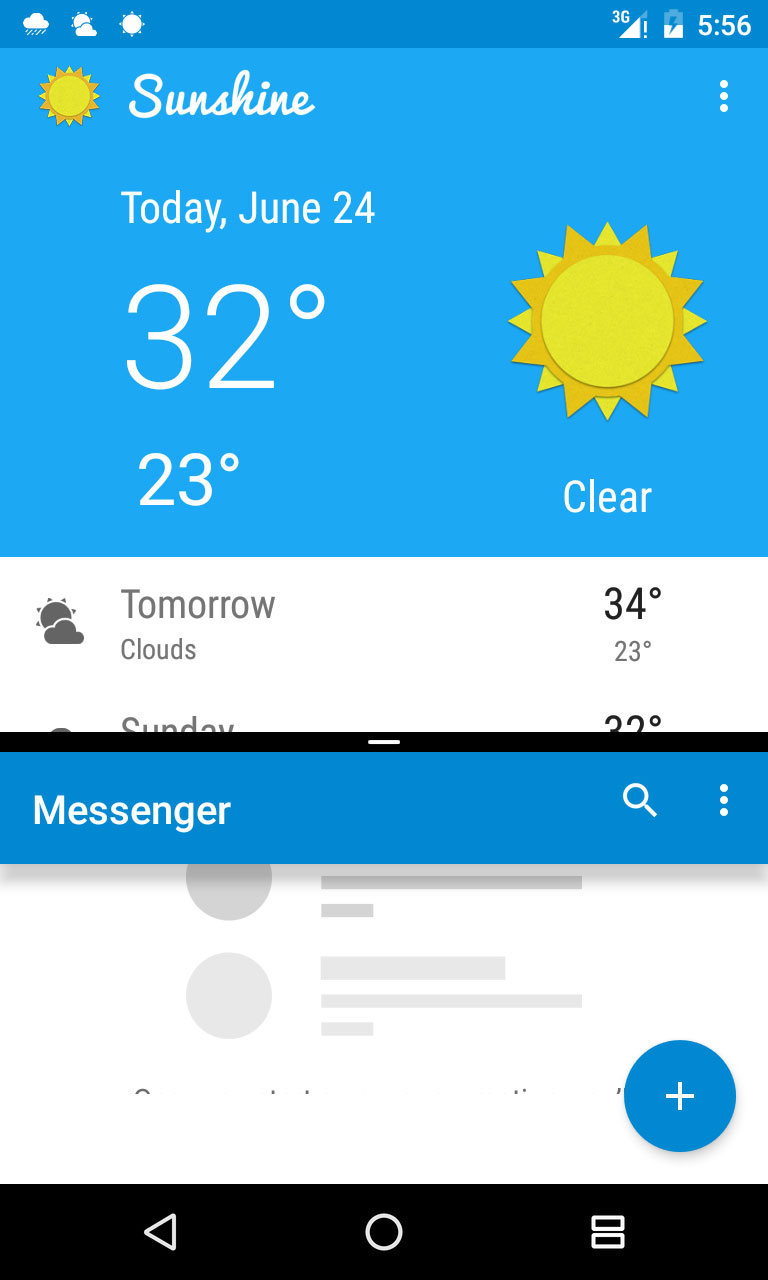
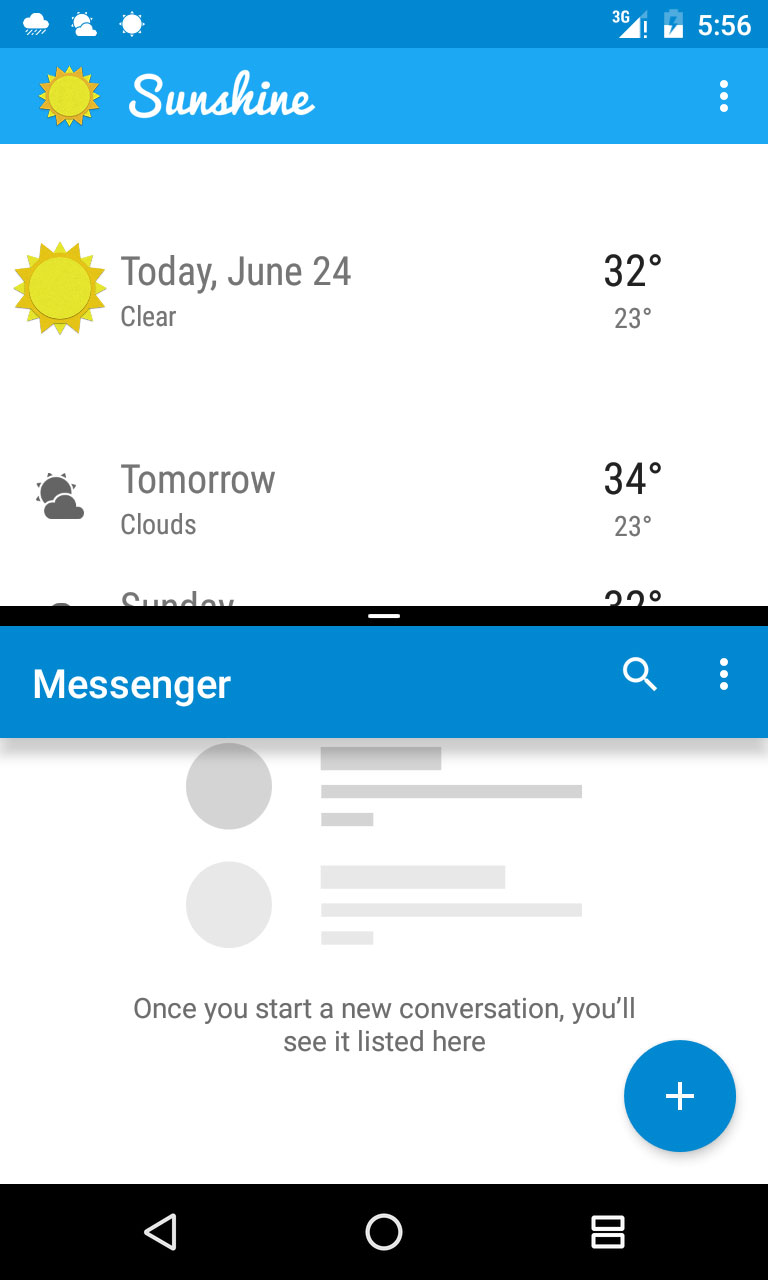
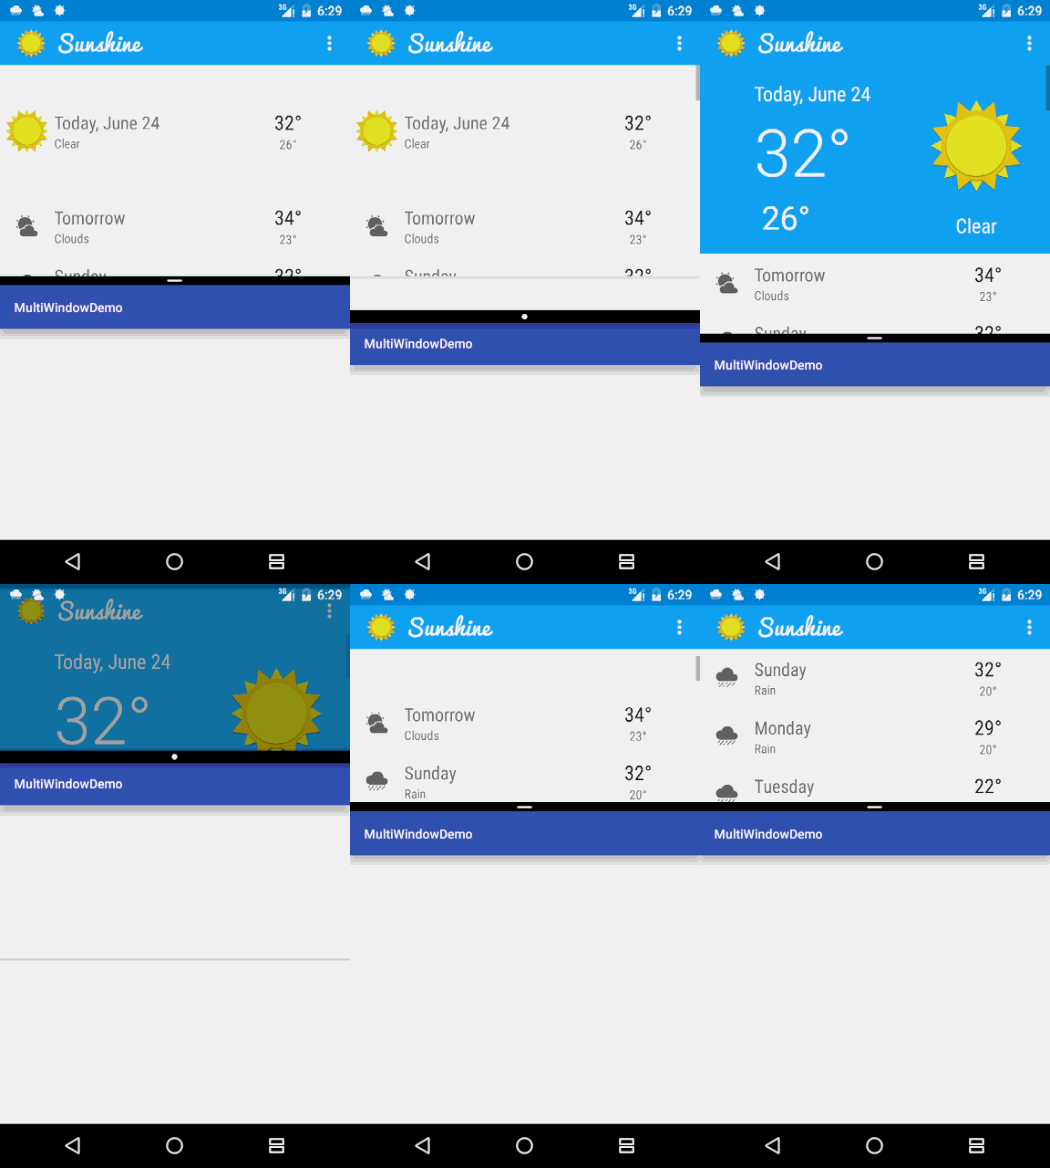
这里还要注意一个问题,如果我们按照上面定义的220dp来命名,那么如果屏幕被继续向上拉,会导致最小边小于220dp,这个时候又会恢复到左边的这个布局,这里解决办法是把220dp设置的更小(如100dp)即可。
这里补充一下效果:
3. 在多窗口中打开一个Activity
在官方的Demo中,可以通过右上角的菜单中的“Map Location”来打开地图App,这个时候如果不加以设置,地图App会在当前的这个小窗口中打开。
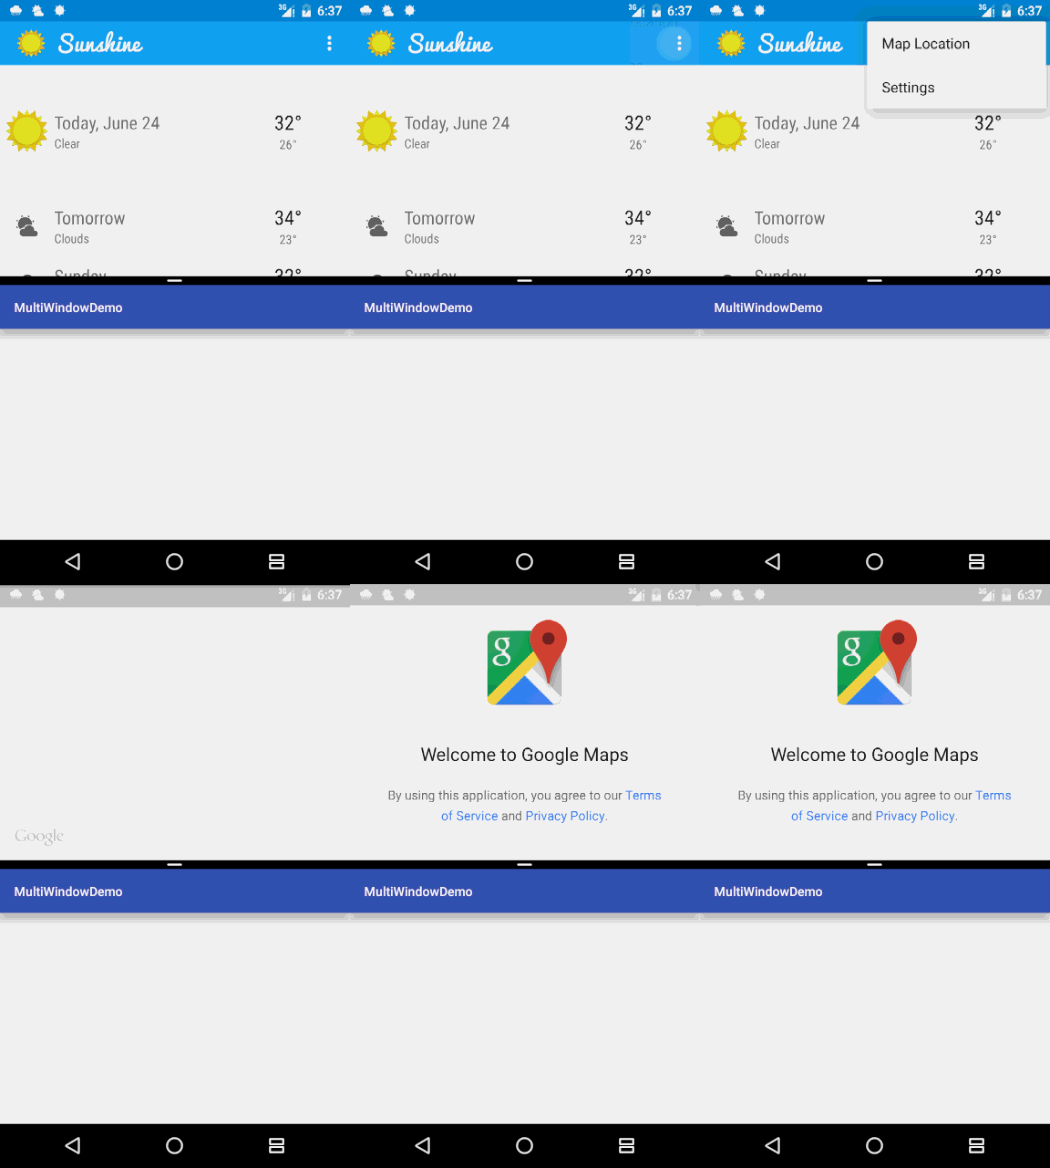
那么我们可不可以让系统在下面的这个窗口打开呢?因为考虑到用户可以不用跳出我们的App而对地图App进行操作,谷歌官方也是提供了这个功能,而且比较简单。
我们找到ForecastFragment.class这个类,定位到206行,代码如下:
Intent intent = new Intent(Intent.ACTION_VIEW);
intent.setData(geoLocation);
很明显这里是要打开一个Activity,接着我们只需要给这个Intent设置一个标签,完整代码如下:
Intent intent = new Intent(Intent.ACTION_VIEW);
intent.setData(geoLocation);
intent.addFlags(Intent.FLAG_ACTIVITY_LAUNCH_ADJACENT);
这个时候,我们再此运行App并打开地图App,会发现,地图App会在另一个窗口中被打开。
