0.前言
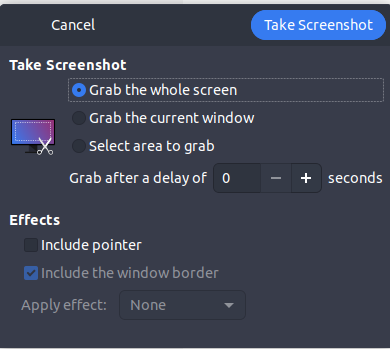
ubuntu 18.04自带一个截图工具gnome-screenshot,有三种模式,全屏截图、当前活动窗口截图、选取活动区域截图
1.设置快捷键
Setting->Devices->Keyboard
在keyboard最下面有个Custom Shortcuts就是可定制快捷键了
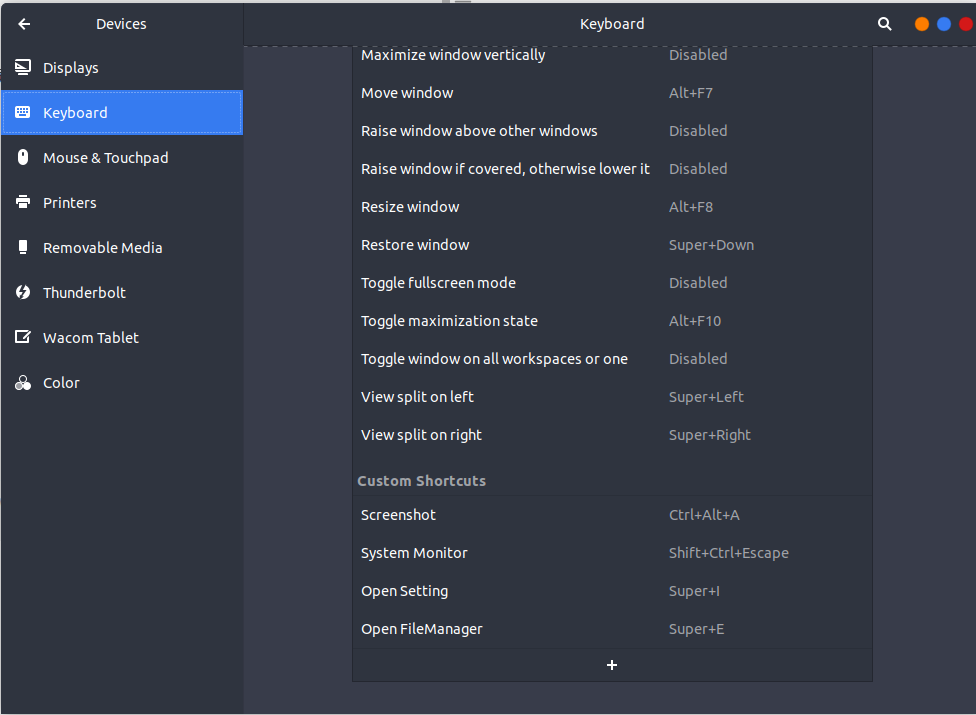
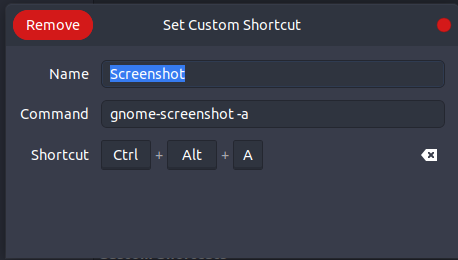
点击“+”号,name随意写,command填入gnome-screenshot -a,快捷键自定义,这样每次打开都是选取活动窗口截图了
2.模式选择
输入gnome-screenshot -h查看用户使用帮助手册
$ gnome-screenshot -h
Usage:
  gnome-screenshot [OPTION…]

Help Options:
  -h, --help                     Show help options
  --help-all                     Show all help options
  --help-gapplication            Show GApplication options
  --help-gtk                     Show GTK+ Options

Application Options:
  -c, --clipboard                Send the grab directly to the clipboard
  -w, --window                   Grab a window instead of the entire screen
  -a, --area                     Grab an area of the screen instead of the entire screen
  -b, --include-border           Include the window border with the screenshot
  -B, --remove-border            Remove the window border from the screenshot
  -p, --include-pointer          Include the pointer with the screenshot
  -d, --delay=seconds            Take screenshot after specified delay [in seconds]
  -e, --border-effect=effect     Effect to add to the border (shadow, border, vintage or none)
  -i, --interactive              Interactively set options
  -f, --file=filename            Save screenshot directly to this file
  --version                      Print version information and exit
  --display=DISPLAY              X display to use
可以看到可以在gnome-screenshot 后面的参数有,-后面的是参数简写,--后面的是完整参数
  -c, --clipboard     	 		将抓取直接发送到剪贴板
  -w, --window        			抓一个窗口而不是整个屏幕
  -a, --area             		抓住屏幕的一个区域而不是整个屏幕
  -b, --include-border  		包含带有屏幕截图的窗口边框
  -B, --remove-border           从屏幕截图中删除窗口边框
  -p, --include-pointer   		包含带有屏幕截图的指针
  -d, --delay=seconds       	在指定的延迟[秒]后截取屏幕截图
  -e, --border-effect=effect    添加到边框的效果(阴影,边框,复古或无)
  -i, --interactive             交互式设置选项
  -f, --file=filename    		将屏幕截图直接保存到此文件
  --version                     打印版本信息并退出
  --display=DISPLAY       	    X显示使用