上面介绍了项目的创建,这一节记录如何编译成安卓和iOS的app,这里先记录如何编译成iOS的。
1.首先在终端中进入到项目的目录下,先看下编译命令有哪些功能,运行cocos compile -h:
 1 bogon:HelloC1 dn9x$ cocos compile -h
 2 usage: cocos compile [-h] [-s SRC_DIR] [-q] [-p PLATFORM] [-m MODE] [-j JOBS]
 3                      [--ap ANDROID_PLATFORM] [--ndk-mode NDK_MODE]
 4                      [--source-map] [--sign-identity SIGN_ID] [--no-res]
 5                      [--compile-script {0,1}] [--lua-encrypt]
 6                      [--lua-encrypt-key LUA_ENCRYPT_KEY]
 7                      [--lua-encrypt-sign LUA_ENCRYPT_SIGN]
 8
 9 Compiles the current project to binary
10
11 optional arguments:
12   -h, --help            show this help message and exit
13   -s SRC_DIR, --src SRC_DIR
14                         project base directory
15   -q, --quiet           less output
16   -p PLATFORM, --platform PLATFORM
17                         select a platform (android, ios, mac, web, win32,
18                         linux)
19   -m MODE, --mode MODE  Set the compile mode, should be debug|release, default
20                         is debug.
21   -j JOBS, --jobs JOBS  Allow N jobs at once.
22
23 Android Options:
24   --ap ANDROID_PLATFORM
25                         parameter for android-update.Without the parameter,the
26                         script just build dynamic library for project. Valid
27                         android-platform are:[10|11|12|13|14|15|16|17|18|19]
28   --ndk-mode NDK_MODE   Set the compile mode of ndk-build, should be
29                         debug|release|none, native code will not be compiled
30                         when the value is none. Default is same value with -m
31
32 Web Options:
33   --source-map          Enable source-map
34
35 iOS Options:
36   --sign-identity SIGN_ID
37                         The code sign identity for iOS. It's required when the
38                         value of "-m, -mode" is release.
39
40 lua/js project arguments:
41   --no-res              Package without project resources.
42   --compile-script {0,1}
43                         Diable/Enable the compiling of lua/js script files.
44
45 lua project arguments:
46   --lua-encrypt         Enable the encrypting of lua scripts.
47   --lua-encrypt-key LUA_ENCRYPT_KEY
48                         Specify the encrypt key for the encrypting of lua
49                         scripts.
50   --lua-encrypt-sign LUA_ENCRYPT_SIGN
51                         Specify the encrypt sign for the encrypting of lua
52                         scripts.
53 bogon:HelloC1 dn9x$
这里面可以看到很多的参数,-p可以指定编译成什么模式,-m可以指定编译的模式是调试还是正式,还有专门安卓编译的选项等,这里是先介绍iOS的,因为我现在还不会oc,所以这一块我们直接使用xcode进行编译。
2.在项目目录下有个frameworks/runtime-src目录,这个目录里面就是各个平台的代码,V3.0 R1版本的默认有4中,android, ios, linux, win32,如:

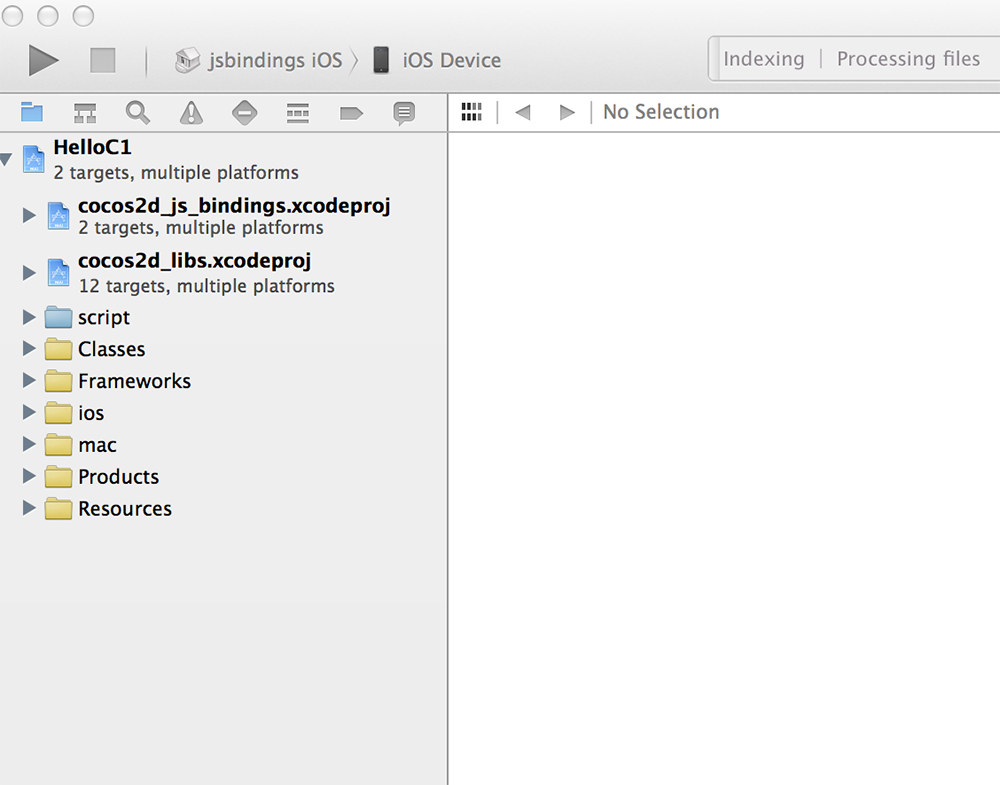
3.直接点击上面的HelloC1.xcodeproj就会用xcode打开了,
设置下运行的虚拟设备:

设置完之后点击运行按钮就可以运行了:

初次运行可能有点慢,所以要稍等下,运行以后效果如下:

和浏览器中看到的效果是一样的。
4.编译成安卓的优点不太一样,这里你的电脑首先要安卓ndk,还要安装ant,所以推荐到谷歌网站上去下载adt套件,下载地址是:http://developer.android.com/sdk/index.html,ant可能要单独下载,下载地址是:http://ant.apache.org/bindownload.cgi,下载之后自己配置下环境变量,在/etc/profile中配置环境变量,如:
export NDK_ROOT=/Users/dn9x/Android/adt-bundle-mac-x86_64-20140702/android-ndk-r10
export ANT_ROOT=/Users/dn9x/Android/apache-ant-1.9.4/bin
export ANDROID_SDK_ROOT=/Users/dn9x/Android/adt-bundle-mac-x86_64-20140702/sdk

export PATH=/Users/dn9x/Cocos/cocos2d-js-v3.0-rc1/tools/cocos2d-console/bin:/Users/dn9x/Android/android-ndk-r9:/Users/dn9x/Android/adt-bundle-mac-x86_64-20140702/sdk/platform-tools:$PATH
这里的NDK_ROOT是要配置的,ANT_ROOT和ANDROID_SDK_ROOT也是要配置的,这里之所以配置了所有的东西是为了一次性的配置完成,后面安卓使用的时候就不用配置了,当然ant的环境变量也是要配置的,之前刚开始用mac的时候环境变量我都是配置在/etc/profile中,后来我看了下profile是所有用户登录的时候都会读取的,不建议配置在这里,所以后面的配置我就配置在另外一个文件中了,/etc/bashrc
export ANT_HOME=/Users/dn9x/Android/apache-ant-1.9.4
export PATH=${PATH}:${ANT_HOME}/bin
配置好ndk和ant之后,重新启动下终端,
重启之后可以运行下ant -v看下是否配置成功,
5.开始编译为安卓程序,文章最开始的时候看过编译的命令,所以就直接使用命令行编译,这里介绍下,上面编译命令中有一个安卓命令的选项,如:
Android Options:
  --ap ANDROID_PLATFORM
                        parameter for android-update.Without the parameter,the
                        script just build dynamic library for project. Valid
                        android-platform are:[10|11|12|13|14|15|16|17|18|19]
  --ndk-mode NDK_MODE   Set the compile mode of ndk-build, should be
                        debug|release|none, native code will not be compiled
                        when the value is none. Default is same value with -m
这里的--ap是指安卓版本,所以在编译的时候可以带上这个,这样他就可以编译为安卓指定版本了
bogon:HelloC1 dn9x$ cocos compile -p android --ap 19
Running command: compile
Building mode: debug
building native
NDK build mode: debug
The Selected NDK toolchain version was 4.8 !
running: '/Users/dn9x/Android/adt-bundle-mac-x86_64-20140702/android-ndk-r10/ndk-build -C /Users/dn9x/work/study/cocos/HelloC1/frameworks/runtime-src/proj.android -j1 NDK_MODULE_PATH=/Users/dn9x/work/study/cocos/HelloC1/frameworks/runtime-src/proj.android/../../js-bindings:/Users/dn9x/work/study/cocos/HelloC1/frameworks/runtime-src/proj.android/../../js-bindings/cocos2d-x:/Users/dn9x/work/study/cocos/HelloC1/frameworks/runtime-src/proj.android/../../js-bindings/cocos2d-x/cocos:/Users/dn9x/work/study/cocos/HelloC1/frameworks/runtime-src/proj.android/../../js-bindings/cocos2d-x/external NDK_DEBUG=1'
.
.
.........
编译的时间是比较久的,好了之后你可以看到:
 1 -post-package:
 2
 3 -do-debug:
 4  [zipalign] Running zip align on final apk...
 5      [echo] Debug Package: /Users/dn9x/work/study/cocos/HelloC1/frameworks/runtime-src/proj.android/bin/HelloC1-debug.apk
 6 [propertyfile] Creating new property file: /Users/dn9x/work/study/cocos/HelloC1/frameworks/runtime-src/proj.android/bin/build.prop
 7 [propertyfile] Updating property file: /Users/dn9x/work/study/cocos/HelloC1/frameworks/runtime-src/proj.android/bin/build.prop
 8 [propertyfile] Updating property file: /Users/dn9x/work/study/cocos/HelloC1/frameworks/runtime-src/proj.android/bin/build.prop
 9 [propertyfile] Updating property file: /Users/dn9x/work/study/cocos/HelloC1/frameworks/runtime-src/proj.android/bin/build.prop
10
11 -post-build:
12
13 debug:
14
15 BUILD SUCCESSFUL
16 Total time: 12 seconds
17 Move apk to /Users/dn9x/work/study/cocos/HelloC1/runtime/android
18 build succeeded.
19 bogon:HelloC1 dn9x$
6.安装编译后的程序到真机,这里把安卓手机通过数据线连接电脑,并且开启USB调试,通过adb命令安装,如果你按照上面的配置文件配置环境变量,那么应该可以直接使用adb命令,如:
  1 bogon:HelloC1 dn9x$ adb -h
  2 Android Debug Bridge version 1.0.31
  3
  4  -a                            - directs adb to listen on all interfaces for a connection
  5  -d                            - directs command to the only connected USB device
  6                                  returns an error if more than one USB device is present.
  7  -e                            - directs command to the only running emulator.
  8                                  returns an error if more than one emulator is running.
  9  -s <specific device>          - directs command to the device or emulator with the given
 10                                  serial number or qualifier. Overrides ANDROID_SERIAL
 11                                  environment variable.
 12  -p <product name or path>     - simple product name like 'sooner', or
 13                                  a relative/absolute path to a product
 14                                  out directory like 'out/target/product/sooner'.
 15                                  If -p is not specified, the ANDROID_PRODUCT_OUT
 16                                  environment variable is used, which must
 17                                  be an absolute path.
 18  -H                            - Name of adb server host (default: localhost)
 19  -P                            - Port of adb server (default: 5037)
 20  devices [-l]                  - list all connected devices
 21                                  ('-l' will also list device qualifiers)
 22  connect <host>[:<port>]       - connect to a device via TCP/IP
 23                                  Port 5555 is used by default if no port number is specified.
 24  disconnect [<host>[:<port>]]  - disconnect from a TCP/IP device.
 25                                  Port 5555 is used by default if no port number is specified.
 26                                  Using this command with no additional arguments
 27                                  will disconnect from all connected TCP/IP devices.
 28
 29 device commands:
 30   adb push [-p] <local> <remote>
 31                                - copy file/dir to device
 32                                  ('-p' to display the transfer progress)
 33   adb pull [-p] [-a] <remote> [<local>]
 34                                - copy file/dir from device
 35                                  ('-p' to display the transfer progress)
 36                                  ('-a' means copy timestamp and mode)
 37   adb sync [ <directory> ]     - copy host->device only if changed
 38                                  (-l means list but don't copy)
 39                                  (see 'adb help all')
 40   adb shell                    - run remote shell interactively
 41   adb shell <command>          - run remote shell command
 42   adb emu <command>            - run emulator console command
 43   adb logcat [ <filter-spec> ] - View device log
 44   adb forward --list           - list all forward socket connections.
 45                                  the format is a list of lines with the following format:
 46                                     <serial> " " <local> " " <remote> "
"
 47   adb forward <local> <remote> - forward socket connections
 48                                  forward specs are one of:
 49                                    tcp:<port>
 50                                    localabstract:<unix domain socket name>
 51                                    localreserved:<unix domain socket name>
 52                                    localfilesystem:<unix domain socket name>
 53                                    dev:<character device name>
 54                                    jdwp:<process pid> (remote only)
 55   adb forward --no-rebind <local> <remote>
 56                                - same as 'adb forward <local> <remote>' but fails
 57                                  if <local> is already forwarded
 58   adb forward --remove <local> - remove a specific forward socket connection
 59   adb forward --remove-all     - remove all forward socket connections
 60   adb jdwp                     - list PIDs of processes hosting a JDWP transport
 61   adb install [-l] [-r] [-d] [-s] [--algo <algorithm name> --key <hex-encoded key> --iv <hex-encoded iv>] <file>
 62                                - push this package file to the device and install it
 63                                  ('-l' means forward-lock the app)
 64                                  ('-r' means reinstall the app, keeping its data)
 65                                  ('-d' means allow version code downgrade)
 66                                  ('-s' means install on SD card instead of internal storage)
 67                                  ('--algo', '--key', and '--iv' mean the file is encrypted already)
 68   adb uninstall [-k] <package> - remove this app package from the device
 69                                  ('-k' means keep the data and cache directories)
 70   adb bugreport                - return all information from the device
 71                                  that should be included in a bug report.
 72
 73   adb backup [-f <file>] [-apk|-noapk] [-obb|-noobb] [-shared|-noshared] [-all] [-system|-nosystem] [<packages...>]
 74                                - write an archive of the device's data to <file>.
 75                                  If no -f option is supplied then the data is written
 76                                  to "backup.ab" in the current directory.
 77                                  (-apk|-noapk enable/disable backup of the .apks themselves
 78                                     in the archive; the default is noapk.)
 79                                  (-obb|-noobb enable/disable backup of any installed apk expansion
 80                                     (aka .obb) files associated with each application; the default
 81                                     is noobb.)
 82                                  (-shared|-noshared enable/disable backup of the device's
 83                                     shared storage / SD card contents; the default is noshared.)
 84                                  (-all means to back up all installed applications)
 85                                  (-system|-nosystem toggles whether -all automatically includes
 86                                     system applications; the default is to include system apps)
 87                                  (<packages...> is the list of applications to be backed up.  If
 88                                     the -all or -shared flags are passed, then the package
 89                                     list is optional.  Applications explicitly given on the
 90                                     command line will be included even if -nosystem would
 91                                     ordinarily cause them to be omitted.)
 92
 93   adb restore <file>           - restore device contents from the <file> backup archive
 94
 95   adb help                     - show this help message
 96   adb version                  - show version num
 97
 98 scripting:
 99   adb wait-for-device          - block until device is online
100   adb start-server             - ensure that there is a server running
101   adb kill-server              - kill the server if it is running
102   adb get-state                - prints: offline | bootloader | device
103   adb get-serialno             - prints: <serial-number>
104   adb get-devpath              - prints: <device-path>
105   adb status-window            - continuously print device status for a specified device
106   adb remount                  - remounts the /system partition on the device read-write
107   adb reboot [bootloader|recovery] - reboots the device, optionally into the bootloader or recovery program
108   adb reboot-bootloader        - reboots the device into the bootloader
109   adb root                     - restarts the adbd daemon with root permissions
110   adb usb                      - restarts the adbd daemon listening on USB
111   adb tcpip <port>             - restarts the adbd daemon listening on TCP on the specified port
112 networking:
113   adb ppp <tty> [parameters]   - Run PPP over USB.
114  Note: you should not automatically start a PPP connection.
115  <tty> refers to the tty for PPP stream. Eg. dev:/dev/omap_csmi_tty1
116  [parameters] - Eg. defaultroute debug dump local notty usepeerdns
117
118 adb sync notes: adb sync [ <directory> ]
119   <localdir> can be interpreted in several ways:
120
121   - If <directory> is not specified, both /system and /data partitions will be updated.
122
123   - If it is "system" or "data", only the corresponding partition
124     is updated.
125
126 environmental variables:
127   ADB_TRACE                    - Print debug information. A comma separated list of the following values
128                                  1 or all, adb, sockets, packets, rwx, usb, sync, sysdeps, transport, jdwp
129   ANDROID_SERIAL               - The serial number to connect to. -s takes priority over this if given.
130   ANDROID_LOG_TAGS             - When used with the logcat option, only these debug tags are printed.
131 bogon:HelloC1 dn9x$
这里我们可以输入adb divices查看连接到电脑上的设备,
1 bogon:HelloC1 dn9x$ adb devices
2 List of devices attached
3 4LRSDI5DIJVG7HFU    device
4
5 bogon:HelloC1 dn9x$
在测试安卓程序的时候,使用真机会比使用模拟器要快,我一般都是使用真机测试,
安装程序到真机,这里可以看到adb中的一个命令:
1  adb install [-l] [-r] [-d] [-s] [--algo <algorithm name> --key <hex-encoded key> --iv <hex-encoded iv>] <file>
2                                - push this package file to the device and install it
3                                  ('-l' means forward-lock the app)
4                                  ('-r' means reinstall the app, keeping its data)
5                                  ('-d' means allow version code downgrade)
6                                  ('-s' means install on SD card instead of internal storage)
7                                  ('--algo', '--key', and '--iv' mean the file is encrypted already)
这里我们可以看到一些安装的详细参数,这里我们进入到/HelloC1/frameworks/runtime-src/proj.android/bin目录下,可以看到生成的HelloC1-debug-unaligned.apk,我们安装此文件到手机中,
1 bogon:bin dn9x$ adb install HelloC1-debug-unaligned.apk
2 9771 KB/s (7920657 bytes in 0.791s)
3 WARNING: linker: libvc1dec_sa.ca7.so has text relocations. This is wasting memory and is a security risk. Please fix.
4 WARNING: linker: libvc1dec_sa.ca7.so has text relocations. This is wasting memory and is a security risk. Please fix.
5     pkg: /data/local/tmp/HelloC1-debug-unaligned.apk
6 Success
7 bogon:bin dn9x$ pwd
8 /Users/dn9x/work/study/cocos/HelloC1/frameworks/runtime-src/proj.android/bin
9 bogon:bin dn9x$
安装成功之后你的手机也会提示,然后再手机上打开可以看到和在浏览器中的效果是一致的,到这里你的cocos2d-js的项目就已经编译并且运行到安卓设备上了,
7.其实直接开发中我们往往都是在编译之后通过eclipse打开项目进行编译并且调试项目,这里我们就介绍下用eclipse打开项目并且运行项目,
首先打开eclipse,导入项目,

选择项目:

在eclipse中打开项目之后项目会报错,如:

这主要是因为我们要手动设置项目中需要的cocos提供的java文件,这些java文件的位置在:
/HelloC1/frameworks/js-bindings/cocos2d-x/cocos/platform/android/java/src
然后直接复制src中的整个org文件夹到项目的src中,如:

然后配置运行,这里我们在模拟器中运行下看看。在模拟器中就是太慢,还是运行在真机中把,我的手机是联想S568t,安卓版本的是:4.4.2,所以在运行是完全没有问题,

截取了下屏幕的快照,

下面就会开始记录cocos2d-js中的知识了,