用到的技术:
后台: java (springboot+shiro) 。创建项目-可参考 写一个简易的java项目(一)
前台: vue-admin-template (前台权限参考vue-element-admin)。下载配置-可参考 写一个简易的java项目(三)
编辑器:
后台:IntelliJ IDEA
前台:Visual Studio Code
后台:
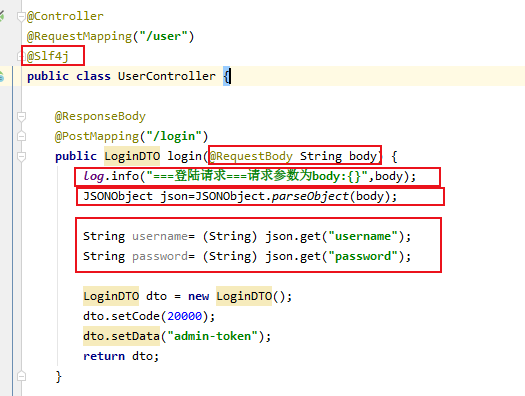
第一步:打印日志 &确认前台传过来的参数:账号密码
这里我使用fastjson的方法 获取用户密码,代码如下
pom:


    <dependency>
            <groupId>com.alibaba</groupId>
            <artifactId>fastjson</artifactId>
            <version>1.2.47</version>
        </dependency>
登陆打印结果:

第二步: 这里我们先创建三张表:
因为只是登陆 还没到权限所以 主要是用户表: 存一些基本信息如 账号 密码 头像 密码盐(如果需要的话) 角色id
sys_user 用户
sys_role 角色
sys_permission 权限
用户表:
CREATE TABLE `sys_user` (
  `user_id` bigint NOT NULL COMMENT '主键id',
  `avatar` varchar(255) CHARACTER SET utf8 COLLATE utf8_general_ci DEFAULT NULL COMMENT '头像',
  `account` varchar(50) CHARACTER SET utf8 COLLATE utf8_general_ci DEFAULT NULL COMMENT '账号',
  `password` varchar(50) CHARACTER SET utf8 COLLATE utf8_general_ci DEFAULT NULL COMMENT '密码',
  `salt` varchar(50) CHARACTER SET utf8 COLLATE utf8_general_ci DEFAULT NULL COMMENT '密码盐',
  `name` varchar(50) CHARACTER SET utf8 COLLATE utf8_general_ci DEFAULT NULL COMMENT '名字',
  `birthday` datetime DEFAULT NULL COMMENT '生日',
  `sex` varchar(32) CHARACTER SET utf8 COLLATE utf8_general_ci DEFAULT NULL COMMENT '性别',
  `email` varchar(32) CHARACTER SET utf8 COLLATE utf8_general_ci DEFAULT NULL COMMENT '邮箱',
  `phone` varchar(32) CHARACTER SET utf8 COLLATE utf8_general_ci DEFAULT NULL COMMENT '电话',
  `role_ids` varchar(255) CHARACTER SET utf8 COLLATE utf8_general_ci DEFAULT NULL COMMENT '角色id(多个逗号隔开)',
  `create_time` datetime DEFAULT NULL COMMENT '创建时间',
  `create_user` bigint DEFAULT NULL COMMENT '创建人',
  `update_time` datetime DEFAULT NULL COMMENT '更新时间',
  `update_user` bigint DEFAULT NULL COMMENT '更新人',
  PRIMARY KEY (`user_id`) USING BTREE
) ENGINE=InnoDB DEFAULT CHARSET=utf8 ROW_FORMAT=DYNAMIC COMMENT='用户表';
角色表:
CREATE TABLE `sys_role` (
  `role_id` bigint NOT NULL COMMENT '主键id',
  `pid` bigint DEFAULT NULL COMMENT '父角色id',
  `name` varchar(255) CHARACTER SET utf8 COLLATE utf8_general_ci DEFAULT NULL COMMENT '角色名称',
  `description` varchar(255) CHARACTER SET utf8 COLLATE utf8_general_ci DEFAULT NULL COMMENT '描述',
  `sort` int DEFAULT NULL COMMENT '序号',
  `create_time` datetime DEFAULT NULL COMMENT '创建时间',
  `update_time` datetime DEFAULT NULL COMMENT '修改时间',
  `create_user` bigint DEFAULT NULL COMMENT '创建用户',
  `update_user` bigint DEFAULT NULL COMMENT '修改用户',
  `deleted` tinyint(1) DEFAULT '0' COMMENT '逻辑删除',
  PRIMARY KEY (`role_id`) USING BTREE
) ENGINE=InnoDB DEFAULT CHARSET=utf8 ROW_FORMAT=DYNAMIC COMMENT='角色表';
权限表:
CREATE TABLE `sys_permission` (
  `id` int NOT NULL AUTO_INCREMENT,
  `role_id` int DEFAULT NULL COMMENT '角色ID',
  `permission` varchar(63) CHARACTER SET utf8mb4 COLLATE utf8mb4_general_ci DEFAULT NULL COMMENT '权限',
  `create_time` datetime DEFAULT NULL COMMENT '创建时间',
  `update_time` datetime DEFAULT NULL COMMENT '更新时间',
  `deleted` tinyint(1) DEFAULT '0' COMMENT '逻辑删除',
  PRIMARY KEY (`id`) USING BTREE
) ENGINE=InnoDB AUTO_INCREMENT=53 DEFAULT CHARSET=utf8mb4 COLLATE=utf8mb4_general_ci ROW_FORMAT=COMPACT COMMENT='权限表';
第三步:shiro 权限认证
1.pom:
    <dependency>
            <groupId>org.apache.shiro</groupId>
            <artifactId>shiro-spring-boot-web-starter</artifactId>
            <version>1.4.0</version>
        </dependency>
2.自定义Realm 主要作用有:验证登陆人的账号密码是否正确、验证账号的权限信息等等
extends AuthorizingRealm 重写两个方法:
doGetAuthorizationInfo(PrincipalCollection principalCollection)
doGetAuthenticationInfo(AuthenticationToken authenticationToken)

KingRealm
第一个方法:授权:这里需要写一些方法->通过角色id 获取角色名称 和 权限信息
  /**
     * 权限认证
     * @param principalCollection
     * @return
     */
    @Override
    protected AuthorizationInfo doGetAuthorizationInfo(PrincipalCollection principalCollection) {
        // 获取用户
        User user = (User) principalCollection.getPrimaryPrincipal();
        String roleIds = user.getRoleIds();

        // 通过角色id获取用户权限
        Set<String> roles = roleService.getRolesByRoleIds(roleIds);
        Set<String> permissions = permissionService.getPermissionsByRoleIds(roleIds);

        SimpleAuthorizationInfo info = new SimpleAuthorizationInfo();
        info.setRoles(roles);
        info.setStringPermissions(permissions);
        return info;
    }
service
public Set<String> getPermissionsByRoleIds(String roleIds) {
        Set<String> permissions = new HashSet<String>();
        if (StringUtils.isEmpty(roleIds)) {
            return permissions;
        }

        List<Permission> permissionList = permissionMapper.getPermissionsByRoleIds(roleIds);

        for (Permission permission : permissionList) {
            permissions.add(permission.getPermission());
        }

        return permissions;
}
第二个方法:认证:这里需要一个方法-》就是通过账号获取用户信息
  /**
     * 登录认证
     * @param authenticationToken
     * @return
     * @throws AuthenticationException
     */
    @Override
    protected AuthenticationInfo doGetAuthenticationInfo(AuthenticationToken authenticationToken) throws AuthenticationException {
        UsernamePasswordToken token = (UsernamePasswordToken) authenticationToken;
        String username = token.getUsername();
        String password = new String(token.getPassword());

        if (StringUtils.isEmpty(username)) {
            throw new AccountException("用户名不能为空");
        }
        if (StringUtils.isEmpty(password)) {
            throw new AccountException("密码不能为空");
        }

        // 根据用户名从数据库中查询该用户
        User user = userService.getByUsername(username);
        if(user == null) {
            throw new UnknownAccountException("账号或密码不正确");// 不存在该账号
        }
        // 验证账号密码是否正确 这里使用 :Md5(token密码+盐) = 数据库密码 的方式
        String requestPassword = SaltMd5Util.toMd5String(password, user.getSalt());// token 中的password
        String dbPassword = user.getPassword();// 数据库中的 password
        if (dbPassword == null || !dbPassword.equalsIgnoreCase(requestPassword)) {
            throw new UnknownAccountException("账号或密码不正确");
        }
        // 把当前用户存到 Session 中
        SecurityUtils.getSubject().getSession().setAttribute("user", user);
        // 传入用户名和密码进行身份认证,并返回认证信息
        AuthenticationInfo authcInfo = new SimpleAuthenticationInfo(user, password, getName());
        return authcInfo;

    }
加密util:
public static String toMd5String(String password, String salt) {
        String secret = password+salt;
        return DigestUtils.md5DigestAsHex(secret.getBytes());
}
3.shiro 配置 ShiroConfig
首先把我们刚刚写好的Realm 引进来:
@Configuration
public class ShiroConfig {

    @Bean
    public KingRealm KingRealm() {return new KingRealm(); }
}
加上shiro 过滤器:
  /**
     * shiro过滤器
     * @param securityManager
     * @return
     */
    @Bean
    public ShiroFilterFactoryBean shiroFilter(SecurityManager securityManager) {
        ShiroFilterFactoryBean shiroFilterFactoryBean = new ShiroFilterFactoryBean();
        shiroFilterFactoryBean.setSecurityManager(securityManager);
        // 拦截器
        // anon 不会拦截
        Map<String, String> filterChainDefinitionMap = new LinkedHashMap<String, String>();
        filterChainDefinitionMap.put("/user/logout", "anon");
        filterChainDefinitionMap.put("/user/login", "anon");
        // authc 拦截
        filterChainDefinitionMap.put("/**", "authc");
        // 默认登录页面地址
        shiroFilterFactoryBean.setLoginUrl("/user/login");
        shiroFilterFactoryBean.setFilterChainDefinitionMap(filterChainDefinitionMap);
        return shiroFilterFactoryBean;
    }
加上安全管理器:
  /**
     * 安全管理器
     * @return
     */
    @Bean
    public DefaultWebSecurityManager securityManager() {
        DefaultWebSecurityManager securityManager = new DefaultWebSecurityManager();
        securityManager.setRealm(KingRealm());return securityManager;
    }
注解权限控制:
切点:
  @Bean
    public AuthorizationAttributeSourceAdvisor authorizationAttributeSourceAdvisor(SecurityManager securityManager) {
        AuthorizationAttributeSourceAdvisor authorizationAttributeSourceAdvisor = new AuthorizationAttributeSourceAdvisor();
        authorizationAttributeSourceAdvisor.setSecurityManager(securityManager);
        return authorizationAttributeSourceAdvisor;
    }
切面:
  @Bean
    @DependsOn("lifecycleBeanPostProcessor")
    public static DefaultAdvisorAutoProxyCreator defaultAdvisorAutoProxyCreator() {
        DefaultAdvisorAutoProxyCreator creator = new DefaultAdvisorAutoProxyCreator();
        creator.setProxyTargetClass(true);
        return creator;
    }
第四步:写登陆、获取用户信息、退出登录 三个后台接口
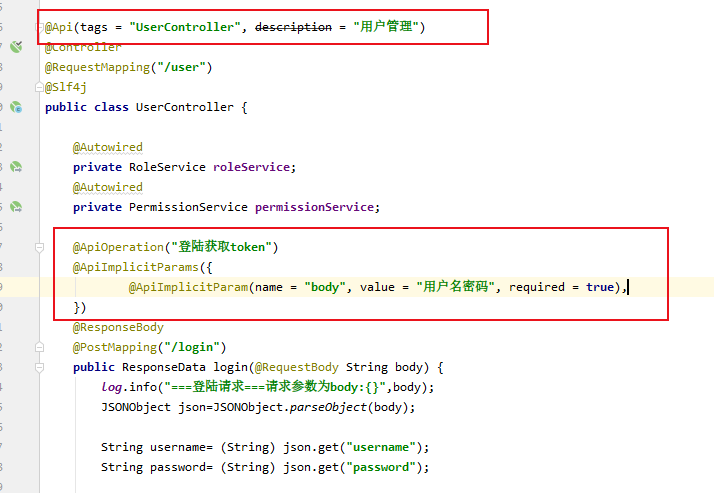
登陆:
   @ResponseBody
    @PostMapping("/login")
    public ResponseData login(@RequestBody String body) {
        log.info("===登陆请求===请求参数为body:{}",body);
        JSONObject json=JSONObject.parseObject(body);

        String username= (String) json.get("username");
        String password= (String) json.get("password");

        if (StringUtils.isEmpty(username) || StringUtils.isEmpty(password)) {
            return ResponseData.error("账号、密码不能为空");
        }

        Subject currentUser = SecurityUtils.getSubject();// 获取当前用户信息
        if (!currentUser.isAuthenticated()) {
            UsernamePasswordToken token = new UsernamePasswordToken(username,password);
            try {
                currentUser.login(token);
            } catch (UnknownAccountException uae) {
                log.error("===登陆请求===错误:{}", "账号或密码错误");
                return ResponseData.error("账号或密码错误");
            } catch (Exception e) {
                log.error("===登陆请求===错误:{}", "账号或密码错误");
                return ResponseData.error("账号或密码错误");
            }
        }

        log.info("返回结果:{}", JSONObject.toJSONString(currentUser.getSession().getId()));
        return ResponseData.success(currentUser.getSession().getId());
    }
获取用户信息:
   @ResponseBody
    @RequestMapping("/info")
    public ResponseData info() {
        Subject currentUser = SecurityUtils.getSubject();
        User user = (User) currentUser.getPrincipal();

        Map<String, Object> data = new HashMap<>();
        data.put("name", user.getAccount());
        data.put("avatar", user.getAvatar());

        String roleIds = user.getRoleIds();

        // 通过角色id获取用户权限
        Set<String> roles = roleService.getRolesByRoleIds(roleIds);
        Set<String> permissions = permissionService.getPermissionsByRoleIds(roleIds);
        data.put("roles", roles);
        data.put("permissions", permissions);

        log.info("用户信息:{}", JSONObject.toJSONString(data));
        return ResponseData.success(data);
  }
退出登录:
   @ResponseBody
    @PostMapping("/logout")
    public ResponseData login() {
        Subject currentUser = SecurityUtils.getSubject();
        currentUser.logout();

        log.info("===退出登录===:{}", JSONObject.toJSONString(currentUser.getSession().getId()));
        return ResponseData.success();
    }
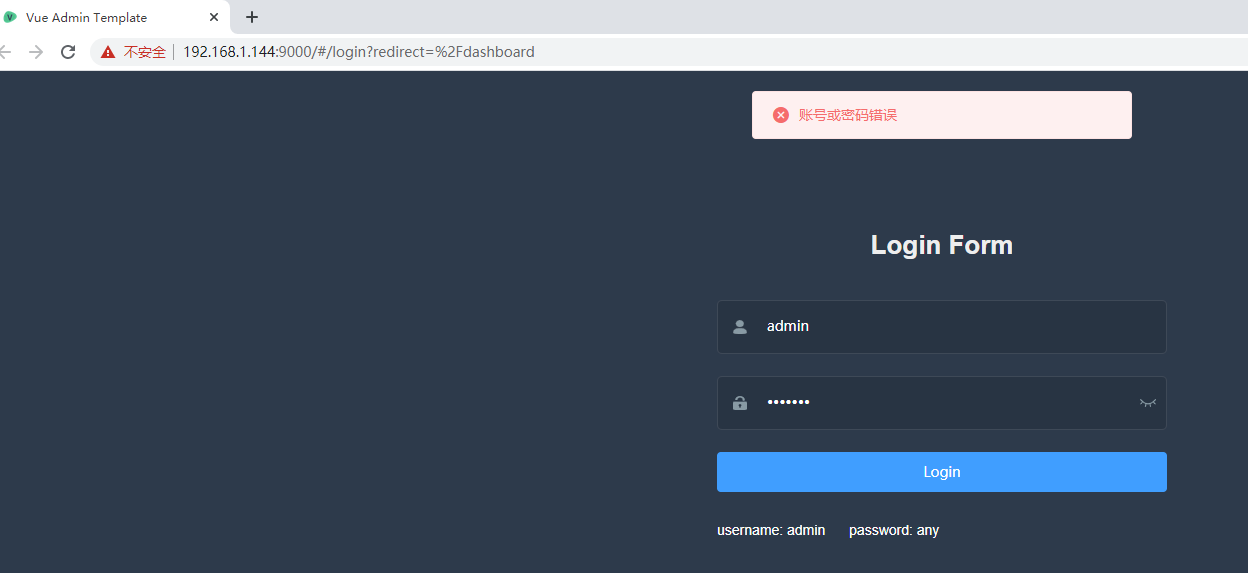
看一下测试效果:
失败:
控制台输出:

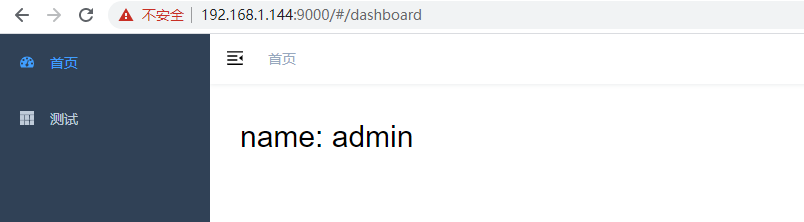
成功:
控制台输出:

点击退出->
回到了登录页面
控制台输出:

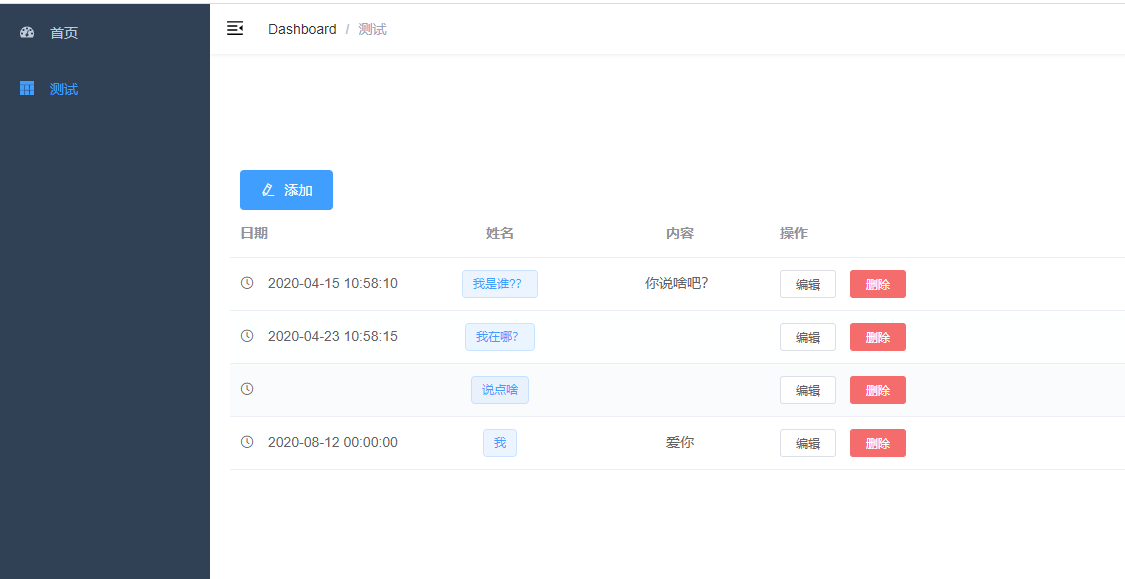
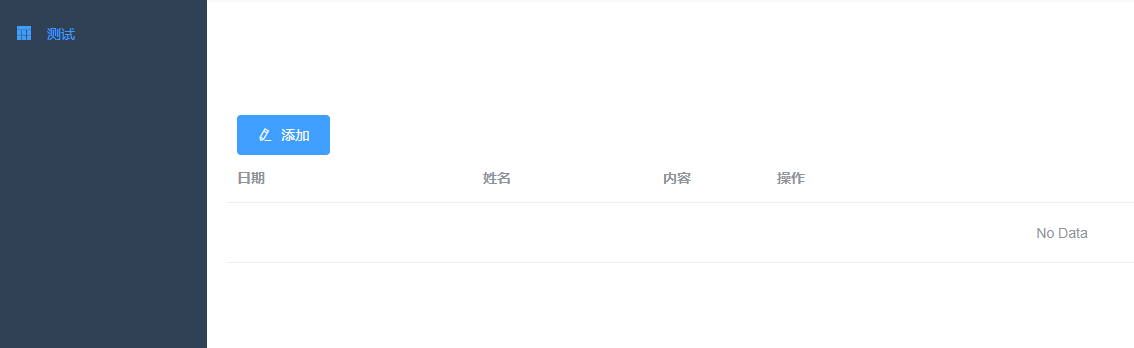
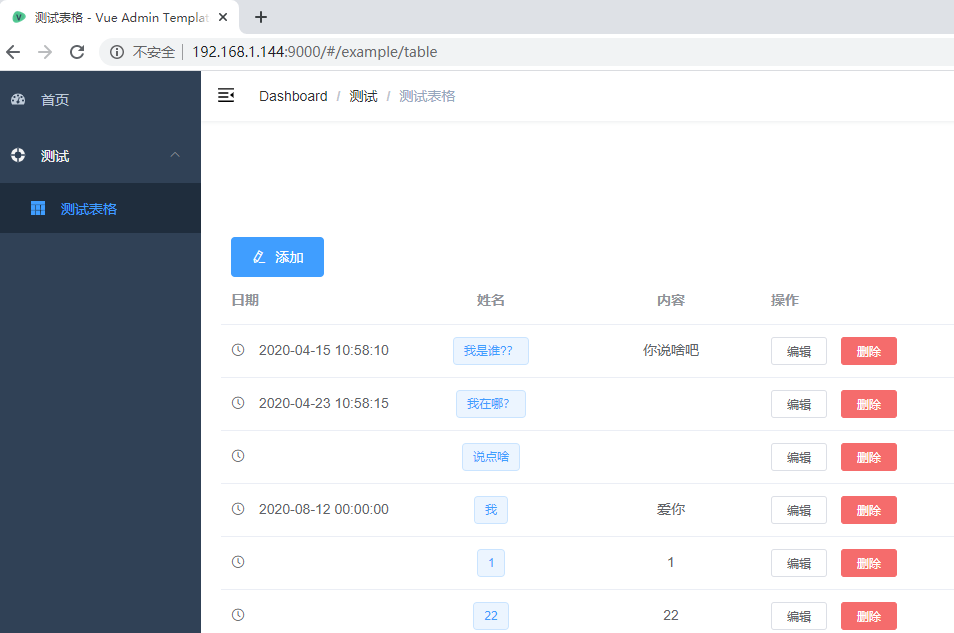
这是我之前的测试页面,做了简单的增删改查:
怎样给admin 这个用户添加权限?
后台:
直接加注解看看:

###如果出现这种问题:
404

解决一下这个问题:原因是 在ShiroConfig 中少加了代码:
  @Bean
    @DependsOn("lifecycleBeanPostProcessor")
    public static DefaultAdvisorAutoProxyCreator defaultAdvisorAutoProxyCreator() {
        DefaultAdvisorAutoProxyCreator creator = new DefaultAdvisorAutoProxyCreator();
        creator.setProxyTargetClass(true);
        return creator;
    }
###
前台:
###插曲 -了解一下vue-admin-template 的登陆验证 > <。
它用到了vuex, 什么是vuex?-》》vuex 学习笔记
这里我改了个东西:
登录的返回值。因为后台我直接返回了token ,所以这里把 .token 去掉了 。不需要盲目的改 看自己返回的结果。
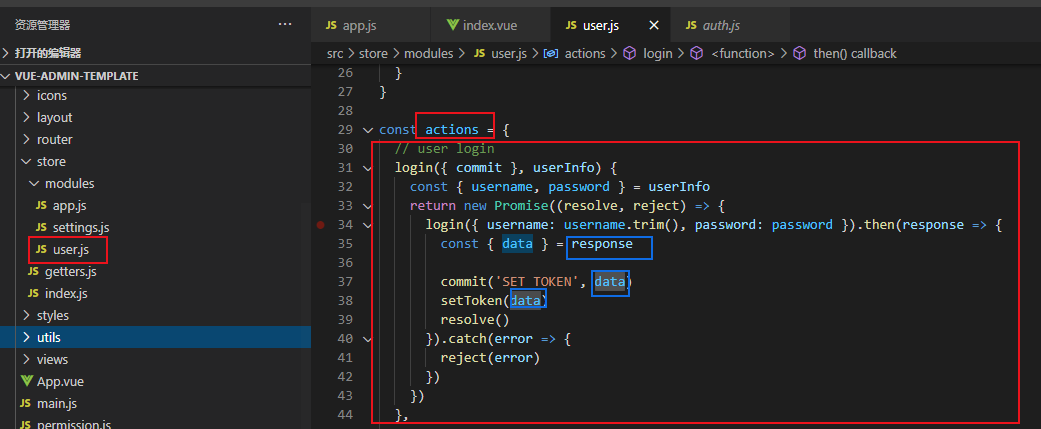
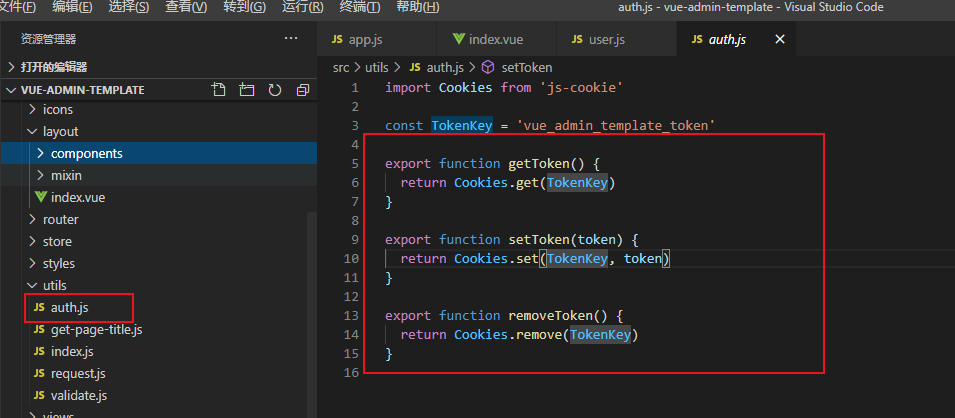
这样我们就可以通过 getToken() 获取到token 了。
而我们在permission.js 的 router.beforeEach 方法中 (路由拦截) 调用了此方法,判断用户是否登陆过了。
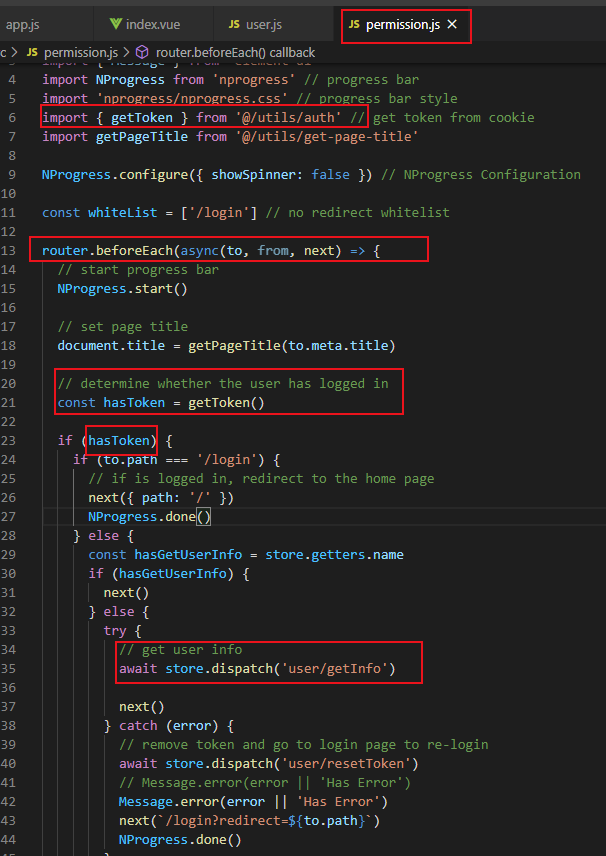
#main.js 中可以看到引入了权限=》 permission.js

###
其实既然没有权限就没必要显示出来 -》
菜单权限:
看一下permission.js 中路由拦截的方法:
router.beforeEach(async(to, from, next) => {
  // start progress bar
  NProgress.start()

  // set page title
  document.title = getPageTitle(to.meta.title)

  // determine whether the user has logged in
  const hasToken = getToken()

  if (hasToken) {// 如果存在token
    if (to.path === '/login') {
      // if is logged in, redirect to the home page
      next({ path: '/' })
      NProgress.done()
    } else {
      const hasGetUserInfo = store.getters.name
      if (hasGetUserInfo) {// 如果store中存在用户名
        next()
      } else {
        try {
          // get user info 获取用户信息
          await store.dispatch('user/getInfo')

          next()
        } catch (error) {
          // remove token and go to login page to re-login
          await store.dispatch('user/resetToken')
          // Message.error(error || 'Has Error')
          Message.error(error || 'Has Error')
          next(`/login?redirect=${to.path}`)
          NProgress.done()
        }
      }
    }
  } else {// 没有token
    /* has no token*/

    if (whiteList.indexOf(to.path) !== -1) {// 白名单免登陆
      // in the free login whitelist, go directly
      next()
    } else {// 重定向到首页
      // other pages that do not have permission to access are redirected to the login page.
      next(`/login?redirect=${to.path}`)
      NProgress.done()
    }
  }
})
思路:获取用户信息后把权限信息也存起来,然后处理菜单只显示有权限的菜单。
第一步:获取后台的权限信息
看一下前台可以不可获取用户的权限信息,如果可以 我们需要把权限信息存起来。
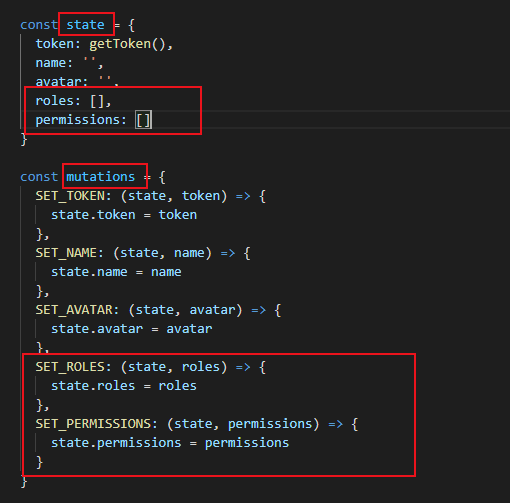
用户信息存放的位置在-vuex:src/store/modules/user.js
state中定义两个变量roles 和permissions 分别存后台传过来的角色名称和权限。
mutations 写好对应的方法,以便调用赋值。
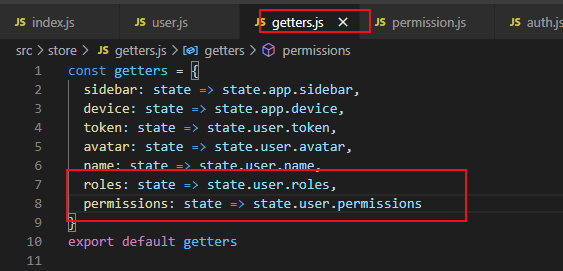
getters
后台传过来的值:
打印了一下 getInfo 返回的data,大概是这样 :

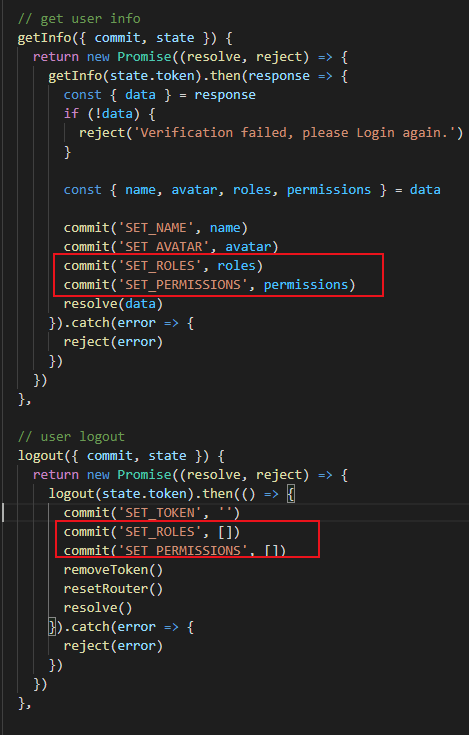
找到getInfo方法 给这两个参数赋值。在退出登录时清空。
第二步:处理菜单只显示有权限的部分
这里为了省事,就直接把 vue-element-admin 中的代码粘过来,改一改好了。o.o
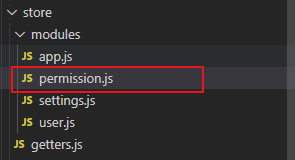
首先是:permission.js
然后是store->permission
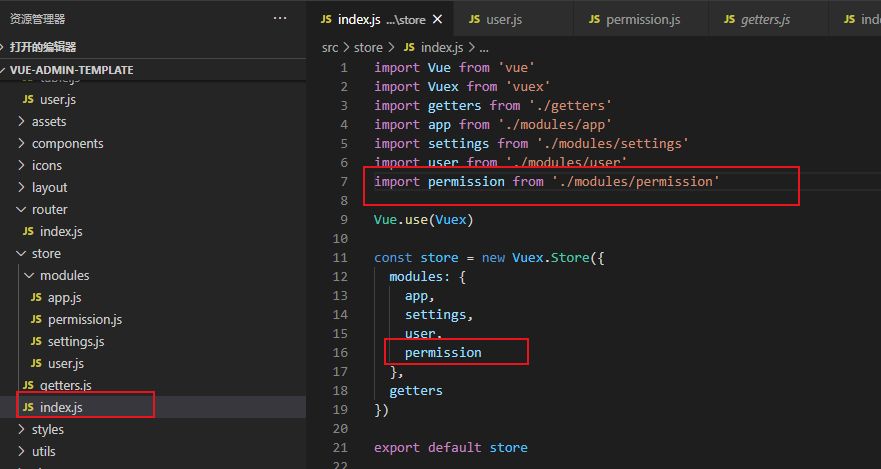
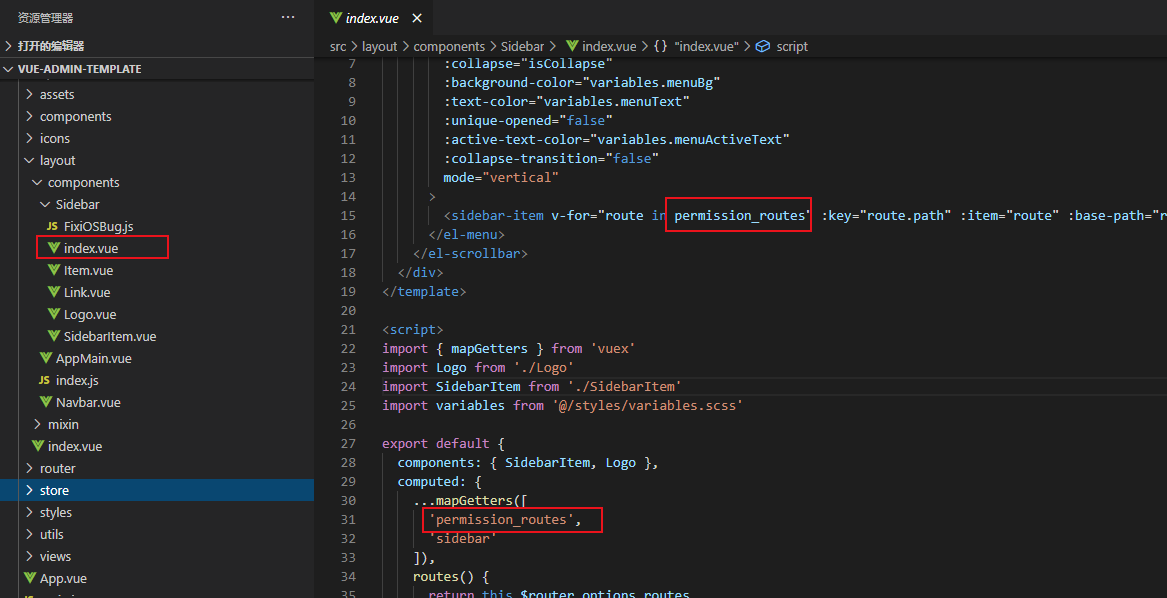
然后是index
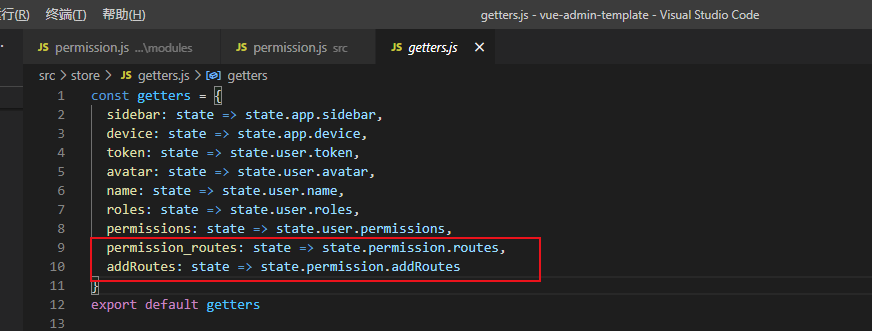
getter
改动:
第一步:由于我想用权限信息 permissions 来确定菜单,而不是用户的角色。所以过滤菜单的方法传参 传permissions。

同理,permission.js 中所有的role 都改成了permission 也是为了代码的可读性。
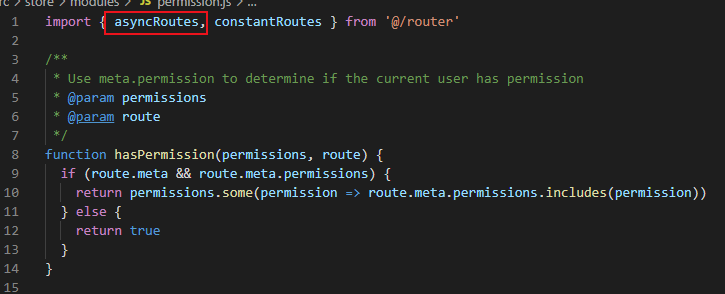
第二步: permission.js 中传的参数 asyncRoutes
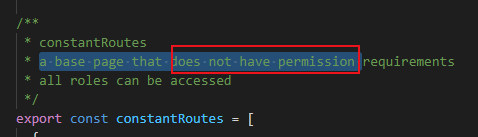
不需要权限的:
需要权限的:为了测试,现在把测试菜单放到这下面:

现在 router 中的代码:
import Vue from 'vue'
import Router from 'vue-router'

Vue.use(Router)

/* Layout */
import Layout from '@/layout'

/**
 * Note: sub-menu only appear when route children.length >= 1
 * Detail see: https://panjiachen.github.io/vue-element-admin-site/guide/essentials/router-and-nav.html
 *
 * hidden: true                   if set true, item will not show in the sidebar(default is false)
 * alwaysShow: true               if set true, will always show the root menu
 *                                if not set alwaysShow, when item has more than one children route,
 *                                it will becomes nested mode, otherwise not show the root menu
 * redirect: noRedirect           if set noRedirect will no redirect in the breadcrumb
 * name:'router-name'             the name is used by <keep-alive> (must set!!!)
 * meta : {
    roles: ['admin','editor']    control the page roles (you can set multiple roles)
    title: 'title'               the name show in sidebar and breadcrumb (recommend set)
    icon: 'svg-name'             the icon show in the sidebar
    breadcrumb: false            if set false, the item will hidden in breadcrumb(default is true)
    activeMenu: '/example/list'  if set path, the sidebar will highlight the path you set
  }
 */

/**
 * constantRoutes
 * a base page that does not have permission requirements
 * all roles can be accessed
 */
export const constantRoutes = [
  {
    path: '/login',
    component: () => import('@/views/login/index'),
    hidden: true
  },

  {
    path: '/404',
    component: () => import('@/views/404'),
    hidden: true
  },

  {
    path: '/',
    component: Layout,
    redirect: '/dashboard',
    children: [{
      path: 'dashboard',
      name: 'Dashboard',
      component: () => import('@/views/dashboard/index'),
      meta: { title: '首页', icon: 'dashboard' }
    }]
  }

  // 404 page must be placed at the end !!!
  // { path: '*', redirect: '/404', hidden: true }
]

export const asyncRoutes = [
  {
    path: '/example',
    component: Layout,
    redirect: 'noredirect',
    alwaysShow: true,
    name: 'Example',
    meta: {
      permissions: ['/example'],
      title: '测试',
      icon: 'example' },
    children: [
      {
        path: 'table',
        name: '表格',
        component: () => import('@/views/mytable/index'),
        meta: {
          permissions: ['/example/table'],
          title: '测试表格',
          icon: 'table'
        }
      },
      {
        path: 'other',
        name: '其他',
        component: () => import('@/views/table/index'),
        meta: {
          permissions: ['/example/other'],
          title: '测试其他',
          icon: 'table'
        }
      }
    ]
  },
  // 404 page must be placed at the end !!!
  { path: '*', redirect: '/404', hidden: true }
]

const createRouter = () => new Router({
  // mode: 'history', // require service support
  scrollBehavior: () => ({ y: 0 }),
  routes: constantRoutes
})

const router = createRouter()

// Detail see: https://github.com/vuejs/vue-router/issues/1234#issuecomment-357941465
export function resetRouter() {
  const newRouter = createRouter()
  router.matcher = newRouter.matcher // reset router
}

export default router
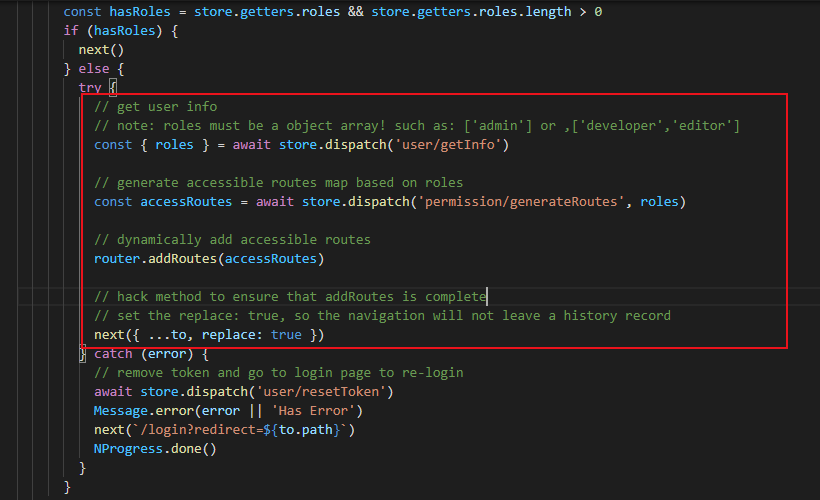
@/permission.js 中代码
import router from './router'
import store from './store'
import { Message } from 'element-ui'
import NProgress from 'nprogress' // progress bar
import 'nprogress/nprogress.css' // progress bar style
import { getToken } from '@/utils/auth' // get token from cookie
import getPageTitle from '@/utils/get-page-title'

NProgress.configure({ showSpinner: false }) // NProgress Configuration

const whiteList = ['/login'] // no redirect whitelist

router.beforeEach(async(to, from, next) => {
  // start progress bar
  NProgress.start()

  // set page title
  document.title = getPageTitle(to.meta.title)

  // determine whether the user has logged in
  const hasToken = getToken()

  if (hasToken) {
    if (to.path === '/login') {
      // if is logged in, redirect to the home page
      next({ path: '/' })
      NProgress.done()
    } else {
      const hasGetUserInfo = store.getters.name
      if (hasGetUserInfo) {
        next()
      } else {
        try {
          // store.dispatch('user/getInfo')
          // next()
          store.dispatch('user/getInfo').then(res => {
            // generate accessible routes map based on roles
            store.dispatch('permission/generateRoutes', res.permissions).then(() => {
              // dynamically add accessible routes
              debugger
              router.addRoutes(store.getters.addRoutes)
              // hack method to ensure that addRoutes is complete
              // set the replace: true, so the navigation will not leave a history record
              next({ ...to, replace: true })
            })
          })
        } catch (error) {
          // remove token and go to login page to re-login
          await store.dispatch('user/resetToken')
          // Message.error(error || 'Has Error')
          Message.error(error || 'Has Error')
          next(`/login?redirect=${to.path}`)
          NProgress.done()
        }
      }
    }
  } else {
    /* has no token*/

    if (whiteList.indexOf(to.path) !== -1) {
      // in the free login whitelist, go directly
      next()
    } else {
      // other pages that do not have permission to access are redirected to the login page.
      next(`/login?redirect=${to.path}`)
      NProgress.done()
    }
  }
})

router.afterEach(() => {
  // finish progress bar
  NProgress.done()
})
第三步:渲染 -》 改成自己的 ok!
数据库:
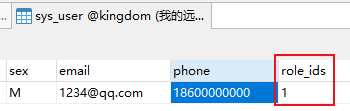
用户:
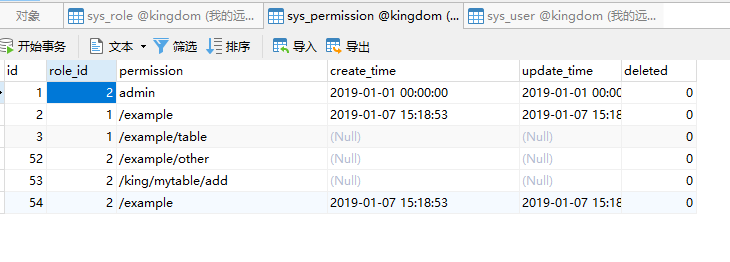
权限
效果:
按钮权限:
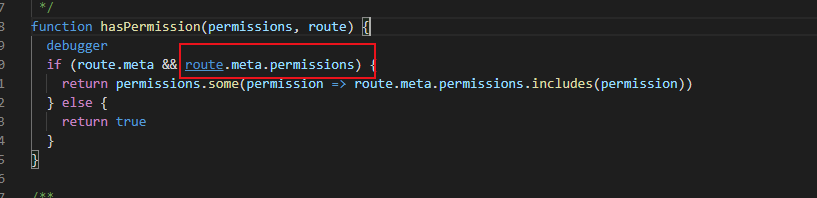
同理为了方便,我们把vue-element-admin 中的utils/permission.js 粘贴过来,做个简单修改。
第一步,粘贴
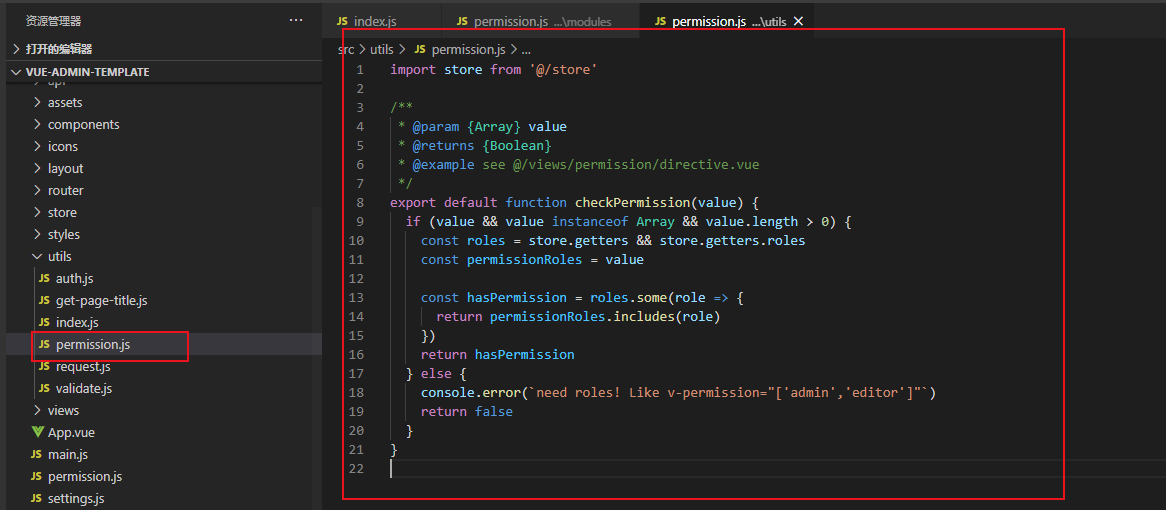
同样,把roles 改成permissions
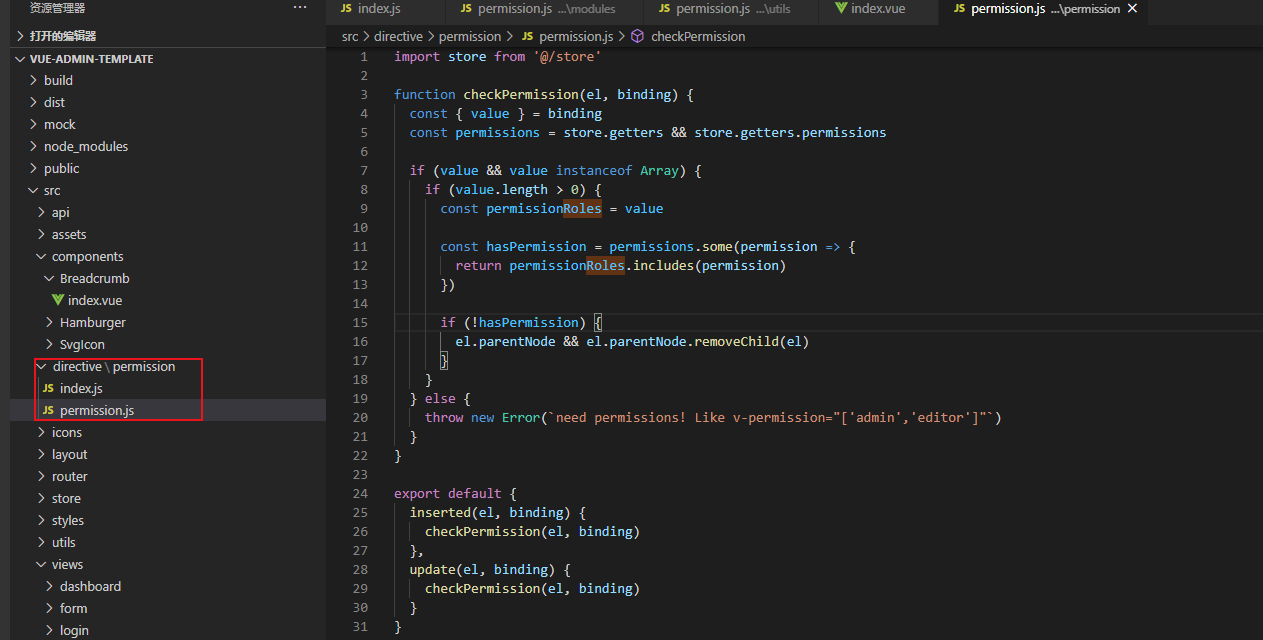
第二步:粘贴 @/directive/permission/index.js 权限判断指令
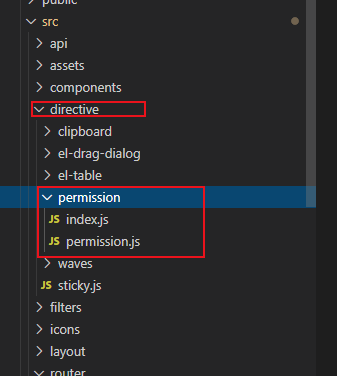
同样,把role 改成permission
main.js
import permission from '@/directive/permission/index.js' // 权限判断指令
Vue.directive('permission', permission)

页面:

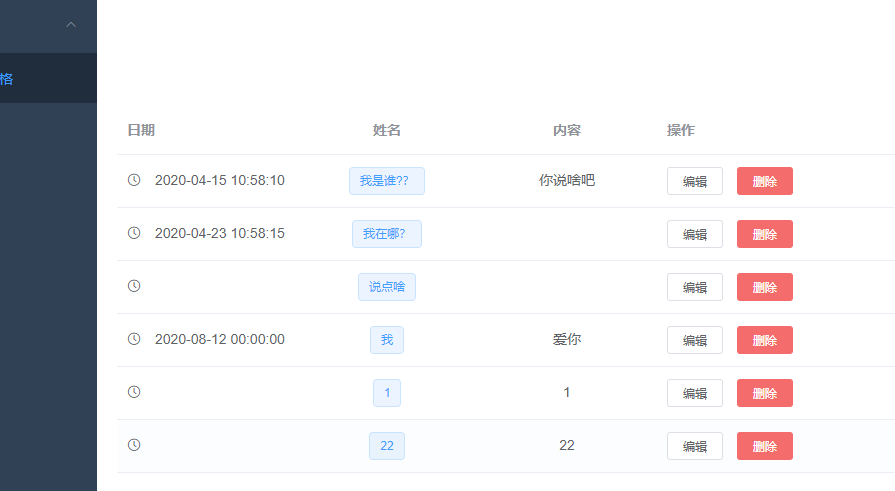
没有权限时:
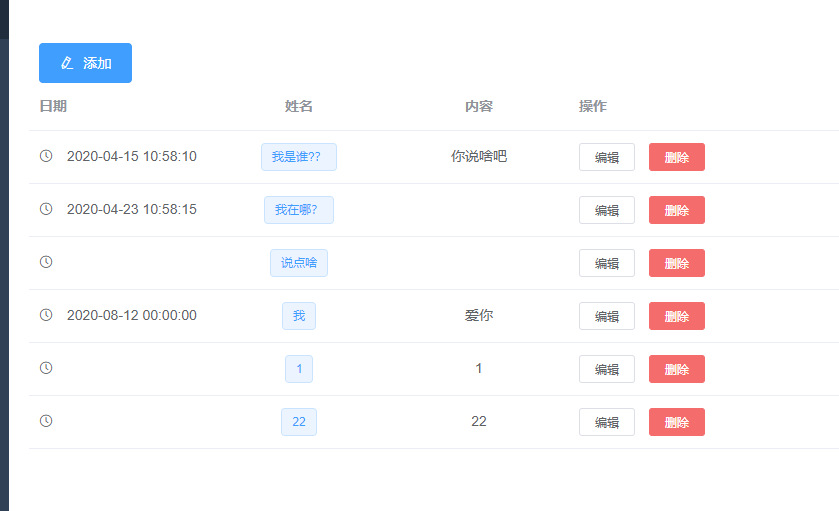
有权限时:
数据库:

解决问题&补充:
问题一:把前台打包放到项目下启动后出现如下错误:

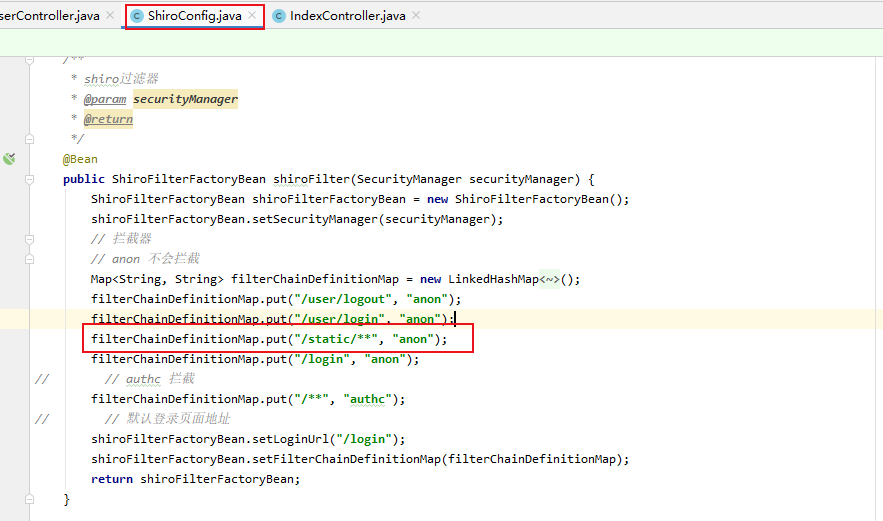
排查错误引发原因得出结论:是shiro 拦截引起的。
Uncaught SyntaxError: Unexpected token '<'
解决方案:放过static 下的静态文件即可
filterChainDefinitionMap.put("/static/**", "anon");
问题二:在本地启动没有问题,打包后就出现如下问题:
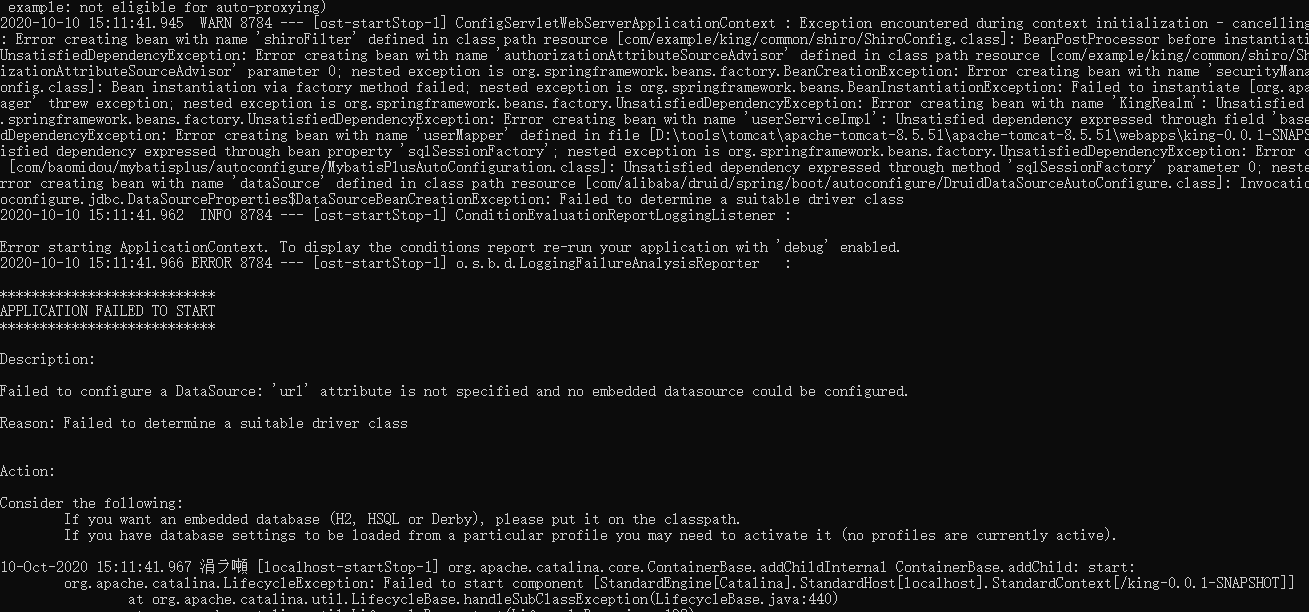
可能导致这个问题的原因有很多。这里我的问题竟然是:。。。 clean 之后直接打包导致的。
2020-10-10 15:11:41.962  INFO 8784 --- [ost-startStop-1] ConditionEvaluationReportLoggingListener :

Error starting ApplicationContext. To display the conditions report re-run your application with 'debug' enabled.
2020-10-10 15:11:41.966 ERROR 8784 --- [ost-startStop-1] o.s.b.d.LoggingFailureAnalysisReporter   :

***************************
APPLICATION FAILED TO START
***************************

Description:

Failed to configure a DataSource: 'url' attribute is not specified and no embedded datasource could be configured.

Reason: Failed to determine a suitable driver class


Action:

Consider the following:
        If you want an embedded database (H2, HSQL or Derby), please put it on the classpath.
        If you have database settings to be loaded from a particular profile you may need to activate it (no profiles are currently active).
正确的操作应该是 clean ->build->package

问题三: 退出登录之后,点击菜单时:url 虽然改变了,但页面空白。点击 enter 刷新后 又可显示页面。。
解决方案:
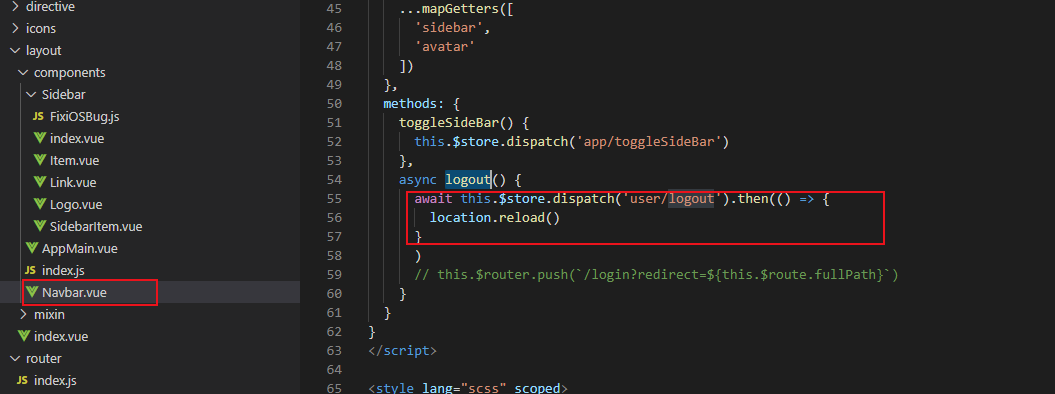
代码:
await this.$store.dispatch('user/logout').then(() => {
        location.reload()
})
问题四:获取用户信息失败时,跳到登录页避免bug
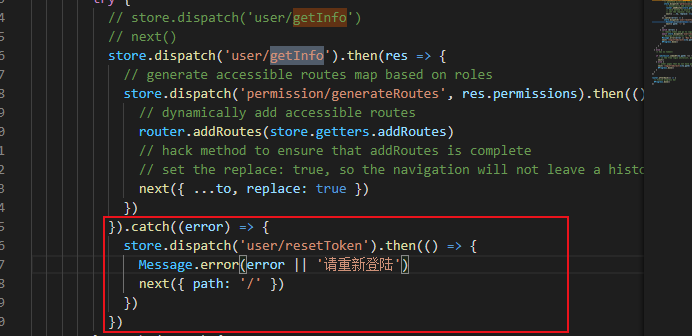
代码:
store.dispatch('user/getInfo').then(res => {
          // generate accessible routes map based on roles
          store.dispatch('permission/generateRoutes', res.permissions).then(() => {
              // dynamically add accessible routes
              router.addRoutes(store.getters.addRoutes)
              // hack method to ensure that addRoutes is complete
              // set the replace: true, so the navigation will not leave a history record
              next({ ...to, replace: true })
            })
          }).catch((error) => {
            store.dispatch('user/resetToken').then(() => {
              Message.error(error || '请重新登陆')
              next({ path: '/' })
          })
})
补充一:在控制台打印mybatis SQL 语句
logging:
  level:
    com.example.king:  DEBUG
控制台输出:

补充二:配置 swagger
自动生成在线开发文档,方便测试等优点
pom
    <!--swagger-->
        <dependency>
            <groupId>io.springfox</groupId>
            <artifactId>springfox-swagger2</artifactId>
            <version>2.9.2</version>
        </dependency>
        <dependency>
            <groupId>io.springfox</groupId>
            <artifactId>springfox-swagger-ui</artifactId>
            <version>2.9.2</version>
        </dependency>
配置:

@Configuration
@EnableSwagger2
public class SwaggerConfig {
    @Bean
    public Docket createRestApi() {
        return new Docket(DocumentationType.SWAGGER_2)
                .apiInfo(apiInfo())
                .select()
                .apis(RequestHandlerSelectors.any())// 限制包
                .paths(PathSelectors.any())// 限制控制器
                .build();
    }

    private ApiInfo apiInfo() {
        return new ApiInfoBuilder()
                .title("King")
                .description("king-接口文档")
                .contact("DarGi")
                .version("1.0")
                .build();
    }
}
shiroConfig 中放行:
     filterChainDefinitionMap.put("/swagger-ui.html", "anon");
        filterChainDefinitionMap.put("/swagger/**", "anon");
        filterChainDefinitionMap.put("/swagger-resources/**", "anon");
        filterChainDefinitionMap.put("/v2/**", "anon");
        filterChainDefinitionMap.put("/webjars/**", "anon");
        filterChainDefinitionMap.put("/configuration/**", "anon");
页面:http://localhost:8091/swagger-ui.html#/
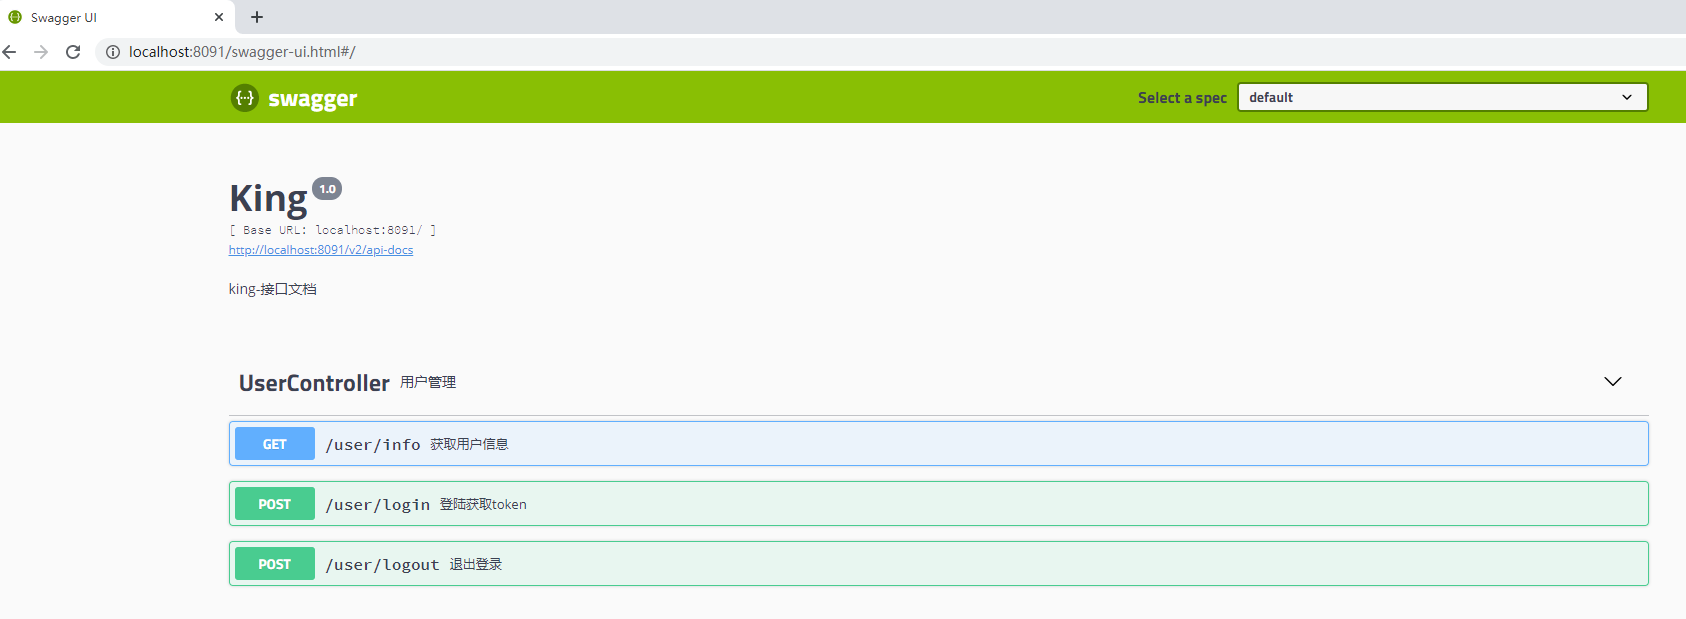
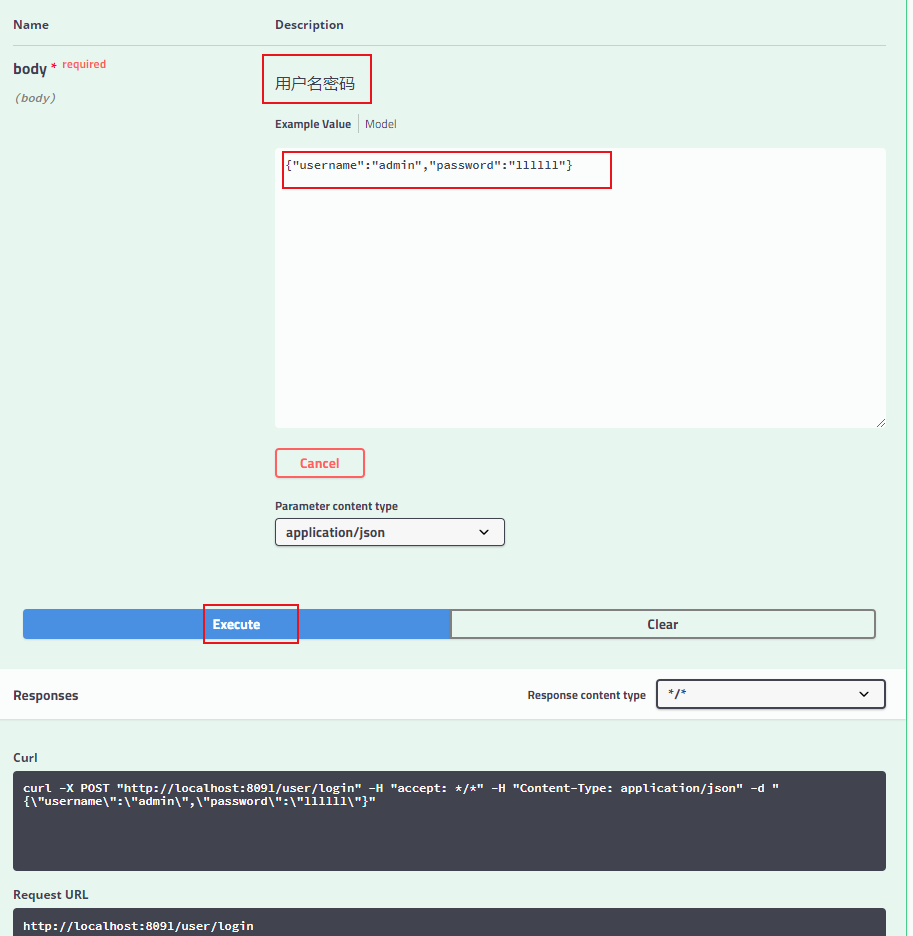
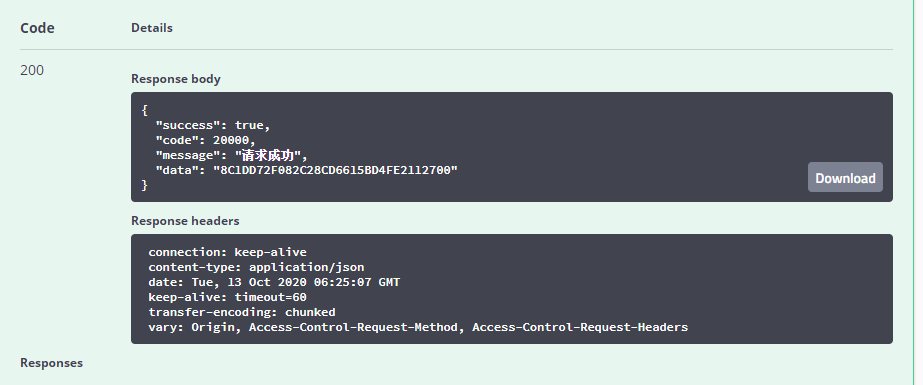
做个测试:
返回结果
@