一、组件
1、父组件传递数据到子组件
01、props第一种写法
Vue.component("my-component", {
    props: ['msg'],
    template: "<div><h1>child component,{{msg}}</h1></div>"
})
02、props第二种写法
Vue.component("my-component", {
    props: {
       msg:{
            required:true/false   //代表改变是否必须
            type:String/Array/Number/Object //传入的变量的类型检查
       },
       names:{
             required:false,
             type:Array
       }
    },
    template: "<div><h1>child component,{{msg}}</h1></div>"
})
2、子组件如何传递数据给父组件
01、是通过发送事件的方式实现
02、发送事件的过程
//使用组件
<div class="box">
     <child-component @myevent="handle"></child-component>
</div>

<template id="child">
	<div>
		<h3>子组件标题</h3>
		<button @click="send">发送</button>
	</div>
</template>
//先注册组件再使用组件
Vue.component("child-component", {
        template: "#child",
        methods: {
            send() {
                //子组件向父组件传递数据的方式,是通过事件触发
                this.$emit("myevent", "green")

                //myevent---->子组件向父组件发送的事件名称
                //green----->是发送的数据
            }
        }
    })

    //创建vue实例
    new Vue({
        el: ".box",
        data: {
            bgColor: 'red'
        },
        methods: {
            handle(data) {
                this.bgColor = data
            }
        }
    })
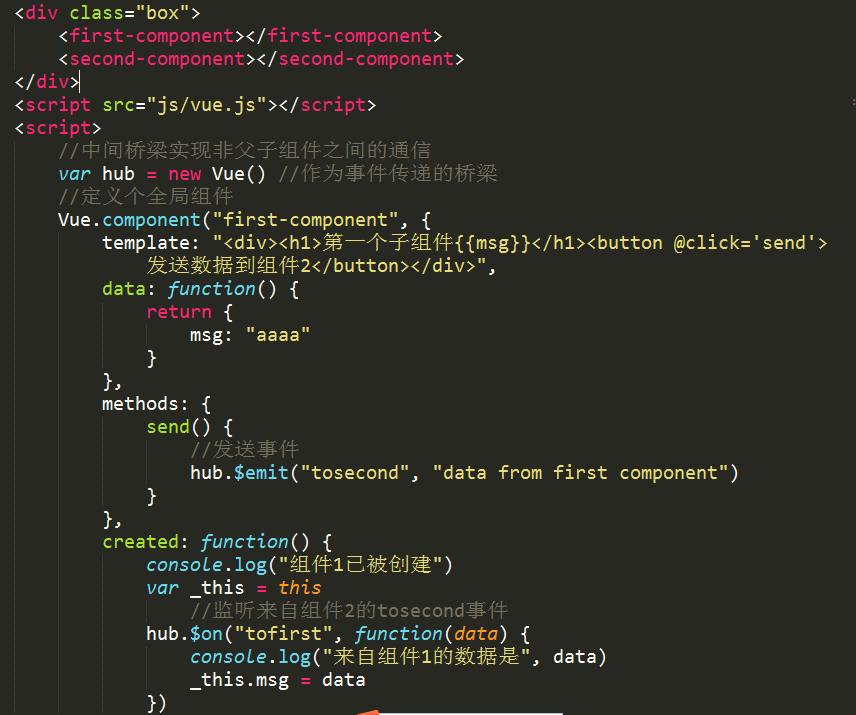
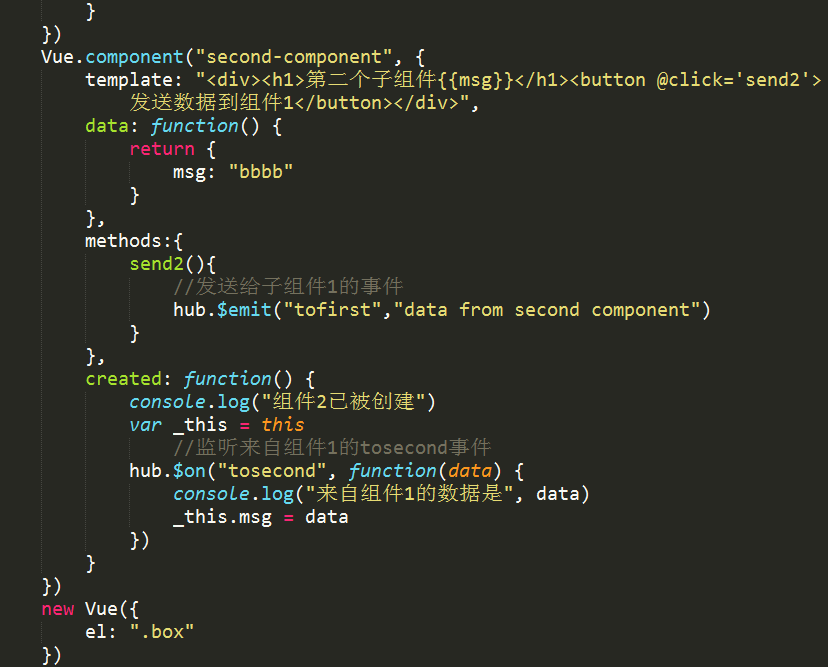
3、非父子组件的通信
01、解决方案:通过中间桥梁实现非父子组件之间的通信
02、实现过程
//创建一个非父子组件之间通信的中间桥梁
var hub = new Vue()

//第一个组件
Vue.component("first-component",{
     template:"<div><button @click='send'>发送事件</button><div>",
     methods:{
          send(){
              //通过中间hub发送事件
              hub.$emit("tosecond","some data....")

    }
})

//第二个组件
Vue.component("first-component",{
     template:"<div><button @click='send'>发送事件</button><div>",
     created:function(){
          //通过hub监听事件
          hub.$on("tosecond",function(data){
          //data---->hub发送事件是所携带的参数
          })
    }
})


4、组件的实际应用

-
style样式
*{ margin:0; padding:0; } body{ padding-top:50px; font-size:16px; } ul>li{ list-style-type:none; } .star{ margin:0 3px; color:red; } .star-empty{ margin:0 3px; color:#ccc; } label{ display:inline-block; 64px; text-align:right; } .title{ margin:5px 0; color:#666; font-size:20px; } .product-list{ overflow:hidden; } .list-item{ float:left; margin:10px; 200px; } .food-img{ display:inline-block; 100%; height: 150px; } -
html样式
<div class="container"> <div class="product-list"> <div class="list-item" v-for="item in products"> <img class="food-img" :src="item.img" alt=""> <p class="title">{{item.title}}</p> <Star :stars="item.stars"></Star> </div> </div> </div> <template id="star"> <ul> <li v-for="(title,index) in titles"> <label>{{title}}</label> </li> </ul> </template> <template id="star"> <ul> <li v-for="(title,index) in titles"> <label>{{title}}</label> <span v-for="item in new Array(stars[index])" class="star glyphicon glyphicon-star"></span> <span v-for="item in new Array(5-stars[index])" class="star-empty glyphicon glyphicon-star-empty"></span> </li> </ul> </template> -
script样式
  //定义一个评分的组件
  Vue.component("Star",{
  	template:"#star",
  	data:function(){
  		return {
  			titles:["总  评","推  荐","口味包装"]
  		}
  	},
  	props:{
  		stars:{
  			required:true,
  			type:Array
  		}
  	},
  	created:function(){
  		console.log(this.stars)
  	}
  })
  new Vue({
      el: ".container",
      data:{
      	products:[{
      		img: "img/01.jpg",
              title: "商品1",
              stars: [2, 2, 5]
          }, {
              img: "img/02.jpg",
              title: "商品2",
              stars: [3, 4, 4]
          }, {
              img: "img/03.jpg",
              title: "商品3",
              stars: [3, 3, 3]
          }, {
              img: "img/04.jpg",
              title: "商品4",
              stars: [2, 1, 4]
      	}]
      }
  })