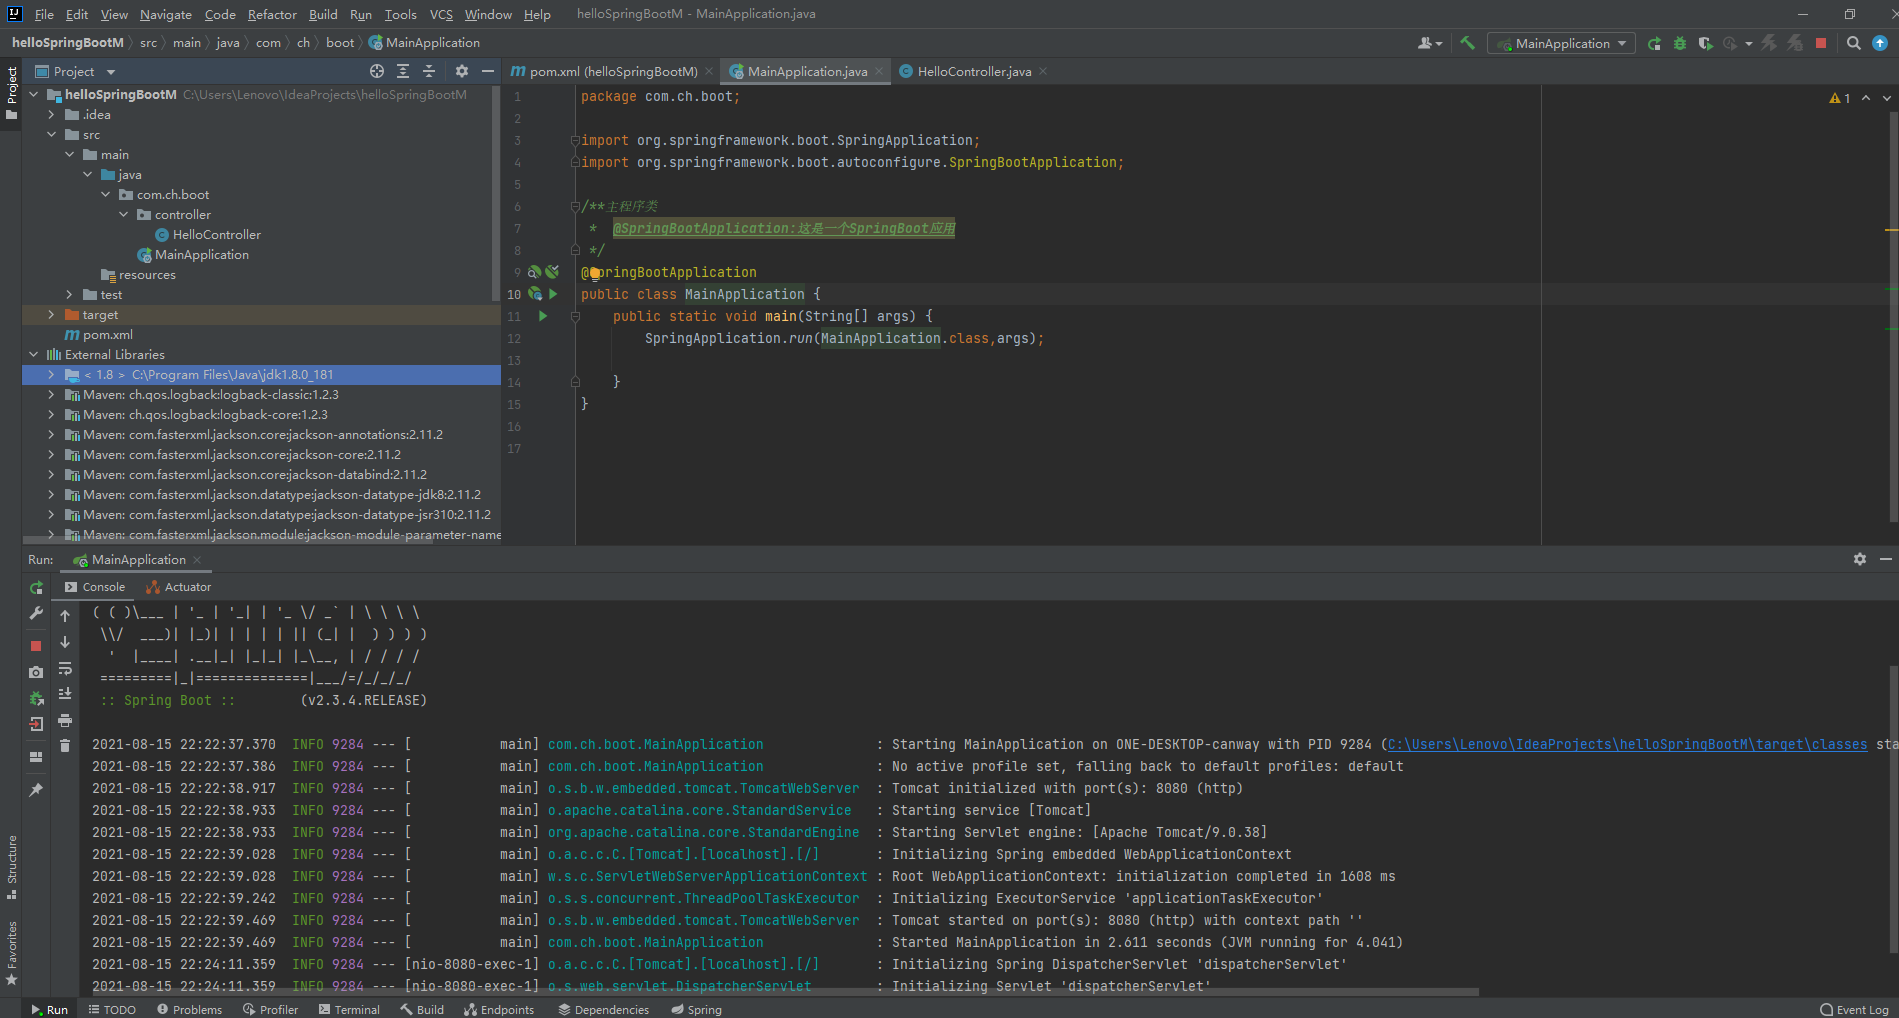

@SpringBootApplication
package com.ch.boot;

import org.springframework.boot.SpringApplication;
import org.springframework.boot.autoconfigure.SpringBootApplication;

/**主程序类
 *  @SpringBootApplication:这是一个SpringBoot应用
 */
@SpringBootApplication
public class MainApplication {
    public static void main(String[] args) {
        SpringApplication.run(MainApplication.class,args);

    }
}
HelloController
package com.ch.boot.controller;

import org.springframework.stereotype.Controller;
import org.springframework.web.bind.annotation.RequestMapping;
import org.springframework.web.bind.annotation.ResponseBody;
import org.springframework.web.bind.annotation.RestController;

@ResponseBody
@Controller
@RestController
public class HelloController {

    @RequestMapping("/hello")
    public String handle01(){
        return "Hello,SpringBoot2!!";

    }

}
配置文件
pom.xml
<?xml version="1.0" encoding="UTF-8"?>
<project xmlns="http://maven.apache.org/POM/4.0.0"
         xmlns:xsi="http://www.w3.org/2001/XMLSchema-instance"
         xsi:schemaLocation="http://maven.apache.org/POM/4.0.0 http://maven.apache.org/xsd/maven-4.0.0.xsd">
    <modelVersion>4.0.0</modelVersion>

    <groupId>com.ch</groupId>
    <artifactId>helloSpringBootM</artifactId>
    <version>1.0-SNAPSHOT</version>

    <properties>
        <maven.compiler.source>8</maven.compiler.source>
        <maven.compiler.target>8</maven.compiler.target>
    </properties>


    <parent>
        <groupId>org.springframework.boot</groupId>
        <artifactId>spring-boot-starter-parent</artifactId>
        <version>2.3.4.RELEASE</version>
    </parent>


    <dependencies>
        <dependency>
            <groupId>org.springframework.boot</groupId>
            <artifactId>spring-boot-starter-web</artifactId>
        </dependency>

    </dependencies>
</project>
为什么用SpringBoot
Spring Boot makes it easy to create stand-alone, production-grade Spring based Applications that you can "just run".
能快速创建出生产级别的Spring应用
2.1、SpringBoot优点
- Create stand-alone Spring applications
- 创建独立Spring应用
- Embed Tomcat, Jetty or Undertow directly (no need to deploy WAR files)
- 内嵌web服务器
- Provide opinionated 'starter' dependencies to simplify your build configuration
- 自动starter依赖,简化构建配置
- Automatically configure Spring and 3rd party libraries whenever possible
- 自动配置Spring以及第三方功能
- Provide production-ready features such as metrics, health checks, and externalized configuration
- 提供生产级别的监控、健康检查及外部化配置
- Absolutely no code generation and no requirement for XML configuration
- 无代码生成、无需编写XML
SpringBoot是整合Spring技术栈的一站式框架
SpringBoot是简化Spring技术栈的快速开发脚手架
2.2、SpringBoot缺点
- 人称版本帝,迭代快,需要时刻关注变化
- 封装太深,内部原理复杂,不容易精通
3、时代背景
3.1、微服务
James Lewis and Martin Fowler (2014) 提出微服务完整概念。https://martinfowler.com/microservices/
In short, the microservice architectural style is an approach to developing a single application as a suite of small services, each running in its own process and communicating with lightweight mechanisms, often an HTTP resource API. These services are built around business capabilities and independently deployable by fully automated deployment machinery. There is a bare minimum of centralized management of these services, which may be written in different programming languages and use different data storage technologies.-- James Lewis and Martin Fowler (2014)
- 微服务是一种架构风格
- 一个应用拆分为一组小型服务
- 每个服务运行在自己的进程内,也就是可独立部署和升级
- 服务之间使用轻量级HTTP交互
- 服务围绕业务功能拆分
- 可以由全自动部署机制独立部署
- 去中心化,服务自治。服务可以使用不同的语言、不同的存储技术
3.2、分布式
分布式的困难
- 远程调用
- 服务发现
- 负载均衡
- 服务容错
- 配置管理
- 服务监控
- 链路追踪
- 日志管理
- 任务调度
- ......
分布式的解决
- SpringBoot + SpringCloud
3.3、云原生
原生应用如何上云。 Cloud Native
上云的困难
- 服务自愈
- 弹性伸缩
- 服务隔离
- 自动化部署
- 灰度发布
- 流量治理
- ......
上云的解决
4、如何学习SpringBoot
4.1、官网文档架构
查看版本新特性;
https://github.com/spring-projects/spring-boot/wiki#release-notes
SpringBoot2入门
1、系统要求
- Java 8 & 兼容java14 .
- Maven 3.3+
- idea 2019.1.2
1.1、maven设置
<mirrors>
      <mirror>
        <id>nexus-aliyun</id>
        <mirrorOf>central</mirrorOf>
        <name>Nexus aliyun</name>
        <url>http://maven.aliyun.com/nexus/content/groups/public</url>
      </mirror>
  </mirrors>

  <profiles>
         <profile>
              <id>jdk-1.8</id>
              <activation>
                <activeByDefault>true</activeByDefault>
                <jdk>1.8</jdk>
              </activation>
              <properties>
                <maven.compiler.source>1.8</maven.compiler.source>
                <maven.compiler.target>1.8</maven.compiler.target>
                <maven.compiler.compilerVersion>1.8</maven.compiler.compilerVersion>
              </properties>
         </profile>
  </profiles>
2、HelloWorld
需求:浏览发送/hello请求,响应 Hello,Spring Boot 2
2.1、创建maven工程
2.2、引入依赖
<parent>
        <groupId>org.springframework.boot</groupId>
        <artifactId>spring-boot-starter-parent</artifactId>
        <version>2.3.4.RELEASE</version>
    </parent>


    <dependencies>
        <dependency>
            <groupId>org.springframework.boot</groupId>
            <artifactId>spring-boot-starter-web</artifactId>
        </dependency>

    </dependencies>
2.3、创建主程序
/**
 * 主程序类
 * @SpringBootApplication:这是一个SpringBoot应用
 */
@SpringBootApplication
public class MainApplication {

    public static void main(String[] args) {
        SpringApplication.run(MainApplication.class,args);
    }
}
2.4、编写业务
@RestController
public class HelloController {


    @RequestMapping("/hello")
    public String handle01(){
        return "Hello, Spring Boot 2!";
    }


}
2.5、测试
直接运行main方法
2.6、简化配置
application.properties
server.port=8888
2.7、简化部署
 <build>
        <plugins>
            <plugin>
                <groupId>org.springframework.boot</groupId>
                <artifactId>spring-boot-maven-plugin</artifactId>
            </plugin>
        </plugins>
    </build>
把项目打成jar包,直接在目标服务器执行即可。
注意点:
- 取消掉cmd的快速编辑模式