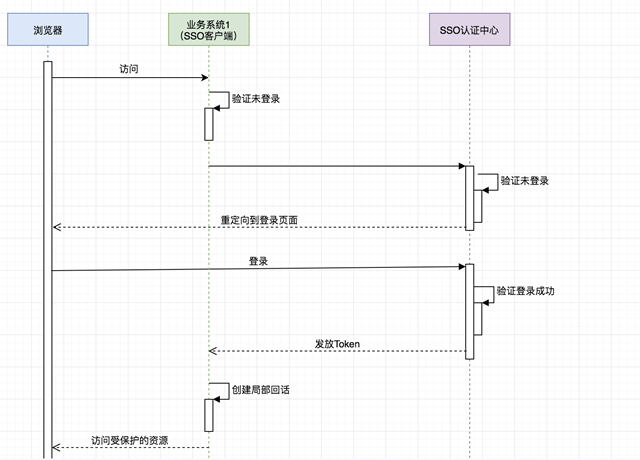
本节将学习 spring security oauth 实现单点登录
概述
首先我们来了解什么是单点登录。看下面两张图就明白了。
很明显,单点登录最重要解决的就是登录和注销的功能,今天的例子,可以用来这样的界面来验证我们实现的单点登录是否成功。
一个是是否登录后可以跳到子服务器,另一个是退出登录,是否需要重新登录才可以再次访问页面。
代码实现
以下并不是完整的demo 代码,而是编写过程中需要注意注意的地方
单点登录的客户端需要添加@EnableOauthSso的注解 :
@EnableOAuth2Sso
@Configuration
@EnableGlobalMethodSecurity(prePostEnabled = true)
public class UiSecurityConfig extends WebSecurityConfigurerAdapter {


    @Override
    public void configure(HttpSecurity http) throws Exception {
        http.antMatcher("/**")
                .authorizeRequests()
                .antMatchers("/", "/login**","/logout","/static**").permitAll()
                .anyRequest()
                .authenticated().and()
                .logout().logoutUrl("/logout").logoutSuccessUrl("http://localhost:8080/logout")
                .and().csrf().disable().cors();
    }

}
从上面的配置,我们也看到了指定了登录和注销的 url ,我们看到注销的地址是跨域的,所以要注销地址的服务器需要设置 CORS
认证服务器端
@Configuration
@EnableWebSecurity
public class SecurityConfig extends WebSecurityConfigurerAdapter {
    ....

    @Bean
    CorsConfigurationSource corsConfigurationSource() {
        CorsConfiguration configuration = new CorsConfiguration();
        configuration.setAllowedOrigins(Arrays.asList("http://localhost:8081"));
        configuration.setAllowedMethods(Arrays.asList("GET","POST"));
        configuration.setAllowedHeaders(Arrays.asList("x-requested-with"));
        UrlBasedCorsConfigurationSource source = new UrlBasedCorsConfigurationSource();
        source.registerCorsConfiguration("/**", configuration);
        return source;
    }


    @Override
    protected void configure(HttpSecurity http) throws Exception {
        http.authorizeRequests()
                .antMatchers("/oauth/**","/login/**", "/client/exit","/actuator**").permitAll()
                .anyRequest().authenticated()   // 其他地址的访问均需验证权限
                .and()
                .logout().deleteCookies("remove").invalidateHttpSession(false)
                .and()
                .formLogin()
                .loginPage("/login").and().csrf().disable().cors();
    }
}
完整代码详见 :代码
总结
逻辑实现过程中注意看项目输出的log日志,方便理解整个流程,再一个需要看文档


