CloudFormation
In this hands-on exercise, you will create an S3 bucket with AWS CloudFormation.
-
Prerequisites: AWS account
-
By the end of this lab, you will be able to:
- Create a CloudFormation stack using the CloudFormation Designer
- Launch S3 bucket using Infrastructure as Code
- Save and deploy a CloudFormation stack
- View resources created through CloudFormation
Follow the exercise instructions described below:
Steps:
- Create CloudFormation Stack
- On the AWS Management Console page, type
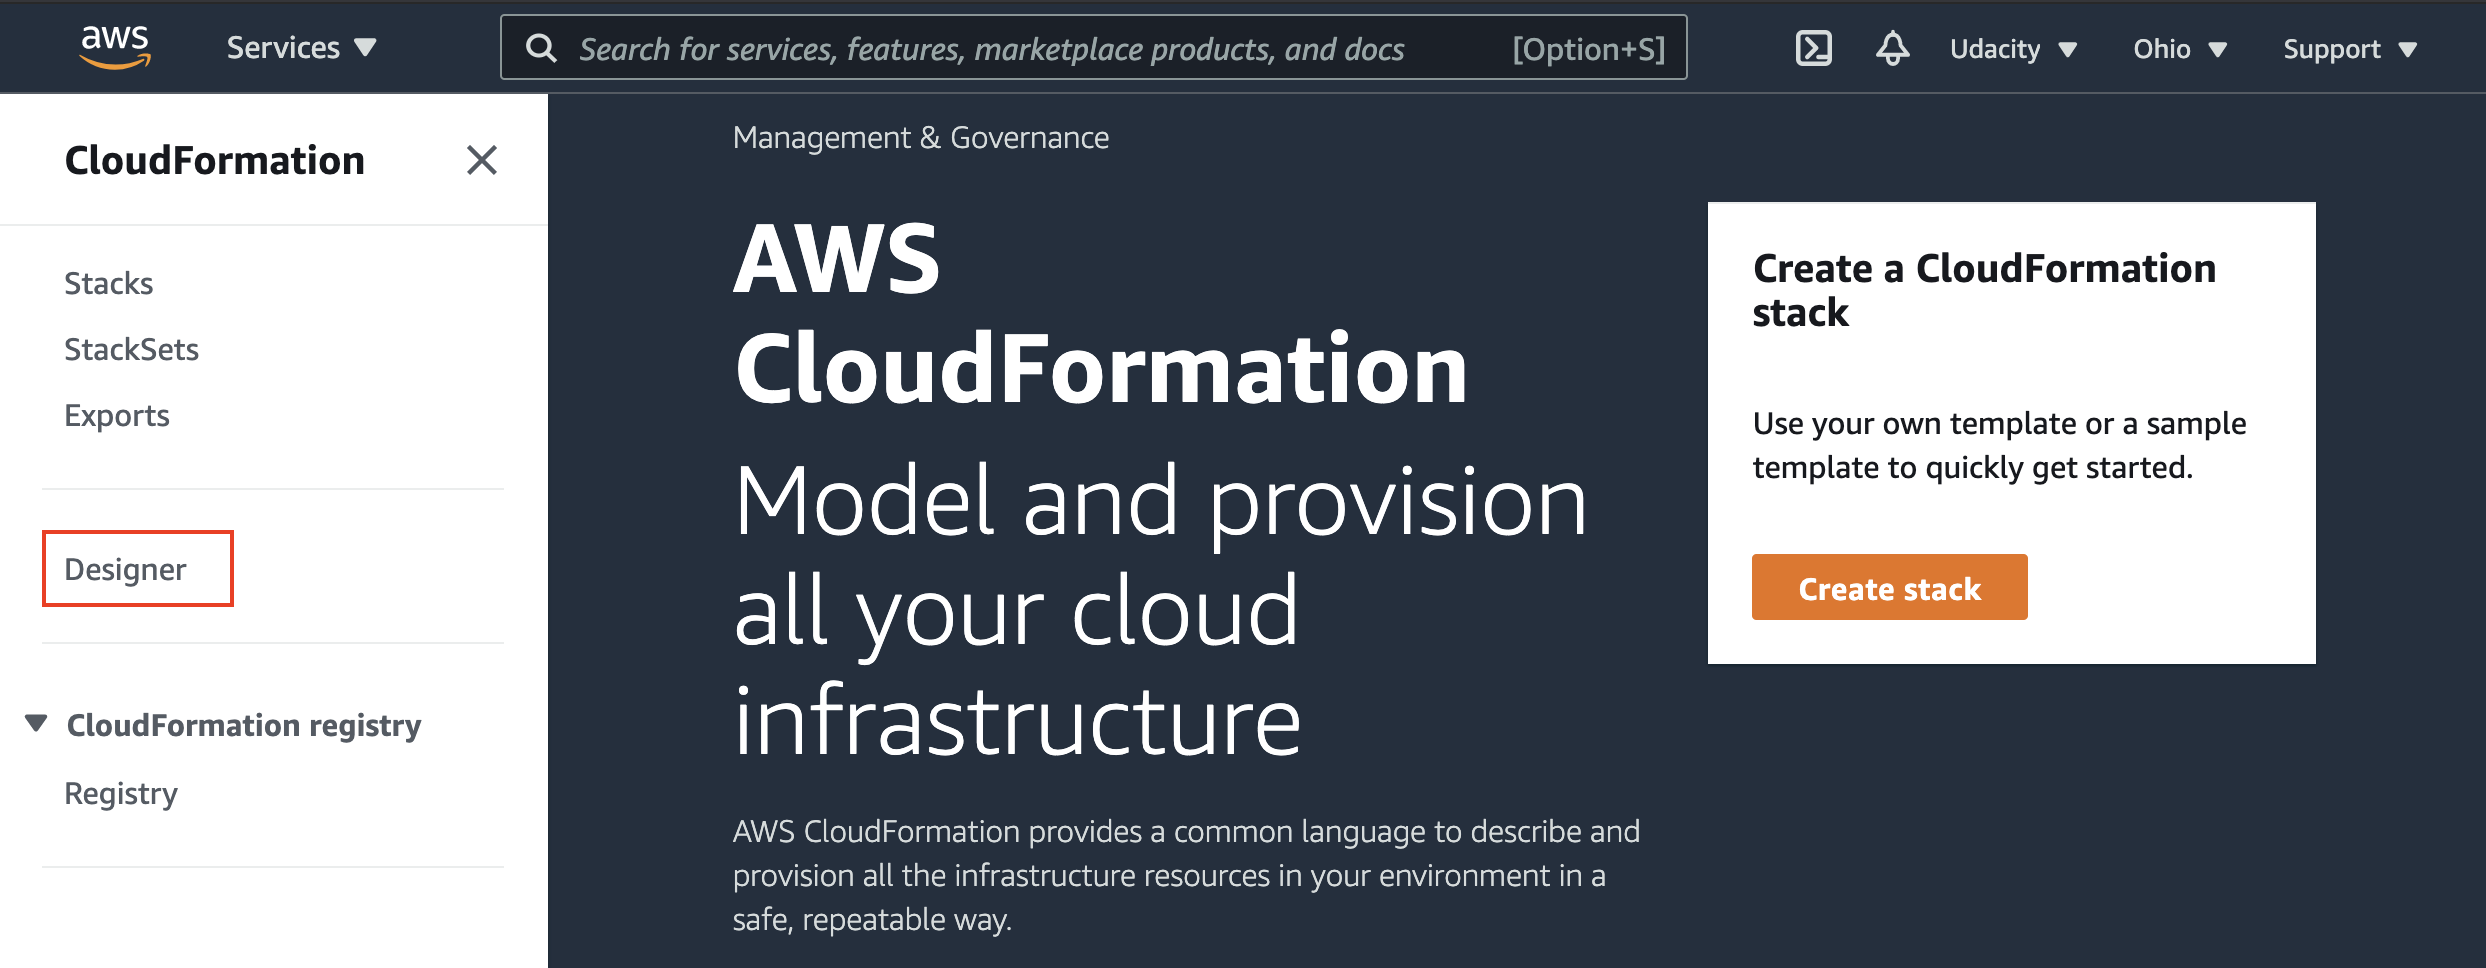
cloud formationin theFind Servicesbox and then selectCloudFormation.Important: The redesigned AWS CloudFormation console is available now. This tutorial covers the new designer. To access the new designer, click on the
Try it out now and provide us feedback.message that displays in a message similar to what’s shown below.
- On the AWS Management Console page, type
CloudFormation dashboard
- If the left-hand menu options do not appear, expand the options by clicking on
in the top left-hand corner. - Select
Designerfrom the left-hand menu. - Locate
S3in theResource Typesection and expand it. - Select Bucket and drag it to the designer window on the right-hand side.
- Copy the JSON below and replace entirely the JSON found in the
Propertiestab.{ "AWSTemplateFormatVersion": "2010-09-09", "Description": "Basic S3 Bucket CloudFormation template", "Resources": { "S3BucketCreatedByCloudFormation": { "Type": "AWS::S3::Bucket", "DeletionPolicy": "Delete", "Properties": { "AccessControl": "PublicRead" } } }, "Outputs": { "BucketName": { "Value": { "Ref": "S3BucketCreatedByCloudFormation" }, "Description": "Name of the newly created Amazon S3 Bucket" } } }
- Save CloudFormation Stack
- In the CloudFormation Designer Toolbar, click the Document icon , and click Save.
- Click
Local Fileand clickSave. The JSON file will download. - In the AWS CloudFormation Designer toolbar, click to validate your template. You will see a message that states,
Template is valid.
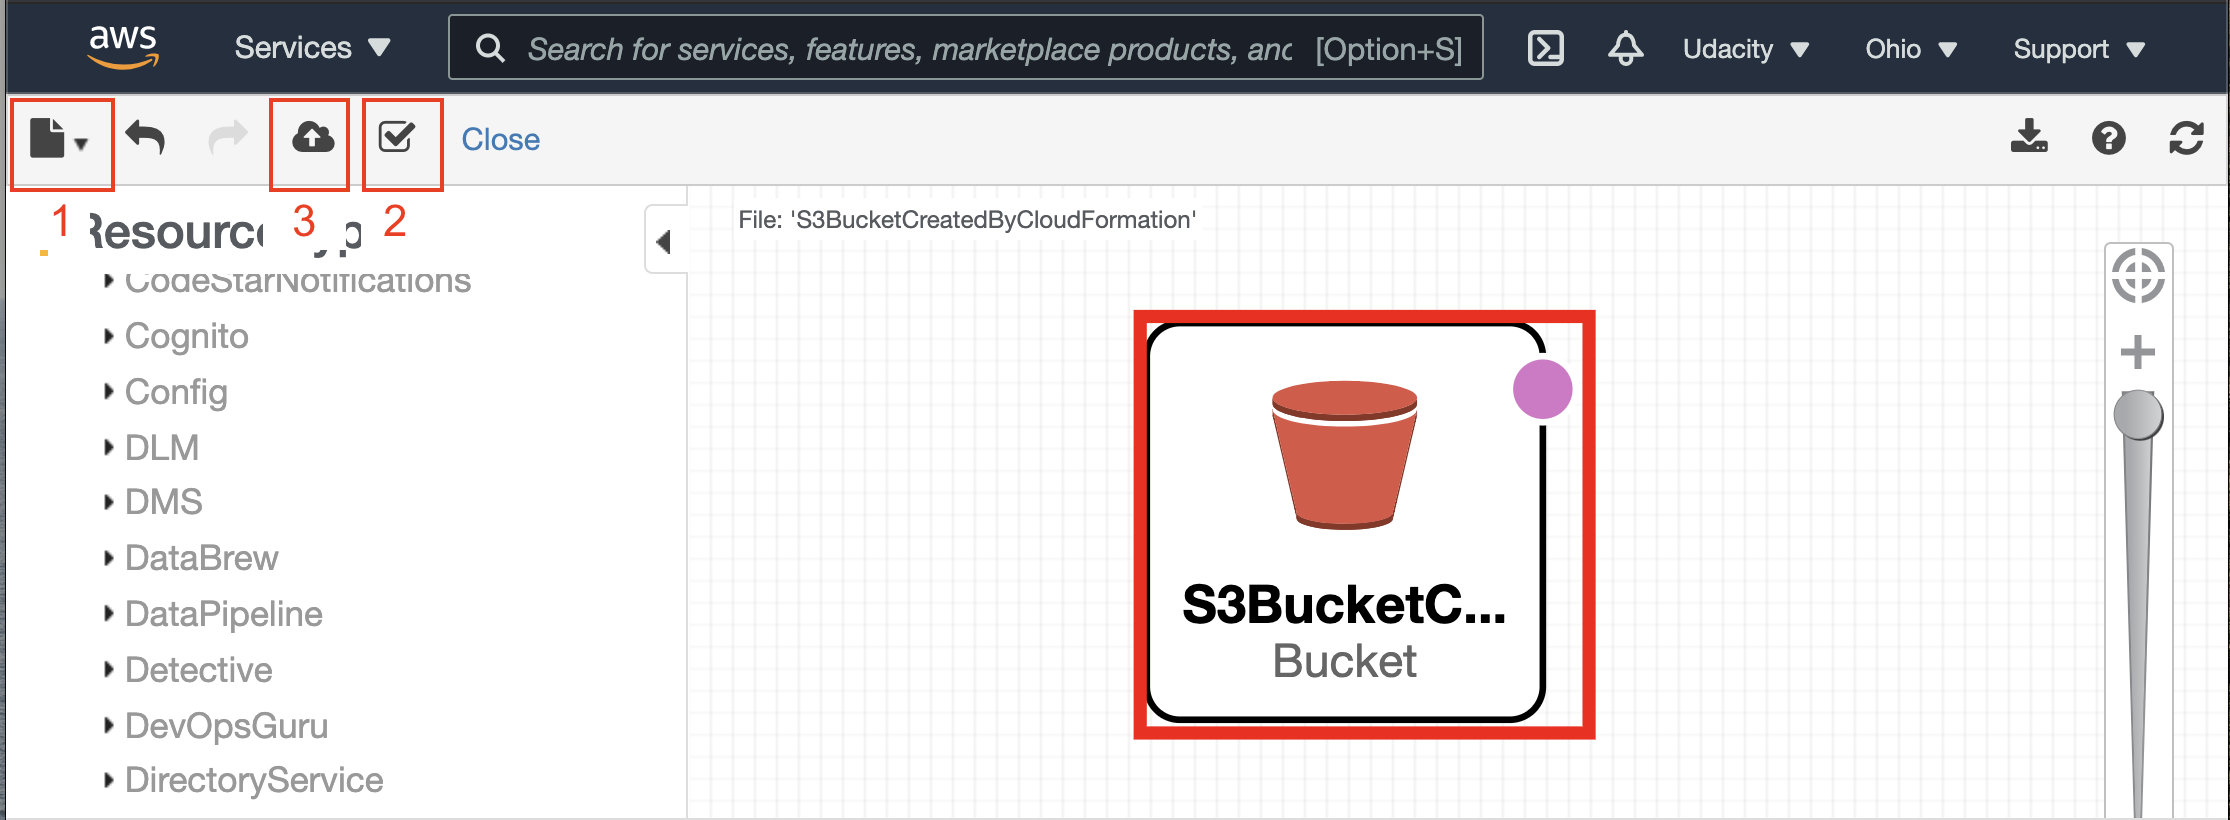
Designer toolbar - save, verify, and then deploy the stack.
- Deploy CloudFormation Stack
- In the CloudFormation Designer Toolbar, click to deploy the stack. The
Create stackscreen appears. - Accept the defaults and click
Next. - Enter a
Stack name. LeaveParametersempty. ClickNext. - Leave the defaults and click
Next. - Review the stack details and click
Create Stack. The stack status will beCREATE_IN_PROGRESS. To the current status of the stack, select the Refresh button in the upper right-hand corner. Once the stack reaches theCREATE_COMPLETEstatus, the stack has been deployed.
- In the CloudFormation Designer Toolbar, click to deploy the stack. The
- View S3 Bucket created by CloudFormation Stack
- From the
Servicesmenu option at the top, type inS3and selectS3. - To quickly find the bucket created by the CloudFormation Stack, click on
Date Createdin the column heading to sort by the most recent buckets created. - The newly created bucket appears at the top,
cfs3stack-s3bucketcreatedbycloudformation-1at0fv1v9ndc1.
- From the
- Delete CloudFormation Stack
- To avoid on-going charges, delete the stack by navigating to the stack, and click the
Deletebutton in the upper right-hand corner.Note: When the stack is deleted, all resources created by the stack template will also be deleted.
- To avoid on-going charges, delete the stack by navigating to the stack, and click the