0、流程:LoginView-SendNotification()---->LoginCommand--Execute()--->调用proxy中的函数操作模型数据--LoginProxy---->接收服务器返回-操作数据-返回通知视图控制器--LoginMediator--->操作视图。
(虽然很繁琐,一个功能需要写很多个文件,但是对于大型项目来说使用起来是很舒服的。比如A复制背包,B复制商场,这里都需要用到人物的金币信息,对与A/B来说我只要监听到了金币更新的操作,我就通过视图控制器来做update操作就可以了,不关心是谁的操作引起的金币变化。好处就不多说了,看下面代码吧)
1、下载puremvc,http://www.puremvc.org/
2、复制puremvc源代码到项目scripts目录下
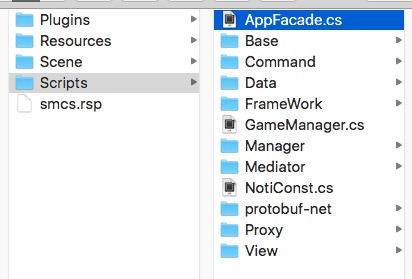
3、AppFacade.cs文件,这是puremvc的启动文件
 1 using UnityEngine;
 2 using System.Collections;
 3 using PureMVC.Patterns;
 4 using PureMVC.Interfaces;
 5 public class AppFacade : Facade,IFacade {
 6     public const string STARTUP = "starup";
 7     public const string LOGIN = "login";
 8     private static AppFacade _instance;
 9     public static AppFacade getInstance
10     {
11         get{
12             if (_instance == null) {
13                 _instance = new AppFacade ();
14             }
15             return _instance;
16         }
17     }
18     protected override void InitializeController ()
19     {
20         base.InitializeController ();
21         RegisterCommand (STARTUP, typeof(StartupCommand));
22         RegisterCommand (NotiConst.S_LOGIN, typeof(LoginCommand));
23     }
24     public void startup()
25     {
26         SendNotification (STARTUP);
27     }
28 }
4、在场景中创建一个GameManager.cs文件,挂在Main Camera上
 1 using UnityEngine;
 2 using System.Collections;
 3
 4 public class GameManager : MonoBehaviour {
 5
 6     // Use this for initialization
 7     void Start () {
 8         DontDestroyOnLoad (this.gameObject);
 9         AppFacade.getInstance.startup ();
10     }
11
12     // Update is called once per frame
13     void Update () {
14
15     }
16 }
5、编写StartupCommand.cs文件,在这里注册所有的command。
 1 using UnityEngine;
 2 using System.Collections;
 3 using PureMVC.Patterns;
 4
 5 public class StartupCommand : MacroCommand {
 6     protected override void InitializeMacroCommand ()
 7     {
 8         AddSubCommand (typeof(ModelPreCommand));
 9     }
10
11 }
5、创建ModelPreCommand.cs文件,这里注册proxy文件。
1 // 创建Proxy,并注册。
2 public class ModelPreCommand : SimpleCommand {
3
4     public override void Execute (PureMVC.Interfaces.INotification notification)
5     {
6         Facade.RegisterProxy (new LoginProxy());
7     }
8 }
6、在AppFacade.cs文件InitializeController方法中注册消息号与Command直接的监听关系。这里使用了NotiConst来定义所有的消息号。
7、创建LoginView.cs这是一个视图文件,同时创建LoginViewMediator.cs文件。
 1 using UnityEngine;
 2 using System.Collections;
 3 using System.Collections.Generic;
 4 using PureMVC.Patterns;
 5 using PureMVC.Interfaces;
 6
 7 public class LoginViewMediator : Mediator,IMediator {
 8
 9     public const string NAME = "LoginViewMediator";
10
11     public LoginViewMediator(LoginView _view):base(NAME,_view){
12
13     }
14     //需要监听的消息号
15     public override System.Collections.Generic.IList<string> ListNotificationInterests ()
16     {
17         List<string> list = new List<string>();
18         list.Add (NotiConst.R_LOGIN);
19         return list;
20     }
21     //接收消息到消息之后处理
22     public override void HandleNotification (PureMVC.Interfaces.INotification notification)
23     {
24         string name = notification.Name;
25         object vo = notification.Body;
26         switch (name) {
27         case NotiConst.R_LOGIN:
28                 (this.ViewComponent as LoginView).receiveMessage (vo);
29                 break;
30         }
31     }
32 }
LoginView.cs
1 void Start () {
2 //注册mediator
3         AppFacade.getInstance.RegisterMediator (new LoginViewMediator (this));
4     }
5
6 void OnDestory(){
7         AppFacade.getInstance.RemoveMediator (LoginViewMediator.NAME);
8     }
8、编写LoginCommand.cs文件,监听发送过来的消息。
在AppFacade里面InitializeController注册:RegisterCommand (NotiConst.S_LOGIN, typeof(LoginCommand));
 1 using UnityEngine;
 2 using System.Collections;
 3 using PureMVC.Patterns;
 4
 5 public class LoginCommand : SimpleCommand {
 6
 7     public override void Execute (PureMVC.Interfaces.INotification notification)
 8     {
 9         Debug.Log ("LoginCommand");
10         object obj = notification.Body;
11         LoginProxy loginProxy;
12         loginProxy = Facade.RetrieveProxy (LoginProxy.NAME) as LoginProxy;
13         string name = notification.Name;
14         switch (name) {
15         case NotiConst.S_LOGIN:
16             loginProxy.sendLogin (obj);
17             break;
18         }
19     }
20 }
9、创建LoginProxy.cs文件,这里复制数据处理,与服务器通讯等操作。
 1 using UnityEngine;
 2 using System.Collections;
 3 using PureMVC.Patterns;
 4 using PureMVC.Interfaces;
 5 using LitJson;
 6
 7 public class LoginProxy : Proxy,IProxy {
 8     public const string NAME = "LoginProxy";
 9     // Use this for initialization
10     public LoginProxy():base(NAME){}
11     //请求登陆
12     public void sendLogin(object data)
13     {
14         //与服务器通讯,返回消息处理玩之后,如果需要改变试图则调用下面消息
15         receiveLogin();
16     }
17     // 登陆返回
18     private void receiveLogin(JsonData rData)
19     {
20        SendNotification (NotiConst.R_LOGIN, rData);
21     }
22 }
10、测试。在视图里面创建一个按钮点击按钮发送登陆消息。
1 void sendNotice(){
2     int obj = 233333;
3     AppFacade.getInstance.SendNotification (NotiConst.S_LOGIN,obj);
4 }
然后在写一个接收到服务器端返回数据的操作函数
1 public void receiveLogin(object obj){
2     //下一步操作
3 }