当下.Net Core项目可是如雨后春笋一般发展起来,作为.Net大军中的一员,我热忱地拥抱了.Net Core并且积极使用其进行业务的开发,我们先介绍下.Net Core项目下实现文件上传下载接口。
GitHub源码地址 https://github.com/sevenTiny/QX_Core.FilesCenter
一、开发环境
毋庸置疑,宇宙第一IDE VisualStudio 2017
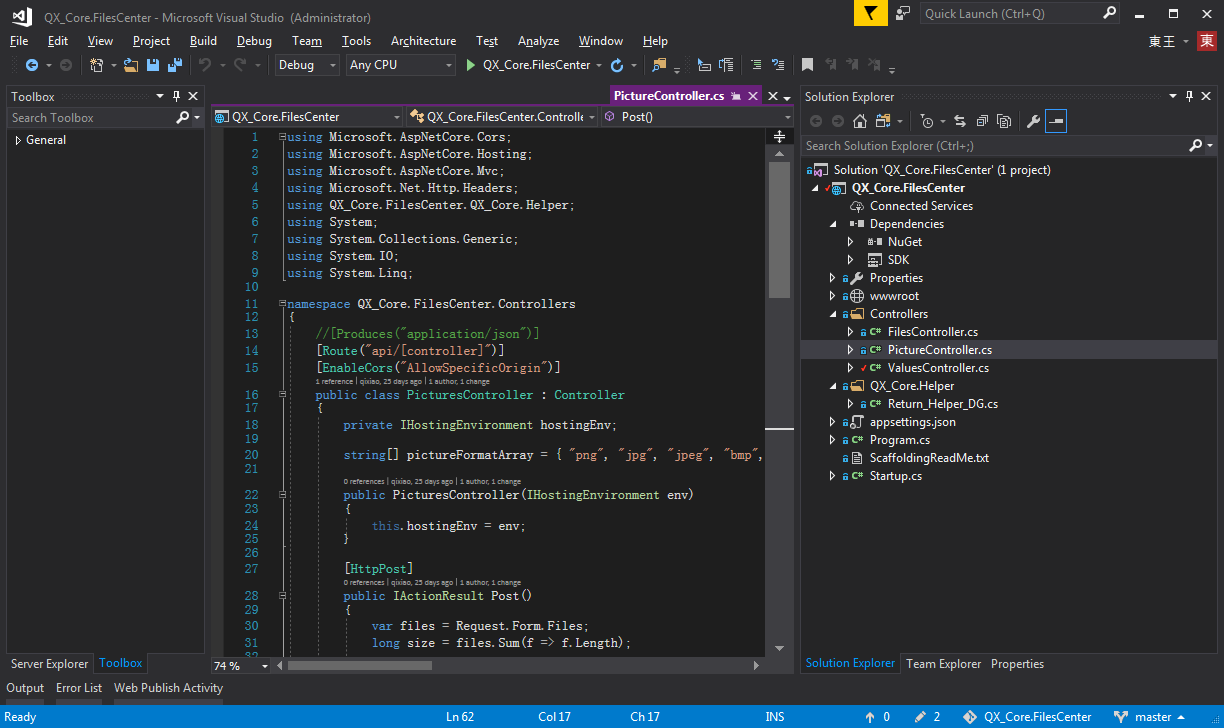
二、项目结构
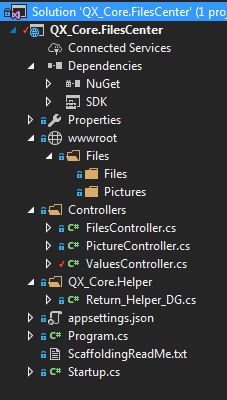
FilesController 文件上传下载控制器
PictureController 图片上传下载控制器
Return_Helper_DG 返回值帮助类
三、关键代码
1、首先我们来看Startup.cs 这个是我们的程序启动配置类,在这里我们进行一系列的配置。
跨域配置:
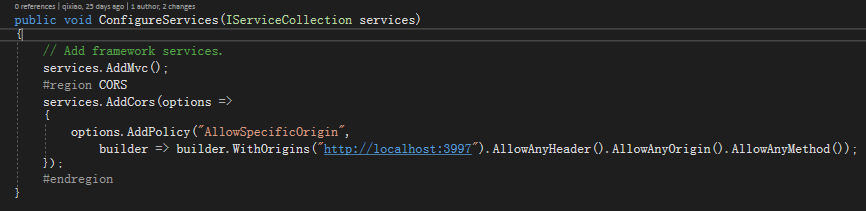
当然跨域少不了dll的引用,我们使用Nuget引用相关的引用包

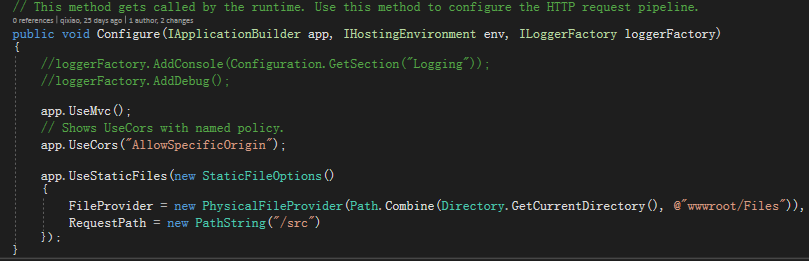
服务器资源路径置换,这样可以防止客户端猜测服务端文件路径,制造一个虚拟的隐射进行访问,提高了安全性。

Startup.cs的完整代码如下:
 1 using Microsoft.AspNetCore.Builder;
 2 using Microsoft.AspNetCore.Hosting;
 3 using Microsoft.AspNetCore.Http;
 4 using Microsoft.Extensions.Configuration;
 5 using Microsoft.Extensions.DependencyInjection;
 6 using Microsoft.Extensions.FileProviders;
 7 using Microsoft.Extensions.Logging;
 8 using System.IO;
 9
10 namespace QX_Core.FilesCenter
11 {
12     public class Startup
13     {
14         public Startup(IHostingEnvironment env)
15         {
16             var builder = new ConfigurationBuilder()
17                 .SetBasePath(env.ContentRootPath)
18                 .AddJsonFile("appsettings.json", optional: false, reloadOnChange: true)
19                 .AddJsonFile($"appsettings.{env.EnvironmentName}.json", optional: true)
20                 .AddEnvironmentVariables();
21             Configuration = builder.Build();
22         }
23
24         public IConfigurationRoot Configuration { get; }
25
26         // This method gets called by the runtime. Use this method to add services to the container.
27         public void ConfigureServices(IServiceCollection services)
28         {
29             // Add framework services.
30             services.AddMvc();
31             #region CORS
32             services.AddCors(options =>
33             {
34                 options.AddPolicy("AllowSpecificOrigin",
35                     builder => builder.WithOrigins("http://localhost:3997").AllowAnyHeader().AllowAnyOrigin().AllowAnyMethod());
36             });
37             #endregion
38         }
39
40         // This method gets called by the runtime. Use this method to configure the HTTP request pipeline.
41         public void Configure(IApplicationBuilder app, IHostingEnvironment env, ILoggerFactory loggerFactory)
42         {
43             //loggerFactory.AddConsole(Configuration.GetSection("Logging"));
44             //loggerFactory.AddDebug();
45
46             app.UseMvc();
47             // Shows UseCors with named policy.
48             app.UseCors("AllowSpecificOrigin");
49
50             app.UseStaticFiles(new StaticFileOptions()
51             {
52                 FileProvider = new PhysicalFileProvider(Path.Combine(Directory.GetCurrentDirectory(), @"wwwroot/Files")),
53                 RequestPath = new PathString("/src")
54             });
55         }
56     }
57 }
2、Return_Helper_DG类用户设置一个统一的返回值反馈到客户端
Return_Helper_DG类的代码如下:
 1 using System.Net;
 2 /**
 3 * author:qixiao
 4 * create:2017-5-19 15:15:05
 5 * */
 6 namespace QX_Core.FilesCenter.QX_Core.Helper
 7 {
 8     public abstract class Return_Helper_DG
 9     {
10         public static object IsSuccess_Msg_Data_HttpCode(bool isSuccess, string msg, dynamic data, HttpStatusCode httpCode = HttpStatusCode.OK)
11         {
12             return new { isSuccess = isSuccess, msg = msg, httpCode = httpCode, data = data };
13         }
14         public static object Success_Msg_Data_DCount_HttpCode(string msg, dynamic data = null, int dataCount = 0, HttpStatusCode httpCode = HttpStatusCode.OK)
15         {
16             return new { isSuccess = true, msg = msg, httpCode = httpCode, data = data, dataCount = dataCount };
17         }
18         public static object Error_Msg_Ecode_Elevel_HttpCode(string msg, int errorCode = 0, int errorLevel = 0, HttpStatusCode httpCode = HttpStatusCode.InternalServerError)
19         {
20             return new { isSuccess = false, msg = msg, httpCode = httpCode, errorCode = errorCode, errorLevel = errorLevel };
21         }
22     }
23 }
3、FilesController是我们的文件上传控制器接口,这里定义了对上传的文件的接收操作,并且在控制器上启用跨域配置
 1 using Microsoft.AspNetCore.Cors;
 2 using Microsoft.AspNetCore.Hosting;
 3 using Microsoft.AspNetCore.Mvc;
 4 using Microsoft.Net.Http.Headers;
 5 using QX_Core.FilesCenter.QX_Core.Helper;
 6 using System;
 7 using System.Collections.Generic;
 8 using System.IO;
 9 using System.Linq;
10
11 namespace QX_Core.FilesCenter.Controllers
12 {
13     //[Produces("application/json")]
14     [Route("api/[controller]")]
15     [EnableCors("AllowSpecificOrigin")]
16     public class FilesController : Controller
17     {
18         private IHostingEnvironment hostingEnv;
19
20         public FilesController(IHostingEnvironment env)
21         {
22             this.hostingEnv = env;
23         }
24
25         [HttpPost]
26         public IActionResult Post()
27         {
28             var files = Request.Form.Files;
29             long size = files.Sum(f => f.Length);
30
31             //size > 100MB refuse upload !
32             if (size > 104857600)
33             {
34                 return Json(Return_Helper_DG.Error_Msg_Ecode_Elevel_HttpCode("files total size > 100MB , server refused !"));
35             }
36
37             List<string> filePathResultList = new List<string>();
38
39             foreach (var file in files)
40             {
41                 var fileName = ContentDispositionHeaderValue.Parse(file.ContentDisposition).FileName.Trim('"');
42
43                 string filePath = hostingEnv.WebRootPath + $@"\Files\Files\";
44
45                 if (!Directory.Exists(filePath))
46                 {
47                     Directory.CreateDirectory(filePath);
48                 }
49
50                 fileName = Guid.NewGuid() + "." + fileName.Split('.')[1];
51
52                 string fileFullName = filePath + fileName;
53
54                 using (FileStream fs = System.IO.File.Create(fileFullName))
55                 {
56                     file.CopyTo(fs);
57                     fs.Flush();
58                 }
59                 filePathResultList.Add($"/src/Files/{fileName}");
60             }
61
62             string message = $"{files.Count} file(s) /{size} bytes uploaded successfully!";
63
64             return Json(Return_Helper_DG.Success_Msg_Data_DCount_HttpCode(message, filePathResultList, filePathResultList.Count));
65         }
66
67     }
68 }
在上述的代码中,我们对上传的文件的大小进行了限制,并且对文件的大小进行反馈。
4、PictureController 图片上传控制器接口,类似于文件,不过对上传的图片类型进行了校验和限制
 1 using Microsoft.AspNetCore.Cors;
 2 using Microsoft.AspNetCore.Hosting;
 3 using Microsoft.AspNetCore.Mvc;
 4 using Microsoft.Net.Http.Headers;
 5 using QX_Core.FilesCenter.QX_Core.Helper;
 6 using System;
 7 using System.Collections.Generic;
 8 using System.IO;
 9 using System.Linq;
10
11 namespace QX_Core.FilesCenter.Controllers
12 {
13     //[Produces("application/json")]
14     [Route("api/[controller]")]
15     [EnableCors("AllowSpecificOrigin")]
16     public class PicturesController : Controller
17     {
18         private IHostingEnvironment hostingEnv;
19
20         string[] pictureFormatArray = { "png", "jpg", "jpeg", "bmp", "gif","ico", "PNG", "JPG", "JPEG", "BMP", "GIF","ICO" };
21
22         public PicturesController(IHostingEnvironment env)
23         {
24             this.hostingEnv = env;
25         }
26
27         [HttpPost]
28         public IActionResult Post()
29         {
30             var files = Request.Form.Files;
31             long size = files.Sum(f => f.Length);
32
33             //size > 100MB refuse upload !
34             if (size > 104857600)
35             {
36                 return Json(Return_Helper_DG.Error_Msg_Ecode_Elevel_HttpCode("pictures total size > 100MB , server refused !"));
37             }
38
39             List<string> filePathResultList = new List<string>();
40
41             foreach (var file in files)
42             {
43                 var fileName = ContentDispositionHeaderValue.Parse(file.ContentDisposition).FileName.Trim('"');
44
45                 string filePath = hostingEnv.WebRootPath + $@"\Files\Pictures\";
46
47                 if (!Directory.Exists(filePath))
48                 {
49                     Directory.CreateDirectory(filePath);
50                 }
51
52                 string suffix = fileName.Split('.')[1];
53
54                 if (!pictureFormatArray.Contains(suffix))
55                 {
56                     return Json(Return_Helper_DG.Error_Msg_Ecode_Elevel_HttpCode("the picture format not support ! you must upload files that suffix like 'png','jpg','jpeg','bmp','gif','ico'."));
57                 }
58
59                 fileName = Guid.NewGuid() + "." + suffix;
60
61                 string fileFullName = filePath + fileName;
62
63                 using (FileStream fs = System.IO.File.Create(fileFullName))
64                 {
65                     file.CopyTo(fs);
66                     fs.Flush();
67                 }
68                 filePathResultList.Add($"/src/Pictures/{fileName}");
69             }
70
71             string message = $"{files.Count} file(s) /{size} bytes uploaded successfully!";
72
73             return Json(Return_Helper_DG.Success_Msg_Data_DCount_HttpCode(message, filePathResultList, filePathResultList.Count));
74         }
75
76     }
77 }
到此,我们的文件图片上传代码已经全部完成,下面我们对文件上传的客户端进行实现
四、客户端的实现
客户端我们很简单地用jQuery Ajax的方式进行图片文件的提交,客户端代码的实现:
 1 <!doctype>
 2
 3 <head>
 4     <script src="jquery-3.2.0.min.js"></script>
 5     <script>
 6         $(document).ready(function () {
 7             var appDomain = "http://localhost:53972/";
 8             $("#btn_fileUpload").click(function () {
 9                                 var fileUpload = $("#files").get(0);
10                 var files = fileUpload.files;
11                 var data = new FormData();
12                 for (var i = 0; i < files.length; i++) {
13                       data.append(files[i].name, files[i]);
14                 }
15                 $.ajax({
16                     type: "POST",
17                     url: appDomain+'api/Pictures',
18                     contentType: false,
19                     processData: false,
20                     data: data,
21                     success: function (data) {
22                         console.log(JSON.stringify(data));
23                     },
24                     error: function () {
25                         console.log(JSON.stringify(data));
26                     }
27                 });
28             });
29             //end click
30
31
32         })
33     </script>
34 </head>
35 <title></title>
36
37 <body>
38     <article>
39         <header>
40             <h2>article-form</h2>
41         </header>
42         <p>
43             <form id="uploadForm" enctype="multipart/form-data">
44                 <input type="file" id="files" name="files" placeholder="file" multiple>file-multiple属性可以选择多项<br><br>
45                 <input type="button" id="btn_fileUpload" value="fileUpload">
46             </form>
47         </p>
48     </article>
49 </body>
五、代码测试
1.启动服务器
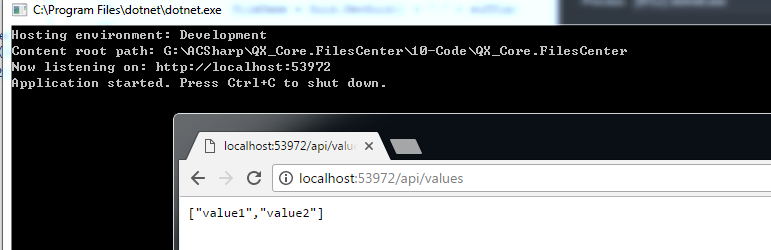
我们可以看到一个控制台和一个web自动启动,并且web显示默认的Values控制器的请求返回值。
2.图片上传
我们使用ajax的方式进行图片的上传操作,打开测试web页面,并且选择图片,点击上传,查看控制台返回的结果:

可以看到,一张图片上传成功!
输入返回的地址,我们可以看到成功访问到了图片,特别注意这里服务器路径的改变:

多图片上传:


可见,多图片上传没有任何问题!
同样进行文件上传的测试:

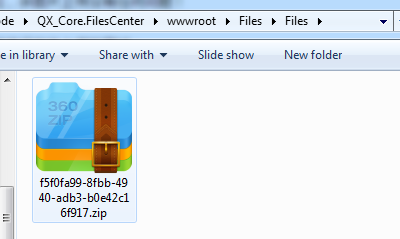
同样,文件上传也没有任何问题!
六、总结
至此,我们已经实现了预期的.Net Core图片文件上传的全部功能!
