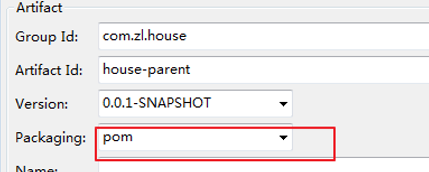
一、创建一个maven的pom的父包继承SpringBoot-parent

子项目--继承-->父项目 --> 继承 -->springBoot-parent
1、添加相关依赖
<project xmlns="http://maven.apache.org/POM/4.0.0"
    xmlns:xsi="http://www.w3.org/2001/XMLSchema-instance"
    xsi:schemaLocation="http://maven.apache.org/POM/4.0.0 https://maven.apache.org/xsd/maven-4.0.0.xsd">
    <modelVersion>4.0.0</modelVersion>
    <groupId>com.zl</groupId>
    <artifactId>springCloud-parent</artifactId>
    <version>0.0.1-SNAPSHOT</version>
    <packaging>pom</packaging>

    <!--1、继承Spring-boot-parent -->
    <parent>
        <groupId>org.springframework.boot</groupId>
        <artifactId>spring-boot-starter-parent</artifactId>
        <version>2.1.9.RELEASE</version>
        <relativePath /> <!-- lookup parent from repository -->
    </parent>

    <!-- 版本的控制 -->
    <properties>
        <java.version>1.8</java.version>
        <!-- 规定SpringCloud的版本 -->
        <spring.cloud.version>Greenwich.SR1</spring.cloud.version>
    </properties>

    <!-- 2、添加SpringCloud的依赖 -->
        <!-- 只是对版本进行管理,不会实际引入jar   -->
    <dependencyManagement>
        <dependencies>
            <dependency>
                <groupId>org.springframework.cloud</groupId>
                <artifactId>spring-cloud-dependencies</artifactId>
                <version>${spring.cloud.version}</version>
                <type>pom</type>
                <scope>import</scope>
            </dependency>
        </dependencies>
    </dependencyManagement>
<!-- 父项目添加maven插件,子项目不用编写了-->
    <build>
        <plugins>
            <plugin>
                <groupId>org.springframework.boot</groupId>
                <artifactId>spring-boot-maven-plugin</artifactId>
            </plugin>
        </plugins>
    </build>

</project>
二、创建注册中心(eureka-server)
1、创建一个SpringBoot的jar项目
2、修改pom.xml中的parent,继承创建的maven父项目
<?xml version="1.0" encoding="UTF-8"?>
<project xmlns="http://maven.apache.org/POM/4.0.0" xmlns:xsi="http://www.w3.org/2001/XMLSchema-instance"
    xsi:schemaLocation="http://maven.apache.org/POM/4.0.0 https://maven.apache.org/xsd/maven-4.0.0.xsd">
    <modelVersion>4.0.0</modelVersion>
    <!-- 1、修改父类为maven的pom文件,因为maven的pom继承的springboot -->
    <parent>
        <groupId>com.zl</groupId>
        <artifactId>springCloud-parent</artifactId>
        <version>0.0.1-SNAPSHOT</version>
        <!-- 2、指定父项目的pom文件路径, 默认从本地仓库查找 如果父项目自定义的, 需要指定父项目的pom文件路径 -->
        <relativePath>../springCloud-parent/pom.xml</relativePath>
    </parent>

    <artifactId>springCloud-eureka</artifactId>
    <name>springCloud-eureka</name>
    <description>Demo project for Spring Boot</description>

    <properties>
        <java.version>1.8</java.version>
    </properties>

    <dependencies>
        <dependency>
            <groupId>org.springframework.boot</groupId>
            <artifactId>spring-boot-starter</artifactId>
        </dependency>

        <dependency>
            <groupId>org.springframework.boot</groupId>
            <artifactId>spring-boot-starter-test</artifactId>
            <scope>test</scope>
        </dependency>

        <!-- 3、导入eureka-server的依赖 -->
        <dependency>
            <groupId>org.springframework.cloud</groupId>
            <artifactId>spring-cloud-starter-netflix-eureka-server</artifactId>
        </dependency>
    </dependencies>
</project>
3、在启动类添加一个注解, @EnableEurekaServer,表示这个项目是一个Eureka-server(注册中心)
@SpringBootApplication
//表示这个项目是一个Eureka-server(注册中心)
@EnableEurekaServer
public class SpringCloudEurekaApplication {
    public static void main(String[] args) {
        SpringApplication.run(SpringCloudEurekaApplication.class, args);
    }
4、在配置文件application.yml中添加Eureka-server的相关配置
#设置端口
server:
  port: 10001

#给这个项目取一个名字
spring:
  application:
  #取名, 不能使用_
    name: springCloud-eurasia

#eureka相关配置
eureka:
  instance:
    hostname: 127.0.0.1
#设置是否将自己作为客户端注册到注册中心(缺省true)
#这里为不需要,查看@EnableEurekaServer注解的源码,会发现它间接用到了@EnableDiscoveryClient
  client:
    register-with-eureka: false
#设置是否从注册中心获取注册信息,默认值为true
#因为这是一个单点的EurakaServer,不需要同步其他EurekaServer节点的数据,故设置为false
    fetch-registry: false
# 实际测试:若修改尾部的eureka为其它的,比如/myeureka,注册中心启动没问题,但服务端在注册时会失败
# 报告异常:com.netflix.discovery.shared.transport.TransportException: Cannot execute request on any known server
# 一定是eureka
    serviceUrl:
      defaultZone: http://${eureka.instance.hostname}:${server.port}/eureka/
启动注册中心: 访问注册中心: ip:端口
http://127.0.0.1:10001/

三、搭建服务提供者 和 搭建服务消费者(共同相关配置)(eureka-client)
1、创建一个SpringBoot的jar项目,添加spring-boot-starter-web 的starters
2、修改pom.xml中的parent,继承创建的maven父项目
<?xml version="1.0" encoding="UTF-8"?>
<project xmlns="http://maven.apache.org/POM/4.0.0"
    xmlns:xsi="http://www.w3.org/2001/XMLSchema-instance"
    xsi:schemaLocation="http://maven.apache.org/POM/4.0.0 https://maven.apache.org/xsd/maven-4.0.0.xsd">
    <modelVersion>4.0.0</modelVersion>
    <!-- 1、修改父类为maven的pom文件,因为maven的pom继承的springboot -->
    <parent>
        <groupId>com.zl</groupId>
        <artifactId>springCloud-parent</artifactId>
        <version>0.0.1-SNAPSHOT</version>
        <!-- 2、指定父项目的pom文件路径, 默认从本地仓库查找 如果父项目自定义的, 需要指定父项目的pom文件路径 -->
        <relativePath>../springCloud-parent/pom.xml</relativePath>
    </parent>

    <artifactId>springCloud-client1</artifactId>
    <name>springCloud-client1</name>
    <description>Demo project for Spring Boot</description>

    <properties>
        <java.version>1.8</java.version>
    </properties>

    <dependencies>
        <dependency>
            <groupId>org.springframework.boot</groupId>
            <artifactId>spring-boot-starter</artifactId>
        </dependency>
        <dependency>
            <groupId>org.springframework.boot</groupId>
            <artifactId>spring-boot-starter-test</artifactId>
            <scope>test</scope>
        </dependency>
        <dependency>
            <groupId>org.springframework.boot</groupId>
            <artifactId>spring-boot-starter-web</artifactId>
        </dependency>

        <!-- 热部署 -->
        <dependency>
            <groupId>org.springframework.boot</groupId>
            <artifactId>spring-boot-devtools</artifactId>
        </dependency>

        <!-- 3、导入eureka-client的依赖 -->
        <dependency>
            <groupId>org.springframework.cloud</groupId>
            <artifactId>spring-cloud-starter-netflix-eureka-client</artifactId>
        </dependency>
</project>
3、在启动类添加一个注解, @EnableEurekaClient,表示这个项目是一个Eureka-client(服务)
如果选用的注册中心是eureka,那么就推荐@EnableEurekaClient,
如果是其他的注册中心,那么推荐使用@EnableDiscoveryClient。
@SpringBootApplication
//表示这个项目是一个Eureka-client(服务)
@EnableEurekaClient //或者使用 @EnableDiscoveryClient
public class SpringCloudClient1Application {
    public static void main(String[] args) {
        SpringApplication.run(SpringCloudClient1Application.class, args);
    }
4、在配置文件application.yml中添加Eureka-Client的相关配置
#设置端口
server:
  port: 8888

#给这个项目取个名字
spring:
  application:
  #取名, 不能使用_
    name: springCould-client1

#eureka相关配置
eureka:
  instance:
    hostname: 127.0.0.1
   #设置是否将自己作为客户端注册到注册中心(缺省true)
   #这里为不需要,查看@EnableEurekaServer注解的源码,会发现它间接用到了@EnableDiscoveryClient
    instance-id: userService-${spring.cloud.client.ipaddress}-${server.port}
  client:
    serviceUrl:
      defaultZone: http://${eureka.instance.hostname}:10001/eureka/
开启client1:可在注册中心查看相关信息

创建多个客户端模块只需要相同的步骤,将端口改为不一致的就行
四、搭建服务提供者--区别
1、不需要做多余的配置
2、创建一个controller接口,告诉消费放url、请求参数、返回参数
//一个测试接口
//相当于加了一个@Controller 和 @ResponseBody
@RestController
@RequestMapping(path = "hello",produces = "application/json;charset=utf-8")
public class helloController {

    @GetMapping("sayHello/{word}")
    public String sayHello(@PathVariable("word")String word)  throws  Exception{
        return "hello:"+word;
    }
}
五、搭建服务消费者--区别
1、在application.yml配置文件中添加服务提供者的url
#2、服务提供方的url   http://+ip+端口+窄化请求路径+访问路径
helloService:
  servicePath: http://${eureka.instance.hostname}:8888/hello/sayHello/
2、在 SpringCloudClient2Application 启动类中添加一个RestTemplate(Rest的HTTP客户端模板工具类)
//创建一个RestTemplate
@Bean
public RestTemplate createRestTemplate() {
    return new RestTemplate();
}
3、在controller中添加服务提供者的url,访问服务提供者的接口
@RestController
@RequestMapping(path = "test", produces = "application/json;charset=utf-8")
public class TestController {

    // 类似HttpClient的一个发生http请求对象
    @Autowired
    private RestTemplate restTemplate;

    @Value("${helloService.servicePath}") //获取yml中的服务提供者的url参数
    private String helloServiceUrl;

    @GetMapping("testHello/{name}")
    public String testHello(@PathVariable("name") String name) throws Exception {
        // 调用helloProvice服务
        // http://${eureka.instance.hostname}:8888/sayHello/aa
        String rs = restTemplate.getForObject(helloServiceUrl + name, String.class);
        return rs;
    }
}