通过flume收集其他机器上flume的监测数据,发送到本机的kafka进行消费。
环境:slave中安装flume,master中安装flume+kafka(这里用两台虚拟机,也可以用三台以上)
masterIP 192.168.83.128 slaveIP 192.168.83.129
通过监控test.log文件的变化,收集变化信息发送到主机的flume中,再发送到kafka中进行消费
1、配置slave1在flume中配置conf目录中的example.conf文件,没有就创建一个
#Name the components on this agent
a1.sources = r1
a1.sinks = k1
a1.channels = c1

# Describe/configure the source
a1.sources.r1.type = exec
#监控文件夹下的test.log文件
a1.sources.r1.command = tail -F /home/qq/pp/data/test.log
a1.sources.r1.channels = c1

# Describe the sink
##sink端的avro是一个数据发送者
a1.sinks = k1
##type设置成avro来设置发消息
a1.sinks.k1.type = avro
a1.sinks.k1.channel = c1
##下沉到master这台机器
a1.sinks.k1.hostname = 192.168.83.133
##下沉到mini2中的44444
a1.sinks.k1.port = 44444
a1.sinks.k1.batch-size = 2

# Use a channel which buffers events in memory
a1.channels.c1.type = memory
a1.channels.c1.capacity = 1000
a1.channels.c1.transactionCapacity = 100

# Bind the source and sink to the channel
a1.sources.r1.channels = c1
a1.sinks.k1.channel = c1
2、master上配置flume/conf里面的example.conf(标红的注意下)
#me the components on this agent
a1.sources = r1
a1.sinks = k1
a1.channels = c1

# Describe/configure the source
##source中的avro组件是一个接收者服务
a1.sources.r1.type = avro
a1.sources.r1.channels = c1
a1.sources.r1.bind = 0.0.0.0
a1.sources.r1.port = 44444

# Describe the sink
#a1.sinks.k1.type = logger
#对于sink的配置描述 使用kafka做数据的消费
a1.sinks.k1.type = org.apache.flume.sink.kafka.KafkaSink
a1.sinks.k1.topic = flume_kafka
a1.sinks.k1.brokerList = 192.168.83.128:9092,192.168.83.129:9092
a1.sinks.k1.requiredAcks = 1
a1.sinks.k1.batchSize = 20

# Use a channel which buffers events in memory
a1.channels.c1.type = memory
a1.channels.c1.capacity = 1000
a1.channels.c1.transactionCapacity = 100

# Bind the source and sink to the channel
a1.sources.r1.channels = c1
a1.sinks.k1.channel = c1
3、向监听文件写入字符串(程序循环写入,不用手动修改test.log文件了)
[root@s1 # cd /home/qq/pp/data
[root@s1 home/qq/pp/data# while true
> do
> echo "toms" >> test.log
> sleep 1
> done
4、查看上面的程序是否执行
#cd /home/qq/pp/data
#tail -f test.log
5、打开消息接收者master的flume
进入flume安装目录,执行如下语句
bin/flume-ng agent -c conf -f conf/example.conf -n a1 -Dflume.root.logger=INFO,console
现在回打印出一些信息
6、启动slave的flume
进入flume安装目录,执行如下语句
bin/flume-ng agent -c conf -f conf/example.conf -n a1 -Dflume.root.logger=INFO,console
7、 进入master ---kafka安装目录
1)启动zookeeper
bin/zookeeper-server-start.sh -daemon config/zookeeper.properties
2)启动kafka服务
bin/kafka-server-start.sh -daemon config/server.properties
3)创建topic
kafka-topics.sh --create --topic flume_kafka --zookeeper 192.168.83.129:2181,192.168.83.128:2181 --partitions 2 --replication-factor 1
4)创建消费者
bin/kafka-console-consumer.sh --bootstrap-server 192.168.83.128:9092,192.168.83.129:9092 --topic flume_kafka --from-beginning
5)然后就会看到消费之窗口打印写入的信息,

8、此时启动 eclipse实例(https://www.cnblogs.com/51python/p/10908660.html),注意修改ip以及topic
如果启动不成功看看是不是kafka设置问题(https://www.cnblogs.com/51python/p/10919330.html第一步虚拟机部署)
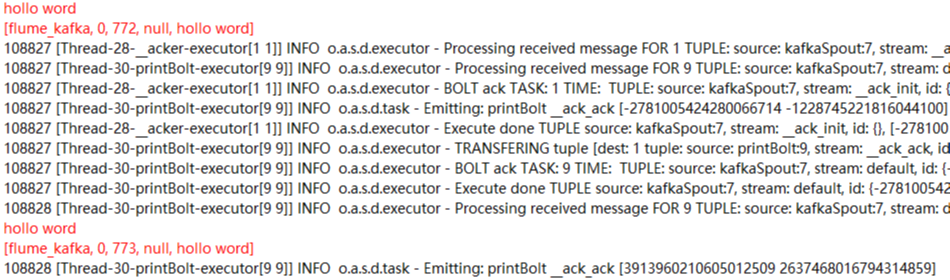
启动后会打印出结果(这是第二次测试不是用的toms而是hollo word测试的,此处只是一个实例)
ok!一个流程终于走完了!
参考:
https://blog.csdn.net/luozhonghua2014/article/details/80369469?utm_source=blogxgwz5
https://blog.csdn.net/wxgxgp/article/details/85701844
https://blog.csdn.net/tototuzuoquan/article/details/73203241