一、基本控件介绍
1、Android中所有控件的顶层基类view的常用属性:
android:id设置控件的标识符号

android:layout_width设置子组件的布局宽度

android:layout_height设置子组件的布局高度

android:background设置控件的背景色

android:onClick设置控件的单击事件绑定监听器

android:visibility设置控件是否可见

android:alpha设置控件透明度(0-1之间的数值)

android:padding设置子组件的内边距

android:layout_margin设置子组件的外边距
2、文本控件TextView常用属性:
android:text:文本的内容

android:textSize:文字的大小

android:textColor:文本的颜色
3、按钮控件Button常用属性:
android:onClick设置控件的单击事件绑定监听器
4、文本编辑控件EditText常用属性:
android:hint输入提示

android:textColorHint提示的颜色

android:textColorHighlight选中字体的背景颜色

android:inputType设置输入类型
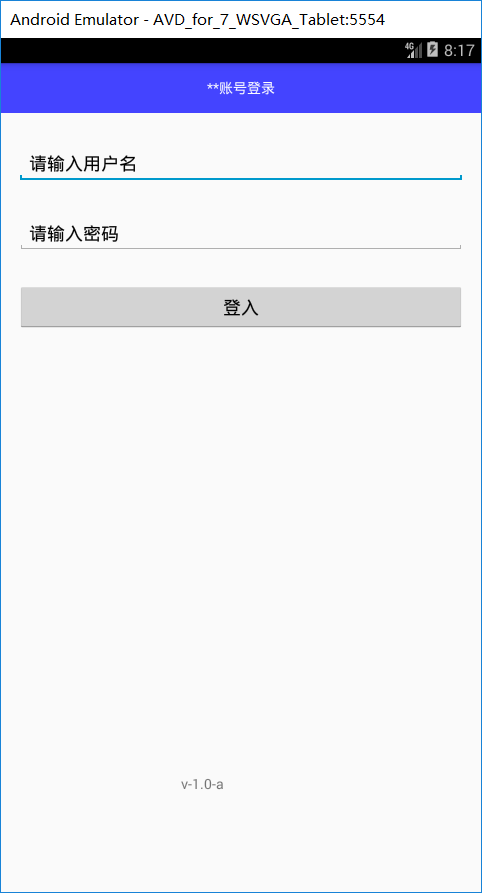
5、组合案例:登入界面
1)xml布局文件


<?xml version="1.0" encoding="utf-8"?>
<LinearLayout xmlns:android="http://schemas.android.com/apk/res/android"
    android:orientation="vertical" android:layout_width="match_parent"
    android:layout_height="match_parent">
    <RelativeLayout
        android:layout_width="match_parent"
        android:layout_height="50dp"
        android:background="#44f">
        <TextView
            android:layout_width="wrap_content"
            android:layout_height="wrap_content"
            android:layout_centerHorizontal="true"
            android:layout_centerVertical="true"
            android:text="**账号登录"
            android:textColor="#ffffff"/>

    </RelativeLayout>

    <EditText
        android:id="@+id/userName"
        android:layout_width="match_parent"
        android:layout_height="wrap_content"
        android:ems="18"
        android:inputType="textPersonName"
        android:hint="请输入用户名"
        android:layout_marginTop="30dp"
        android:layout_marginLeft="16dp"
        android:layout_marginRight="16dp"/>

    <EditText
        android:id="@+id/password"
        android:layout_width="match_parent"
        android:layout_height="wrap_content"
        android:ems="18"
        android:inputType="textPassword"
        android:hint="请输入密码"
        android:layout_marginTop="30dp"
        android:layout_marginLeft="16dp"
        android:layout_marginRight="16dp"/>

    <Button
        android:id="@+id/login"
        android:layout_width="match_parent"
        android:layout_height="wrap_content"
        android:text="登入"
        android:layout_marginTop="30dp"
        android:layout_marginLeft="16dp"
        android:layout_marginRight="16dp"/>

    <TextView
        android:id="@+id/con"
        android:layout_width="wrap_content"
        android:layout_height="wrap_content"
        android:layout_marginTop="2dp"
        android:textSize="30sp"
        android:layout_marginLeft="20dp"/>
    <TextView
        android:layout_width="wrap_content"
        android:layout_height="wrap_content"
        android:text="v-1.0-a"
        android:layout_marginTop="400dp"
        android:layout_marginLeft="180dp"/>
</LinearLayout>
2)逻辑代码
package com.me.androidstudy;

import android.app.Activity;
import android.os.Bundle;
import android.view.View;
import android.widget.Button;
import android.widget.EditText;
import android.widget.TextView;

import androidx.annotation.Nullable;

public class Activity_ui_1 extends Activity {
    EditText userName,password;
    Button login;
    TextView con;
    //绑定控件
    public void initView(){
        userName = findViewById(R.id.userName);
        password = findViewById(R.id.password);
        login = findViewById(R.id.login);
        con = findViewById(R.id.con);
    }
    @Override
    protected void onCreate(@Nullable Bundle savedInstanceState) {
        super.onCreate(savedInstanceState);
        setContentView(R.layout.activity_ui_1);
        initView();
        login.setOnClickListener(new View.OnClickListener() {
            @Override
            public void onClick(View v) {
                String userName_str = userName.getText().toString();
                String password_str = password.getText().toString();
                String str = "用户名:"+ userName_str+"
"+
                             "密码:"+password_str+"
";
                con.setText(str);
            }
        });
    }
}
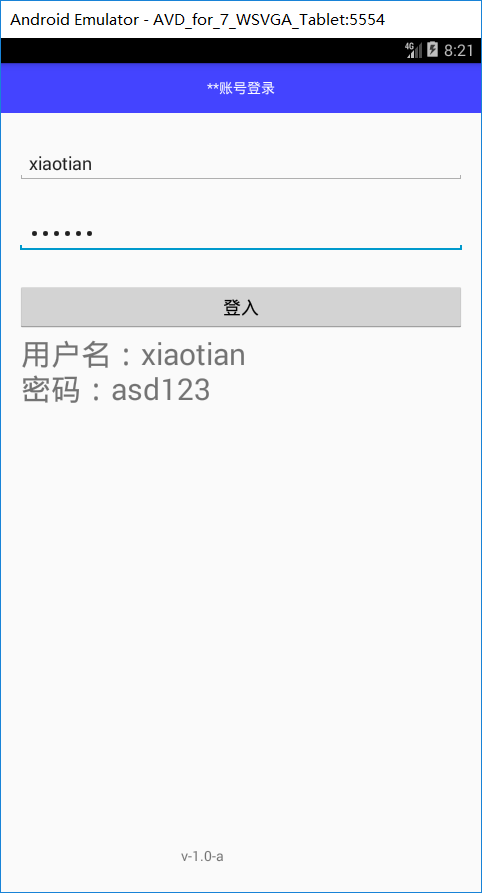
3)测试
6、复选框控件CheckBox
Android中checkbox默认为复选框,也就是多选,实现单选的话,可以让checkbox添加监听,当已经有一个点击了,点击另外一个的时候,修改默认的状态,实现单选。
7、图片控件ImageView
ImageView和ImageButton在用src指定图片的时候,不设置具体宽高,显示效果一样; 设置了具体宽高,若宽高不是图片的原始大小,ImageView会根据宽高放大或者缩小,ImageButton会显示原始图片大小。
8、圆形单选框RadioButton和RadioButton的容器RadioGroup
1)每个RadioGroup中的RadioButton同时只能有一个被选中
2)不同的RadioGroup中的RadioButton互不相干,即如果组A中有一个选中了,组B中依然可以有一个被选中
3)大部分场合下,一个RadioGroup中至少有2个RadioButton
9、进度条SeekBar、ProgressBar
1)SeekBar是进度条。我们使用进度条时,可以使用系统默认的进度条;也可以自定义进度条的图片和滑块图片等。
2)案例功能:手动拖动进度条,TextView中文字显示进度的改变。
10、下拉框:Spinner
1)Spinner其实就是一个列表选择框。不过Android的列表选择框并不需要显示下拉列表,而是相当于弹出一个菜单供用户选择。
2)Spinner 与 Gallery 都继承了AbsSpinner,AbsSpinner 继承了AdapterView,因此它也表现出AdapterView的特征:只要为AdapterView提供Adapter即可。
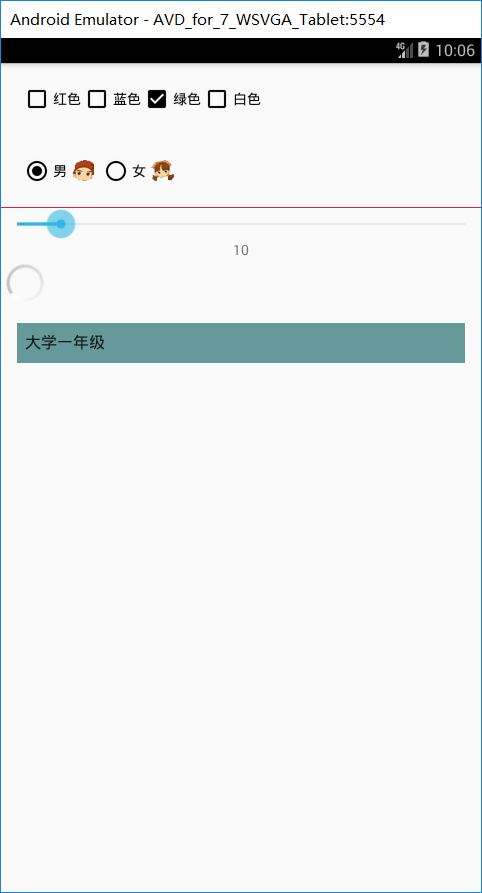
11、组合案例:
1、xml文件:
<?xml version="1.0" encoding="utf-8"?>
<LinearLayout xmlns:android="http://schemas.android.com/apk/res/android"
    android:orientation="vertical" android:layout_width="match_parent"
    android:layout_height="match_parent">
    <LinearLayout
        android:layout_width="match_parent"
        android:layout_height="wrap_content"
        android:orientation="horizontal"
        android:layout_margin="20dp">
        <CheckBox
            android:layout_width="wrap_content"
            android:layout_height="wrap_content"
            android:text="红色"/>
        <CheckBox
            android:layout_width="wrap_content"
            android:layout_height="wrap_content"
            android:text="蓝色"/>
        <CheckBox
            android:layout_width="wrap_content"
            android:layout_height="wrap_content"
            android:checked="true"
            android:text="绿色"/>
        <CheckBox
            android:layout_width="wrap_content"
            android:layout_height="wrap_content"
            android:text="白色"/>
    </LinearLayout>
    <RadioGroup
        android:layout_width="match_parent"
        android:layout_height="wrap_content"
        android:orientation="horizontal"
        android:layout_margin="20dp">
        <RadioButton
            android:layout_width="wrap_content"
            android:layout_height="wrap_content"
            android:text="男"/>
        <ImageView
            android:layout_width="wrap_content"
            android:layout_height="wrap_content"
            android:src="@drawable/m1"
            android:layout_margin="5dp"/>

        <RadioButton
            android:layout_width="wrap_content"
            android:layout_height="wrap_content"
            android:text="女"/>

        <ImageView
            android:layout_width="wrap_content"
            android:layout_height="wrap_content"
            android:src="@drawable/f1"
            android:layout_margin="5dp"/>

    </RadioGroup>

    <ImageView
        android:id="@+id/imageView2"
        android:layout_width="match_parent"
        android:layout_height="wrap_content"
        android:src="@color/colorAccent" />
    <SeekBar
        android:id="@+id/my_seekBar"
        android:layout_width="match_parent"
        android:layout_height="wrap_content"/>
    <TextView
        android:id="@+id/my_seekBar_num"
        android:layout_width="match_parent"
        android:layout_height="wrap_content"
        android:gravity="center"
        android:text="0"
        />

    <ProgressBar
        android:layout_width="wrap_content"
        android:layout_height="wrap_content"/>
    <Spinner
        android:layout_width="match_parent"
        android:layout_height="40dp"
        android:entries="@array/grade"
        android:background="#669999"
        android:layout_margin="16dp"
        />

</LinearLayout>
2、逻辑代码:
package com.me.androidstudy;


import android.app.Activity;
import android.os.Bundle;
import android.widget.SeekBar;
import android.widget.TextView;

public class Activity_ui_2 extends Activity {
    SeekBar mySeekBar;
    TextView textView;
    public void initView(){
        mySeekBar = findViewById(R.id.my_seekBar);
        textView = findViewById(R.id.my_seekBar_num);
    }
    public void action(){
        mySeekBar.setOnSeekBarChangeListener(new SeekBar.OnSeekBarChangeListener() {
            @Override
            public void onProgressChanged(SeekBar seekBar, int progress, boolean fromUser) {
                textView.setText(String.valueOf(progress));
            }

            @Override
            public void onStartTrackingTouch(SeekBar seekBar) {

            }

            @Override
            public void onStopTrackingTouch(SeekBar seekBar) {

            }
        });
    }
    @Override
    protected void onCreate(Bundle savedInstanceState) {
        super.onCreate(savedInstanceState);
        setContentView(R.layout.activity_ui_2);
        initView();
        action();
    }
}
3、测试:

未完待续。。。