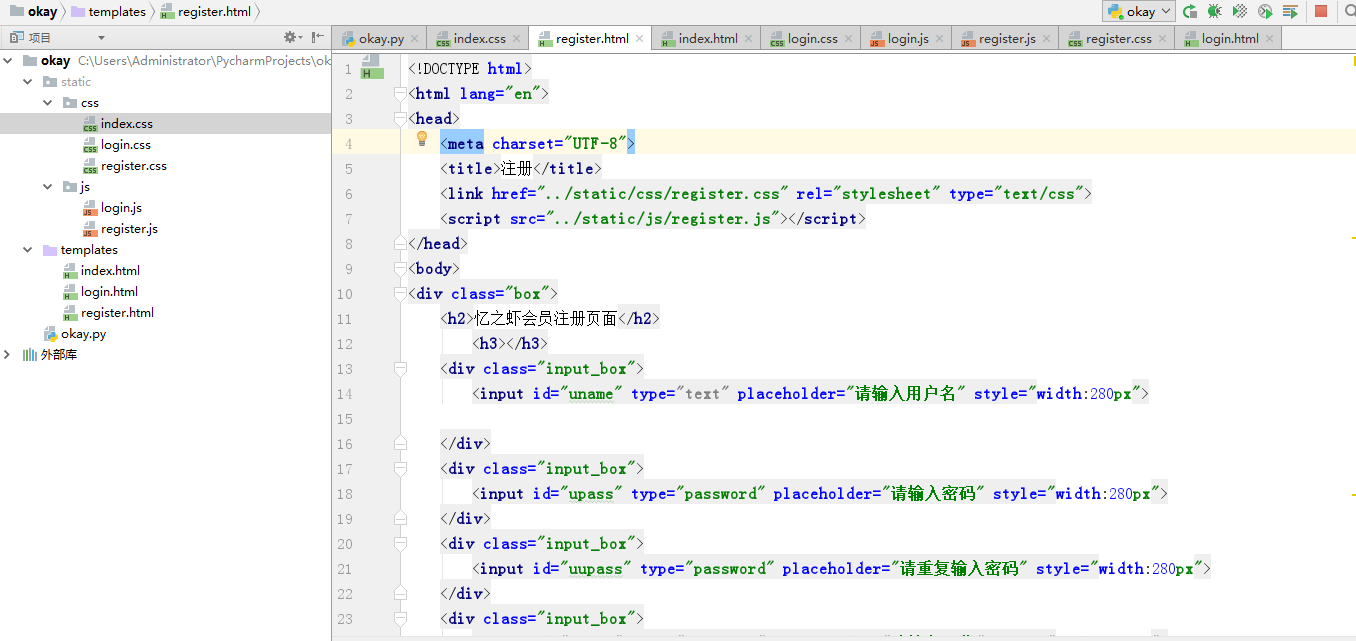
1.新建Flask项目。
2.设置调试模式。
3.理解Flask项目主程序。
4.使用装饰器,设置路径与函数之间的关系。
5.使用Flask中render_template,用不同的路径,返回首页、登录员、注册页。
6.用视图函数反转得到URL,{{url_for(‘login’)}},完成导航条里的链接。
python:
from flask import Flask,render_template

app = Flask(__name__)

@app.route('/')
def index():
    return render_template('index.html')

@app.route('/login/')
def login():
    return render_template('login.html')

@app.route('/register/')
def register():
    return render_template('register.html')

if __name__ == '__main__':
    app.run(debug=True)
<!DOCTYPE HTML> <html> <head lang="en"> <meta charset="UTF-8"> <title>首页</title> <link href="../static/CSS/index.css" rel="stylesheet" type="text/css"> <style type="text/css"> a herf{font-family: 华文宋体;} select{font-family: 华文宋体;} </style> </head> <body> <div> <a href="{{url_for('index')}}"> 首页</a> <a href="#">图片大全</a> <a href="#">影视赏析</a> <a href="#">美文分享</a> <a href="#">新闻娱乐</a> </div> <div style="float: right"><a href="{{ url_for('register')}}"> 注册</a>&<a href="{{ url_for('login') }}"> 登录</a></div> <div style="float: right"> <input type="text" name="search" style="height:20px;300px"> <input type="button" value="搜索"> </div> </nav> <div class="copyright"> <p>Copyright 版权所有忆之虾</p> </div> </body> </html>
<!DOCTYPE html>
<html lang="en">
<head>
    <meta charset="UTF-8">
    <title>登录 </title>
    <link href="../static/css/login.css" rel="stylesheet" type="text/css">
    <script src="../static/js/login.js"></script>
</head></h2>
<body>
<div class="box">
    <h2>忆之虾会员登录页面</h2>
        <h3></h3>
    <div class="input_box">
        <input id="uname" type="text" placeholder="请输入用户名" style="280px">
        <input id="upass" type="password" placeholder="请输入密码" style="280px">
    </div>

    <br>
   <div id="error_box"><br></div>

    <div class="input_box">
        <button onclick="fnLogin()">登录</button><br>

    </div>
 <div class="line">

        最终解释权归忆之虾所有

    </div>
</div>
<script>
    window.alert("go!")
</script>
</body>
</html>
<!DOCTYPE html>
<html lang="en">
<head>
    <meta charset="UTF-8">
    <title>注册</title>
    <link href="../static/css/register.css" rel="stylesheet" type="text/css">
    <script src="../static/js/register.js"></script>
</head>
<body>
<div class="box">
    <h2>忆之虾会员注册页面</h2>
        <h3></h3>
    <div class="input_box">
        <input id="uname" type="text" placeholder="请输入用户名" style="280px">

    </div>
    <div class="input_box">
        <input id="upass" type="password" placeholder="请输入密码" style="280px">
    </div>
    <div class="input_box">
        <input id="uupass" type="password" placeholder="请重复输入密码" style="280px">
    </div>
    <div class="input_box">
        <input id="nname" type="password" placeholder="请输入昵称" style="280px">
    </div>
    </div>
    <br>
   <div id="error_box"><br></div>
    <div class="input_box">
        <button onclick="fnLogin()">注册</button><br>
        注册遇到问题?

    </div>
</div>
<script>
    window.alert("go!")
</script>
</body>
</html>
全部代码展览
