第十九章,配置Squid服务器
一、代理服务器简介
19.1.1:什么是代理服务器
代理服务器的功能就是代理网络用户去取的网络信息,好比是网络信息的中转站,大多被用来连接互联网和局域网。代理服务器好像一个缓冲区,能够显著提高网页浏览速度和效率;代理服务器是Internet链路级网关所提供的安装全功能,起到防火墙作用;
代理服务器作为连接Internet与局域网之前的桥梁,在实际应用中发挥着极其重要的作用,他可用于多个目的,最基本的功能是连接,此外还包括安全性、缓存、内容过滤、和访问控制等功能;
局域网上不能直接上网的主机将上网请求发给代理服务器,然后代理服务器代理完成这个请求,将所要浏览的服务器主页缓存到本地,然后发送给请求者;
19.1.2:代理服务器的功能
1.充当局域网与外部网络的连接出口:可以将内部的网络状态对外部屏蔽
2.防火墙功能
3.网址过滤和访问权限控制:代理服务器可以设置IP过滤,对内部和外界的Internet地址过滤,限制不同用户的访问权限
4.提高访问速度
5.节省IP地址开销
19.1.3:代理服务器的类型
1.标准代理服务器:需要客户机在浏览器中指定代理服务器的地址、端口;
2.透明代理服务器:适用于企业的网关主机(共享接入Internet)中,客户机不需要指定代理服务器地址、端口等信息,代理服务器需要设置防火墙策略将客户机的Web访问数据转交给代理服务程序处理;
3.反向代理服务器:是指以代理服务器来接受internet上的连接请求,然后将请求转发给内部网络上的服务器,并将从服务器上得到的结果返回给internet上请求连接的客户端,此时代理服务器对外就表现为一个服务器。
19.1.4:Squid简介
-
Squid与Linux其他代理服务器相比,下载安装简单,配置简单灵活,支持缓存和多种协议。用Squid结合Iptables的解决方案,就可以获得通过缓存高性能的同时能够无缝连的访问Internet
-
Squid接受用户下载请求,并自动处理下载数据;Squid收到申请后,首先与访问控制列表中的访问规则相对照,如果满足规则,则在缓存中查找是否存在需要的信息。如果有,则将缓存中的信息传递给客户端;如果没有则Squid连接到所申请的网页,接着把主页传给用户,同时自己也保留一个备份,当别的用户申请时,Squid直接将备份立即传递给用户
-
Squid支持HTTP、FTP、gopher、SSL和WAIS等协议;与其他代理服务器不同,Squid是一个单独的、非模块化的、I/O驱动的进程来处理所有客户端请求
-
Squid将数据元缓存在内存,同时也将缓存DNS查找结果,除此之外,它还支持非模块化的DNS查询,对失败的请求进行消极缓存。
-
Squid的另一个优越性在于他使用访问控制列表(ACL)和访问权限列表(ARL)。
-
Squid主要组成部分
服务名:
squid
主程序:/usr/sbin/squid
配置目录:/etc/squid
主配置文件:/etc/squid/squid.conf
监听tcp端口号:3128
默认访问日志文件:/var/log/squid/access.log
二、Squid的安装和配置
19.2.1:安装Squid服务器软件包
1.yum install squid # 使用的yum安装
2.编译安装
①下载安装包:http://www.p-pp.cn/app/squid/squid-3.5.23.tar.gz
②编译安装
[root@Centos6 src]#tar -xvf squid-3.5.23.tar.gz
[root@Centos6 src]#cd squid-3.5.23/
[root@Centos6 squid-3.5.23]#./configure --prefix=/usr/local/squid --sysconfdir=/etc --enable-linux-netfilter --enable-async-io=240 --enable-default-err-language=Simplify_Chinese --disable-poll --enable-epoll --enable-gnuregex
[root@Centos6 squid-3.5.23]#make -j 4 && make install

--enable-async-io:异步I/O可以用来提升存储性能。aufs模块使用大量的线程来执行磁盘I/O操作,N_THREADS参数改变Squid使用的线程数量。
--enable-async-io:等同于如下三个选项,用于异步IO,提升存储性能:
--with-pthreads:在编译过程中链接到系统的P线程库,aufs存储模块是Squid中唯一需要使用线程的部分。
--with-aufs-threads=N_THREADS:指定aufs存储机制使用的线程数量。Squid会根据cache目录的数量,自动计算需要使用多少线程。
--enable-storeio=ufs,aufs,diskd, coss, null:告诉Squid编译时使用哪个存储模块,源码中/src/fs下面有所有可用的存储模块
 --enable-default-err-language=Simplify_Chinese:错误信息的显示语言
--enable-linux-netfilter:使用内核过滤,目的是对透明模式提供支持
--disable-poll  --enable-epoll:关闭默认的poll模式,开启epoll模式提升性能
--enable-gnuregex:允许规则中使用GNU正则表达式

poll是Linux中的字符设备驱动中的一个函数。Linux 2.5.44版本后,poll被epoll取代
③优化路径
[root@Centos6 squid-3.5.23]#ln -s /usr/local/squid/sbin/squid /usr/local/sbin/
[root@Centos6 squid-3.5.23]#useradd -M -s /sbin/nologin squid
[root@Centos6 squid-3.5.23]#chown -R squid:squid /usr/local/squid/va
④添加squid的启动脚本
[root@Centos6 squid-3.5.23]#vim /etc/init.d/squid # 内容如下Squid启动脚本


#!/bin/bash
#chkconfig: 2345 90 25
#discription: /etc/squid.conf
#pidfile: /usr/local/squid/var/run/squid.pid
#description: squid - internet object cache.
PID="usr/local/squid/var/run/squid.pid"
CONF="/etc/squid.conf"
CMD="/usr/local/squid/sbin/squid"
case "$1" in
start)
    netstat -anpt | grep squid  &>/dev/null
    if [ $? -eq 0 ]
     then
      echo "squid is running"
        else
      echo "正在启动squid…….."
      $CMD
    fi
;;
stop)
   $CMD -k kill &> /dev/null
   rm -rf $PID &> /dev/null
;;
status)
   [ -f $PID ] &> /dev/null
       if [$? -eq 0 ]
           then
       netstat -anpt | grep squid
         else
            echo "squid is not running"
         fi
;;
restart)
$0 stop &> /dev/null
      echo "正在关闭squid……"
        $0 start &> /dev/null
      echo "正在启动squid……"
;;
reload)
    $CMD -k reconfigure
;;
check)
    $CMD -k parse
;;
*)
   echo "用法:$0 {start | stop |restart | reload | check | status}"
;;
esac
[root@Centos6 squid-3.5.23]#chmod +x /etc/init.d/squid
[root@Centos6 squid-3.5.23]#chkconfig --add squid
⑤检查配置
[root@Centos6 squid-3.5.23]## squid -k parse       ##检查配置文件的语法是否正确
[root@Centos6 squid-3.5.23]##squid –k reconfigure   ##重新加载,相当于reload
[root@Centos6 squid-3.5.23]## squid -z           ##初始化缓存目录
[root@Centos6 squid-3.5.23]## squid              ##启动squid服务
19.2.2:/etc/squid/squid.conf文件详解
该文件由访问控制列表、参数设置和刷新模式条目3部分组成。该文件内容比较简单,可以参考/usr/share/doc/squid-3.5.20/squid.conf.documented 模板文件
#acl all src 0.0.0.0/0.0.0.0 and http_access allow all选项定义了一个访问控制列表。详细情况参见和Squid软件
#携带的文档。这里的访问控制列表允许所有对代理服务的访问,因为这里该代理是加速web服务器。
acl all src 0.0.0.0/0.0.0.0                 #允许所有IP访问
acl manager proto http                 #manager url协议为http
acl localhost src 127.0.0.1/255.255.255.255  #允午本机IP
acl to_localhost dst 127.0.0.1                 #允午目的地址为本机IP
acl Safe_ports port 80                # 允许安全更新的端口为80
acl CONNECT method CONNECT        #请求方法以CONNECT
http_access allow all                #允许所有人使用该代理.因为这里是代理加速web服务器
http_reply_access allow all                #允许所有客户端使用该代理

acl OverConnLimit maxconn 16        #限制每个IP最大允许16个连接,防止攻击
http_access deny OverConnLimit

icp_access deny all                        #禁止从邻居服务器缓冲内发送和接收ICP请求.
miss_access allow all                #允许直接更新请求
ident_lookup_access deny all                                #禁止lookup检查DNS
http_port 8080 transparent                                #指定Squid监听浏览器客户请求的端口号。

hierarchy_stoplist cgi-bin ?                #用来强制某些特定的对象不被缓存,主要是处于安全的目的。
acl QUERY urlpath_regex cgi-bin ?
cache deny QUERY

cache_mem 1 GB        #这是一个优化选项,增加该内存值有利于缓存。应该注意的是:
                     #一般来说如果系统有内存,设置该值为(n/)3M。现在是3G 所以这里1G
fqdncache_size 1024        #FQDN 高速缓存大小
maximum_object_size_in_memory 2 MB        #允许最大的文件载入内存

memory_replacement_policy heap LFUDA  #动态使用最小的,移出内存cache
cache_replacement_policy heap LFUDA         #动态使用最小的,移出硬盘cache

cache_dir ufs /home/cache 5000 32 512  #高速缓存目录 ufs 类型 使用的缓冲值最大允午1000MB空间,
#32个一级目录,512个二级目录

max_open_disk_fds 0                                 #允许最大打开文件数量,0 无限制
minimum_object_size 1 KB                         #允午最小文件请求体大小
maximum_object_size 20 MB                 #允午最大文件请求体大小

cache_swap_low 90                            #最小允许使用swap 90%
cache_swap_high 95                            #最多允许使用swap 95%

ipcache_size 2048                                # IP 地址高速缓存大小 2M
ipcache_low 90                                #最小允许ipcache使用swap 90%
ipcache_high 95                                  #最大允许ipcache使用swap 90%


access_log /var/log/squid/access.log squid        #定义日志存放记录
cache_log /var/log/squid/cache.log squid
cache_store_log none                        #禁止store日志

emulate_httpd_log on        #将使Squid仿照Web服务器的格式创建访问记录。如果希望使用
                                #Web访问记录分析程序,就需要设置这个参数。

refresh_pattern . 0 20% 4320 override-expire override-lastmod reload-into-ims ignore-reload   #更新cache规则

acl buggy_server url_regex ^http://.... http://          #只允许http的请求
broken_posts allow buggy_server

acl apache rep_header Server ^Apache                 #允许apache的编码
broken_vary_encoding allow apache

request_entities off                                        #禁止非http的标分准请求,防止攻击
header_access header allow all                        #允许所有的http报头
relaxed_header_parser on                                #不严格分析http报头.
client_lifetime 120 minute                                #最大客户连接时间 120分钟

cache_mgr sky@test.com                        #指定当缓冲出现问题时向缓冲管理者发送告警信息的地址信息。

cache_effective_user squid                        #这里以用户squid的身份Squid服务器
cache_effective_group squid

icp_port 0                       #指定Squid从邻居服务器缓冲内发送和接收ICP请求的端口号。
                     #这里设置为0是因为这里配置Squid为内部Web服务器的加速器,
                     #所以不需要使用邻居服务器的缓冲。0是禁用

# cache_peer 设置允许更新缓存的主机,因是本机所以127.0.0.1
cache_peer 127.0.0.1 parent 80 0 no-query default multicast-responder no-netdb-exchange
cache_peer_domain 127.0.0.1
hostname_aliases 127.0.0.1

error_directory /usr/share/squid/errors/Simplify_Chinese        #定义错误路径

always_direct allow all                # cache丢失或不存在是允许所有请求直接转发到原始服务器
ignore_unknown_nameservers on        #开反DNS查询,当域名地址不相同时候,禁止访问
coredump_dir  /var/log/squid                 #定义dump的目录

max_filedesc 2048                #最大打开的文件描述

half_closed_clients off        #使Squid在当read不再返回数据时立即关闭客户端的连接。
                                #有时read不再返回数据是由于某些客户关闭TCP的发送数据
                                #而仍然保持接收数据。而Squid分辨不出TCP半关闭和完全关闭。

buffered_logs on #若打开选项“buffered_logs”可以稍稍提高加速某些对日志文件的写入,该选项主要是实现优化特性。

#防止天涯盗链,转嫁给百度
acl tianya referer_regex -i tianya
http_access deny tianya
deny_info  tianya
#阻止baidu蜘蛛
acl baidu req_header User-Agent Baiduspider
http_access deny baidu
#限制同一IP客户端的最大连接数
acl OverConnLimit maxconn 128
http_access deny OverConnLimit

#防止被人利用为HTTP代理,设置允许访问的IP地址
acl myip dst 222.18.63.37
http_access deny !myip

#允许本地管理
acl Manager proto cache_object
acl Localhost src 127.0.0.1 222.18.63.37
http_access allow Manager Localhost
cachemgr_passwd 53034338 all
http_access deny Manager

#仅仅允许80端口的代理
acl all src 0.0.0.0/0.0.0.0
acl Safe_ports port 80 # http
http_access deny !Safe_ports
http_access allow all

#Squid信息设置
visible_hostname happy.swjtu.edu.cn
cache_mgr  ooopic2008@qq.com

#基本设置
cache_effective_user squid
cache_effective_group squid
tcp_recv_bufsize 65535 bytes

#2.6的反向代理加速配置
cache_peer 127.0.0.1 parent 80 0 no-query originserver

#错误文档
error_directory /usr/local/squid/share/errors/Simplify_Chinese

#单台使用,不使用该功能
icp_port 0

hierarchy_stoplist cgi-bin ?

acl QUERY urlpath_regex cgi-bin ? .php .cgi .avi .wmv .rm .ram .mpg .mpeg .zip .exe
cache deny QUERY

acl apache rep_header Server ^Apache
broken_vary_encoding allow apache


refresh_pattern ^ftp:           1440 20%     10080
refresh_pattern ^gopher:        1440 0%    1440
refresh_pattern .             0    20%     4320

cache_store_log none
pid_filename /usr/local/squid/var/logs/squid.pid
emulate_httpd_log on
squid常用配置选项
/etc/squid/squid.conf
http_port 3128  (还可以只监听一个IP http_port 192.168.0.1:3128)
hierarchy_stoplist cgi-bin ? #用来强制某些特定的对象不被缓存,主要是处于安全的目的
cache_mem 64MB  #缓存占内存大小
maximum_object_size 4096KB  #最大缓存块
reply_body_max_size  1024000 allow all      #限定下载文件大小
access_log /var/log/squid/access.log    #访问日志存放的地方
visible_hostname    proxy.test.xom  #可见的主机名
cache_dir ufs /var/spool/squid  100 16 256
#ufs:缓存数据的存储格式
#/var/spool/squid    缓存目录
#100:缓存目录占磁盘空间大小(M)
#16:缓存空间一级子目录个数
#256:缓存空间二级子目录个数
cache_mgr webmaster@test.com    #定义管理员邮箱
http_access deny all    #访问控制
19.2.3:Squid访问控制列表
ACL元素类型
- src:源地址(即客户机IP地址)
- dst:目标地址(即服务器IP地址)
- srcdomain:源名称(即客户机名称)
- dstdomain:目标名称(即服务器名称)
- time:一天中的时刻和一周内的一天
- url_regex:URL规则表达式匹配
- urlpath_regex:URL-path规则表达式匹配,略去协议和主机名
- proxy_auth:通过外部程序进行用户验证
- maxconn:单一IP的最大连接数
匹配模式
| ^ | 匹配数据的开头 |
| $ | 匹配数据的结尾 |
| . | 匹配任意字符 |
| 匹配标点符号 | |
| [ab] | 匹配一个字符a或b |
| [a-z] | 匹配任意一个小写字母 |
| [a-z 0-9] | 匹配任意小写字母或数字 |
方式举例
# 个人配置
# 设置允许使用代理服务器
acl person_allow src "/etc/squid/person_allow.list"
http_access allow person_allow
# 设置拒绝使用代理服务器
acl person_deny src "/etc/squid/person_deny.list"
http_access deny person_deny
# 屏蔽网站cf.qq.com
acl block_cf dstdomain -i cf.qq.com
http_access deny block_cf
#屏蔽包含"pan"的url路径
acl block_all_pan url_regex -i pan
http_access deny block_all_pan
# 禁止下载gif和rpm文件
acl forbid_gif-rpm urlpath_regex -i .gif$.rpm$
http_access deny forbid_gif-rpm
#禁止用户访问端口21、80、1000-1024
acl forbid_port port 21 80 1000-1024
http_access deny forbid_port
# 限制192.168.9.1只能在周一到周五9.00~18.00使用代理服务器
acl limit_src src 192.168.9.7
acl limit_time time MTWHF 9:00-18:00
http_access allow limit_src limit_time
#禁止MAC地址为00:00:00:00:00:10的客户端使用代理服务器
acl block_MAC arp 00:00:00:00:00:10
http_access deny block_MAC
19.2.4:Squid配置实例
1.打开内核路由转发功能,修改/etc/sysctl.conf ,将net.ipv4.ip_forward的参数设置为1
net.ipv4.ip_forward=1
[root@centos7 ~]#sysctl -p # 让配置内核参数生效 或者/proc/sys/net/ipv4/ip_forward,将这个文件的内容改为1
2.编辑/etc/squid/squid.conf
在访问控制列表添加
# 配置允许192.168.0.0/24
acl client src 192.168.0.0/24
http_access allow client

# 配置端口
http_port 3128
 #用来强制某些特定的对象不被缓存,主要是处于安全的目的。
hierarchy_stoplist cgi-bin ?
# 配置缓存区大小
cache_mem 512 MB
# 配置硬盘缓存,20G,一级目录16个,二级子目录256个
cache_dir ufs /var/spool/squid 20480 16 256
# 配置日志路径
cache_log /var/log/squid/cache.log
# 配置访问日志路径
cache_access_log /var/log/squid/access.log
# 配置网页缓存日志路径
cache_store_log /var/log/squid/store.log
# 进程所有者
cache_effective_user squid
# 进程所属组
cache_effective_group squid
# DNS服务器
dns_nameservers 223.5.5.5
# 可见计算机主机名
visible_hostname 192.168.9.7
# 电子邮件地址
cache_mgr root@p-pp.cn
3.检查配置文件语法
squid -k parse.
4.初始化squid
[root@centos7 ~]# squid -z # 初始化
[root@centos7 ~]#ls /var/spool/squid/ # 查看一级目录
19.2.5:控制squid
Centos 6 service
Centos 7 systemctl
三、配置客户端
19.3.1:Linux客户端
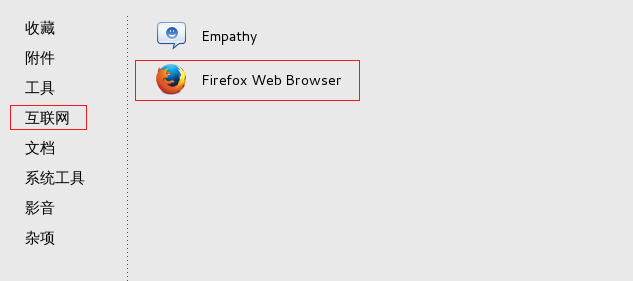
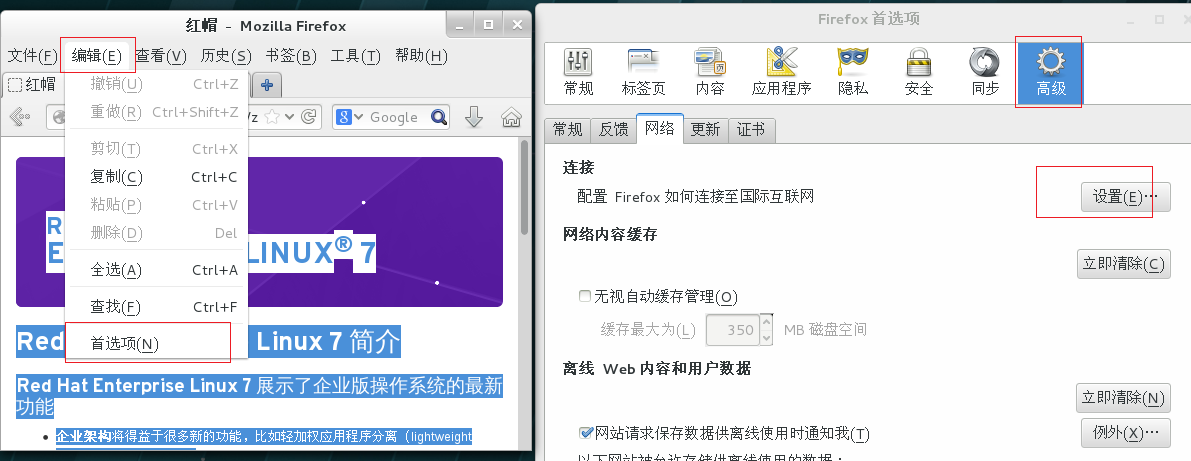
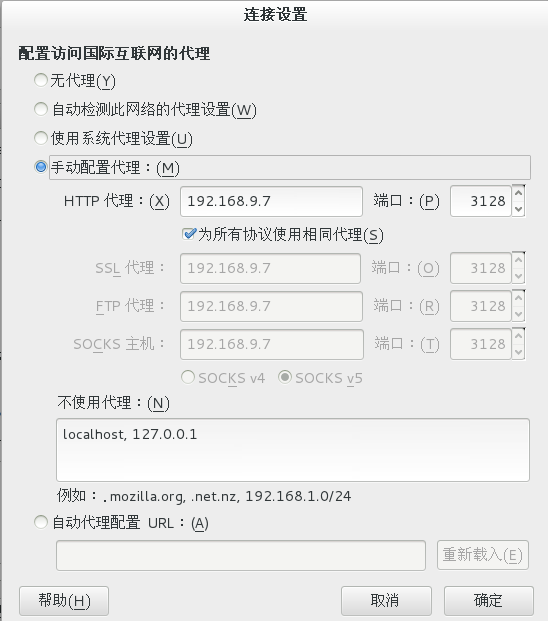
linux也可以编辑/etc/profile文件,使其在终端可以使用代理
HTTP_PROXY=http://172.16.1.111:3128
HTTPS_PROXY=http://172.16.1.111:3128
FTP_PROXY=http://172.16.1.111:3128
NO_PROXY=192.168.1.,192.168.4.
export HTTP_PROXY HTTPS_PROXY FTP_PROXY NO_PROXY
四、Squid日志
19.4.1:日志文件简介
①Squia服务器的日志文件默认都存在/var/log/squid 目录中,用来记录访问日志,缓存日志,和网页缓存日志;
②在/etc/squid/squid.conf配置文件中,可以使用access_log参数指定access.log日志文件,使用cache_log指定cache.log日志文件,使用cache_store_log参数指定store.log日志文件
③其中最重要的是访问日志,通过查看访问日志可以知道Squid服务器运行的高峰时段、每个客户端的使用情况等众多信息。Squid访问日志格式可以是原始日志格式和普通日志格式,默认使用原始日志记录,以下是访问日志示例内容
1553083603.817 116 192.168.9.1 TCP_MISS/200 4701 GET http://www.p-pp.cn/ - HIER_DIRECT/101.132.76.70 text/html
| 状态信息编码 | 描述 |
|
1553083603.817 |
客户度端访问时间 |
| 116 | 处理缓存花费的时间 |
| 192.168.9.1 | 客户端IP地址或是FQDN |
| TCP_MISS/200 | 结果信息编码/状态信息编码 |
| 4701 | 缓存字节数 |
| GET | HTTP请求方法 |
| http://www.p-pp.cn/ | 目的地址的URL |
| - | 默认未使用 |
| HIER_DIRECT/101.132.76.70 | 缓存级别/目的IP |
| text/html | 缓存对象类型 |
19.4.2:使用webalizer时限Squid流量分析
webalizer是一款高效、免费的服务器日志分析程序。其分析结果以HTML文件格式保存,从而可以方便通过Web服务器进行浏览。
1安装:[root@Centos6 squid-3.5.23]#yum install webalizer -y
2.配置
1)编辑/etc/squid/webalizer_squid.conf
[root@Centos6 ~]#cp /etc/webalizer.conf /etc/squid/webalizer_squid.conf # 复制模板文件
[root@Centos6 ~]#vim /etc/squid/webalizer_squid.conf # 修改标红的即可
LogFile        /usr/local/squid/var/log/squid/access.log
LogType squid
OutputDir      /var/www/usage_squid
HistoryName     /var/lib/webalizer/webalizer.hist
Incremental     yes
IncrementalName /var/lib/webalizer/webalizer.current
PageType        htm*
PageType        cgi
PageType        php
PageType        shtml
DNSCache        /var/lib/webalizer/dns_cache.db
DNSChildren     10
Quiet           yes
FoldSeqErr      yes
HideURL         *.gif
HideURL         *.GIF
HideURL         *.jpg
HideURL         *.JPG
HideURL         *.png
HideURL         *.PNG
HideURL         *.ra
SearchEngine    yahoo.com       p=
SearchEngine    altavista.com   q=
SearchEngine    google.com      q=
SearchEngine    eureka.com      q=
SearchEngine    lycos.com       query=
SearchEngine    hotbot.com      MT=
SearchEngine    msn.com         MT=
SearchEngine    infoseek.com    qt=
SearchEngine    webcrawler      searchText=
SearchEngine    excite          search=
SearchEngine    netscape.com    search=
SearchEngine    mamma.com       query=
SearchEngine    alltheweb.com   query=
SearchEngine    northernlight.com  qr=
2)创建/var/www/html/usage_squid目录
[root@Centos6 html]#mkdir /var/www/html/usage_squid
[root@Centos6 html]#cp /var/www/usage/{msfree,webalizer}.png /var/www/html/usage_squid/
3)声成统计分析
[root@Centos6 html]#webalizer -c /etc/squid/webalizer_squid.conf
3.访问webalizer
输入IP/webalizer_squid 即可访问

19.4.3:安装sarg日志分析
1.sarg下载地址:http://www.p-pp.cn/app/squid/sarg-2.3.7.tar.gz
sarg 命令常用选项:
-l 指定输入日志来源
-o 指定输出目录
-z 处理信息
-d 指定日期
2.安装依赖包:
Centos6:gd-devel-2.0.35-11.el6.x86_64.rpm,rpm下载地址:http://www.p-pp.cn/app/squid/gd-devel-2.0.35-11.el6.x86_64.rpm
[root@Centos6 gd-devel]#yum -y install gd-devel-2.0.35-11.el6.x86_64.rpm
Centos 7:http://www.p-pp.cn/app/squid/gd-devel.tar.gz,这个是个yum源,解压配置yum源即可安装
3.编译安装
[root@Centos6 src]#tar -xf sarg-2.3.7.tar.gz
[root@Centos6 sarg-2.3.7]#./configure --prefix=/usr/local/sarg --sysconfdir=/etc/sarg --enable-extraprotection && make && make install
4.配置
里面要改的东西较多,可以删掉/etc/sarg/sarg.conf,在创建一个将红色部分的内容复制进去
7  access_log /usr/local/squid/var/logs/access.log
25  title "Squid User Access Reports"
120  output_dir /var/www/html/sarg
178  user_ip no
184  topuser_sort_field connect  reverse
190  user_sort_field connect reverse
206  exclude_hosts /usr/local/sarg/noreport
257  overwrite_report no
289  mail_utility mailq.postfix
     charset UTF-8
516  weekdays 0-6
523  hours 9-12,14-16,18-20
633  www_document_root /var/www/html


access_log /usr/local/squid/var/logs/access.log
title "Squid User Access Reports"
output_dir /var/www/html/sarg
user_ip no
topuser_sort_field connect  reverse
user_sort_field connect reverse
exclude_hosts /usr/local/sarg/noreport
overwrite_report no
mail_utility mailq.postfix
charset UTF-8
weekdays 0-6
hours 9-12,14-16,18-20
www_document_root /var/www/html
①setenforce 0 # g关闭SElinux
②[root@Centos6 sarg]#touch /usr/local/sarg/noreport #该文件中添加的域名将不被显示在排序中
③[root@Centos6 sarg]#sarg
④Ip/sarg # 访问日志
5.计划任务
计划任务
vim /usr/local/sarg/daily.sh
#!/bin/bash
#Get current date
TODAY=$(date +%d/%m/%Y)
#Get one week ago today
YESTERDAY=$(DATE -d "1 day ago" +%d/%m/%Y)
/usr/local/sarg/bin/sarg -l /usr/local/squid/var/logs/access.log -o /var/www/html/sarg -z -d $YESTERDAY-$TODAY &> /dev/null
exit 0

chmod +x /usr/local/sarg/daily.sh

crontab -e
20 10 * * * /usr/local/sarg/daily.sh

chkconfig crond on
五、缓存代理
19.5.1:
为了管理和查询Squid服务器的实时情况,在安装squid软件包的同时也一起安装了一个管理工具:cachemgr.cgi。通过Web页面访问cachemgr.cgi,可以查询Squi服务器的缓存活动、内存使用和分配、事件队列、IP地址的缓存状态以及DNS的查询统计‘。
①复制cachemgr.cgi文件
[root@centos7 ~]#cp /usr/lib64/squid/cachemgr.cgi /var/www/cgi-bin
②编辑/etc/squid/cachemgr.conf文件
localhost
③编辑/etc/httpd/conf.d/squid.conf
安装squid的时候默认已创建该文件,无需修改
④l浏览器打开http://192.168.9.7/cgi-bin/cachemgr.cgi,然后直接continue即可

19.5.2:Squid安全设置
可以使用ls /usr/lib64/squid查看目录中的外部认证程序
[root@centos7 ~]#ls /usr/lib64/squid/
basic_db_auth                 cachemgr.cgi                 helper-mux.pl
basic_getpwnam_auth           cert_tool                    log_db_daemon
basic_ldap_auth               digest_edirectory_auth       log_file_daemon
basic_msnt_multi_domain_auth  digest_file_auth             negotiate_kerberos_auth
basic_ncsa_auth               digest_ldap_auth             negotiate_kerberos_auth_test
basic_nis_auth                diskd                        ntlm_fake_auth
basic_pam_auth                ext_file_userip_acl          ntlm_smb_lm_auth
basic_pop3_auth               ext_kerberos_ldap_group_acl  ssl_crtd
basic_radius_auth             ext_ldap_group_acl           storeid_file_rewrite
basic_sasl_auth               ext_session_acl              unlinkd
basic_smb_auth                ext_time_quota_acl           url_fake_rewrite
basic_smb_auth.sh             ext_unix_group_acl           url_fake_rewrite.sh
basic_smb_lm_auth             ext_wbinfo_group_acl
1.创建认证账号文件,例如。创建user1和user2
[root@centos7 ~]#htpasswd -c /etc/squid/passwd user1
New password:
Re-type new password:
Adding password for user user1
[root@centos7 ~]#htpasswd /etc/squid/passwd user2
New password:
Re-type new password:
Adding password for user user2
2.无需在系统中创建用户,可以查看/etc/squid/passwd查看已经创建的用户账号
[root@centos7 ~]#cat /etc/squid/passwd
user1:$apr1$qkErpbNC$zzfAIHKck28HcoTlhf4Yu.
user2:$apr1$uCxVK3RL$Wt98QXjqJIUMX1Gp89PBh1
3.编辑/etc/squid/squid.conf文件
[root@centos7 ~]#vim /etc/squid/squid.conf
# 设置认证方式为basic,认证程序路径/usr/lib64/squid/ncsa_auth,认证程序读取的文件/etc/squid/passwdauth_param basic program /usr/lib64/squid/basic_ncsa_auth  /etc/squid/passwd

# 认证程序进程数5个
auth_param basic children 5

# 认证有效期为2小时当认证过期后,需要重新认证
auth_param basic credentialsttl 2 hous

# 认证提示内容
auth_param basic realm This is p-pp.cn Squid proxy caching

# 设置acl
acl auth_user proxy_auth REQUIRED
http_access allow auth_user