ppium+python+pytest自动化APP po模式脚本分离
原创 weixin_45237395 发布于2020-01-02 11:46:19 阅读数 1 收藏
编辑 展开
appium+python+pytest自动化 po模式脚本分离:环境需要:jdk+python+sdk+appium+appium-python-Client+手机(或模拟器)
具体环境看前面文章:
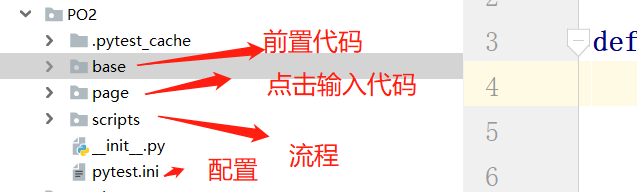
1前置代码:base_action.py文件
from appium import webdriver
def init_driver():
desired_caps = {}
# 设备信息
desired_caps[‘platformName’] = ‘Android’
desired_caps[‘platformVersion’] = ‘5.1’
desired_caps[‘deviceName’] = ‘127.0.0.1:62001’
# app的信息启动名和包名
desired_caps[‘appPackage’] = ‘com.android.settings’
desired_caps[‘appActivity’] = ‘.Settings’
# 中文输入允许
desired_caps[‘unicodeKeyboard’] = True
desired_caps[‘resetKeyboard’] = True
# 声明我们的driver对象
driver = webdriver.Remote(‘http://127.0.0.1:4723/wd/hub’, desired_caps)
return driver
3、点击输入脚本:display_page.py文件
from selenium.webdriver.common.by import By #导入By模块
class DisplayPage:
#显示按钮
display_button = By.XPATH,"//*[@text=‘显示’]"
#点击放大镜
search_button = By.ID,“com.android.settings:id/search”
#输入文字搜索框
input_text_view = By.ID,“android:id/search_src_text”
#点击返回按钮
back_button = By.CLASS_NAME,“android.widget.ImageButton”
def __init__(self,driver):
self.driver = driver
def click_display(self):
# 点击显示
# self.driver.find_element_by_xpath("//*[@text='显示']").click()
# self.driver.find_element(By.XPATH,"//*[@text='显示']").click() #这个跟上面这个是一样的
#调用find_elemnt()方法传入变量display_button
self.find_element(self.display_button).click()
def click_search(self):
# 点击放大镜
# self.driver.find_element_by_id("com.android.settings:id/search").click()
# self.driver.find_element(By.ID,"com.android.settings:id/search").click()
self.find_element(self.search_button).click()
def input_text(self,text):
# #输入文字
# self.driver.find_element_by_id("android:id/search_src_text").send_keys(text)
# self.driver.find_element(By.ID,"android:id/search_src_text").send_keys(text)
self.find_element(self.input_text_view).send_keys(text)
def click_back(self):
# #点击返回
# self.driver.find_element_by_class_name("android.widget.ImageButton").click()
# self.driver.find_element(By.CLASS_NAME,"android.widget.ImageButton").click()
self.find_element(self.back_button).click()
#自己定义一个方法调用
def find_element(self,loc):
return self.driver.find_element(loc[0],loc[1])
4、业务流程:test_dispaly.py文件:
#pytest必须导入OS,sy模块
import os,sys
sys.path.append(os.getcwd())
from appium import webdriver
from …base.base_driver import init_driver
from …page.display_page import DisplayPage
#进入设置操作
class TestDisplay:
def setup(self):
self.driver = init_driver()
self.display_page = DisplayPage(self.driver)
#定义流程执行函数
def test_modile_display_input(self):
#点击显示
self.display_page.click_display()
#点击放大镜
self.display_page.click_search()
# #输入文字
self.display_page.input_text(“hello”)
# #点击返回
self.display_page.click_back()
5、pytest.ini配置文件:
[pytest]
#添加命令参数
addopts = -s --html=report/report.html
#搜索那个文件夹
testpaths = ./scripts
#搜索文件名
python_files =test_.py
#类名
python_classes = Test
#函数名
python_functions = test_*
6、安装:
pytest生成报告的插件:pip install pytest-html
生成报告命令:pytest --html=report/report.html
安装pytest和allure:pip install pytest 和 pip install allure-pytest
7、|PO模式: