一、Allure安装
官网:https://docs.qameta.io/allure/
1、我下载的是2.10.0 的zip版本 https://repo.maven.apache.org/maven2/io/qameta/allure/allure-commandline/
2、然后解压,设置bin目录的环境变量
3、最后验证版本:allure --version
二、配置
1、添加属性,下面build中的插件会用到(注意版本11,根据你本地版本修改)
    <properties>
        <maven.compiler.source>11</maven.compiler.source>
        <maven.compiler.target>11</maven.compiler.target>
        <aspectj.version>1.8.10</aspectj.version>
        <maven.build.timestamp.format>yyyyMMddHHmmss</maven.build.timestamp.format>
    </properties>
2、依赖
    <dependencies>
        <dependency>
            <groupId>org.slf4j</groupId>
            <artifactId>slf4j-simple</artifactId>
            <version>1.7.25</version>
            <scope>compile</scope>
        </dependency>
        <dependency>
            <groupId>org.testng</groupId>
            <artifactId>testng</artifactId>
            <version>6.14.3</version>
        <dependency>
            <groupId>io.qameta.allure</groupId>
            <artifactId>allure-testng</artifactId>
            <version>2.12.1</version>
        </dependency>
    </dependencies>
3、build
实际运行的时候,提示:[INFO] No tests to run.
查资料有说是命名不规范的情况:https://blog.csdn.net/zha6476003/article/details/108691614
实际我的解决办法是 <configuration>下添加了<suiteXmlFiles>的配置
 <build>
        <plugins>
            <plugin>
                <groupId>org.apache.maven.plugins</groupId>
                <artifactId>maven-surefire-plugin</artifactId>
                <version>2.20</version>
                <configuration>
                    <suiteXmlFiles>
                        <suiteXmlFile>src/main/resources/testng.xml</suiteXmlFile>
                    </suiteXmlFiles>
                    <systemPropertyVariables>
                        <allure.results.directory>${project.build.directory}/allure-results/${maven.build.timestamp}
                        </allure.results.directory>
                        <allure.link.issue.pattern>https://example.org/browse/{}</allure.link.issue.pattern>
                        <allure.link.tms.pattern>https://example.org/browse/{}</allure.link.tms.pattern>
                    </systemPropertyVariables>
                    <argLine>
                        -javaagent:"${settings.localRepository}/org/aspectj/aspectjweaver/${aspectj.version}/aspectjweaver-${aspectj.version}.jar"
                    </argLine>
                </configuration>
                <dependencies>
                    <dependency>
                        <groupId>org.aspectj</groupId>
                        <artifactId>aspectjweaver</artifactId>
                        <version>${aspectj.version}</version>
                    </dependency>
                </dependencies>
            </plugin>
        </plugins>
    </build>
三、运行并获得报告
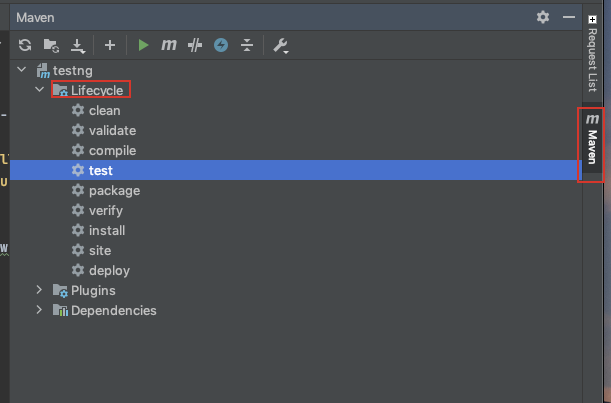
不知道什么情况我本地的mvn运行时会报错,只能用idea右侧的maven,如下图
1、先点击clean(清除target目录),再点击test(install也可以)

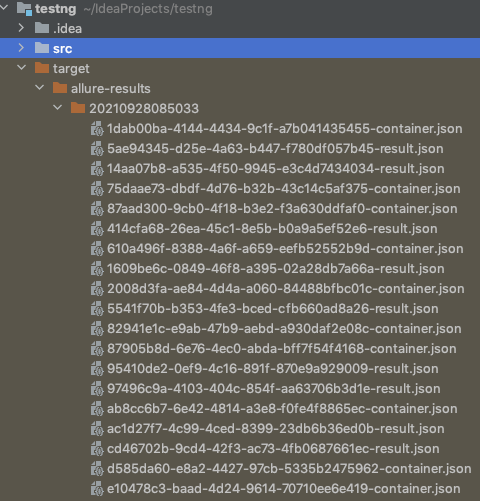
2、生成的结果会在target目录中,如下截图

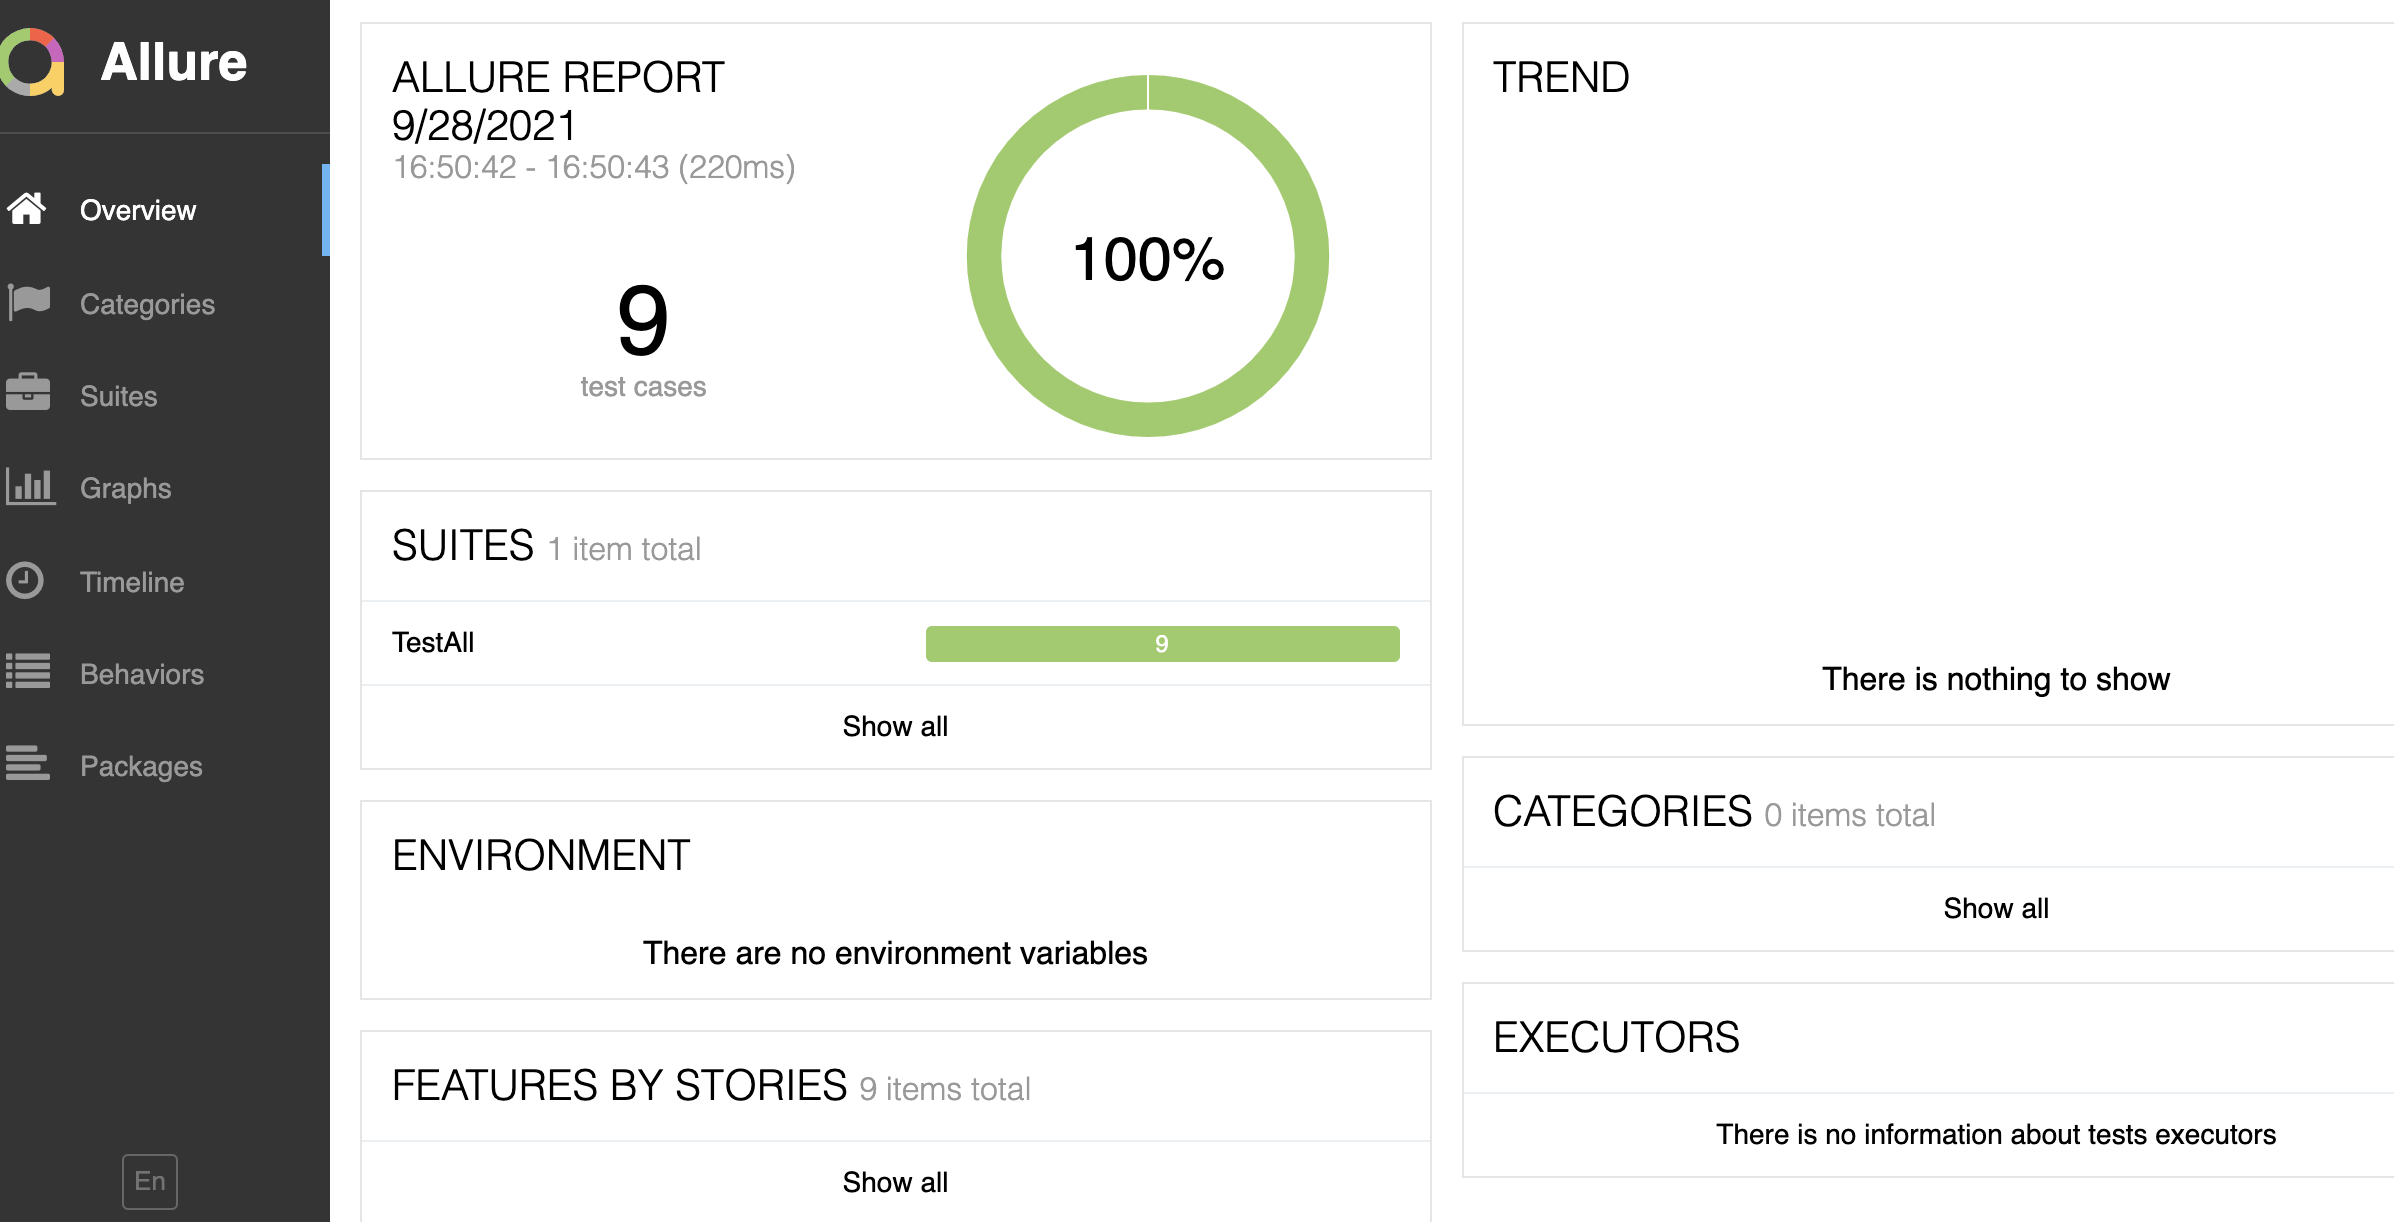
3、在项目根目录下运行命令:allure serve target/allure-results/20190813053653
然后会自动生成allure测试报告,并在浏览器中打开,效果如下截图
