3D Touch的三大模块
代码Demo:https://github.com/haozheMa/3DTouch
在我们的app中使用3D Touch功能,主要分为以下三个模块:
1、Home Screen Quick Actions
通过主屏幕的应用Icon,我们可以用3D Touch呼出一个菜单,进行快速定位应用功能模块相关功能的开发。如上面的日历。
2、peek and pop
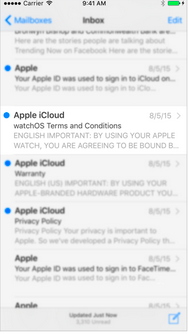
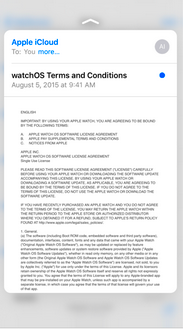
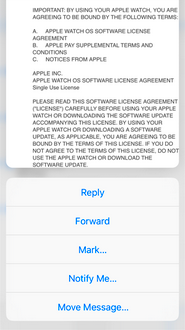
这个功能是一套全新的用户交互机制,在使用3D Touch时,ViewController中会有如下三个交互阶段:
(1)提示用户这里有3D Touch的交互,会使交互控件周围模糊
(2)继续深按,会出现预览视图
(3)通过视图上的交互控件进行进一步交互
这个模块的设计可以在网址连接上进行网页的预览交互。
3.Force Properties
iOS9为我们提供了一个新的交互参数:力度。我们可以检测某一交互的力度值,来做相应的交互处理。例如,我们可以通过力度来控制快进的快慢,音量增加的快慢等。
Home Screen Quick Action使用与相关api详解
1、静态标签
静态标签是我们在项目的配置plist文件中配置的标签,在用户安装程序后就可以使用,并且排序会在动态标签的前面。
我们先来看静态标签的配置:
首先,在info.plist文件中添加如下键值(我在测试的时候,系统并没有提示,只能手打上去):

先添加了一个UIApplicationShortcutItems的数组,这个数组中添加的元素就是对应的静态标签,在每个标签中我们需要添加一些设置的键值:
必填项(下面两个键值是必须设置的):
UIApplicationShortcutItemType 这个键值设置一个快捷通道类型的字符串
UIApplicationShortcutItemTitle 这个键值设置标签的标题
选填项(下面这些键值不是必须设置的):
UIApplicationShortcutItemSubtitle 设置标签的副标题
UIApplicationShortcutItemIconType 设置标签Icon类型
UIApplicationShortcutItemIconFile 设置标签的Icon文件
UIApplicationShortcutItemUserInfo 设置信息字典(用于传值)
把截图中的内容配置一下,就可以运行程序,测试一下
2、动态标签
动态标签是我们在程序中,通过代码添加的,与之相关的类,主要有三个:
UIApplicationShortcutItem 创建3DTouch标签的类
UIMutableApplicationShortcutItem 创建可变的3DTouch标签的类
UIApplicationShortcutIcon 创建标签中图片Icon的类
首先介绍3DTouch的属性和方法
@interface UIApplicationShortcutItem : NSObject <NSCopying, NSMutableCopying>
//下面是两个初始化方法 通过设置type,title等属性来创建一个标签,这里的icon是UIApplicationShortcutIcon对象,我们后面再说
- (instancetype)initWithType:(NSString *)type localizedTitle:(NSString *)localizedTitle localizedSubtitle:(nullable NSString *)localizedSubtitle icon:(nullable UIApplicationShortcutIcon *)icon userInfo:(nullable NSDictionary *)userInfo NS_DESIGNATED_INITIALIZER;
- (instancetype)initWithType:(NSString *)type localizedTitle:(NSString *)localizedTitle;
//下面这是一些只读的属性,获取相应的属性值
@property (nonatomic, copy, readonly) NSString *type;
@property (nonatomic, copy, readonly) NSString *localizedTitle;
@property (nullable, nonatomic, copy, readonly) NSString *localizedSubtitle;
@property (nullable, nonatomic, copy, readonly) UIApplicationShortcutIcon *icon;
@property (nullable, nonatomic, copy, readonly) NSDictionary<NSString *, id <NSSecureCoding>> *userInfo;
//这个类继承于 UIApplicationShortcutItem,创建的标签可变
@interface UIMutableApplicationShortcutItem : UIApplicationShortcutItem
@property (nonatomic, copy) NSString *type;
@property (nonatomic, copy) NSString *localizedTitle;
@property (nullable, nonatomic, copy) NSString *localizedSubtitle;
@property (nullable, nonatomic, copy) UIApplicationShortcutIcon *icon;
@property (nullable, nonatomic, copy) NSDictionary<NSString *, id <NSSecureCoding>> *userInfo;

@end
//这个类创建标签中的icon
@interface UIApplicationShortcutIcon : NSObject <NSCopying>
//创建系统风格的icon
+ (instancetype)iconWithType:(UIApplicationShortcutIconType)type;
//创建自定义的图片icon
+ (instancetype)iconWithTemplateImageName:(NSString *)templateImageName;
@end
下边是实现的代码,可以写在RootVC中,也可以写在AppDlegate的
didFinishLaunchingWithOptions方法中(根据所查网络资料,写这两处都好使)
- (void)viewDidLoad {
    [super viewDidLoad];
    // Do any additional setup after loading the view, typically from a nib.
    //创建
    UIApplicationShortcutItem * item = [[UIApplicationShortcutItem alloc]initWithType:@"2" localizedTitle:@"按钮标签" localizedSubtitle:@"副标题" icon:[UIApplicationShortcutIcon iconWithType:UIApplicationShortcutIconTypePlay] userInfo:nil];
    添加
    [UIApplication sharedApplication].shortcutItems = @[item];
}
图标枚举类型
typedef NS_ENUM(NSInteger, UIApplicationShortcutIconType) {
    UIApplicationShortcutIconTypeCompose,//编辑的图标
    UIApplicationShortcutIconTypePlay,//播放图标
    UIApplicationShortcutIconTypePause,//暂停图标
    UIApplicationShortcutIconTypeAdd,//添加图标
    UIApplicationShortcutIconTypeLocation,//定位图标
    UIApplicationShortcutIconTypeSearch,//搜索图标
    UIApplicationShortcutIconTypeShare//分享图标
} NS_ENUM_AVAILABLE_IOS(9_0);
3、响应标签的行为
我们在AppDlegate中添加方法
- (void)application:(UIApplication *)application
performActionForShortcutItem:(UIApplicationShortcutItem *)shortcutItem
 completionHandler:(void(^)(BOOL succeeded))completionHandler{
}
使用的话可以类似这样
/** 处理shortcutItem */
- (void)application:(UIApplication *)application performActionForShortcutItem:(UIApplicationShortcutItem *)shortcutItem completionHandler:(void (^)(BOOL))completionHandler {
    switch (shortcutItem.type.integerValue) {
        case 1: { // 测试1
            [[NSNotificationCenter defaultCenter] postNotificationName:@"gotoTestVc" object:self userInfo:@{@"type":@"1"}];
        }
        case 2: { // 测试2
            [[NSNotificationCenter defaultCenter] postNotificationName:@"gotoTestVc" object:self userInfo:@{@"type":@"2"}];
        }   break;
        default:
            break;
    }
}
或者这样
- (void)application:(UIApplication *)application performActionForShortcutItem:(UIApplicationShortcutItem *)shortcutItem completionHandler:(void(^)(BOOL succeeded))completionHandler{
    //判断先前我们设置的唯一标识
    if([shortcutItem.type isEqualToString:@"-11.UITouchText.share"]){
        NSArray *arr = @[@"hello 3D Touch"];
        UIActivityViewController *vc = [[UIActivityViewController alloc]initWithActivityItems:arr applicationActivities:nil];
        //设置当前的VC 为rootVC
        [self.window.rootViewController presentViewController:vc animated:YES completion:^{
        }];
    }
}
几点注意:
1、快捷标签最多可以创建四个,包括静态的和动态的。
2、每个标签的题目和icon最多两行,多出的会用...省略
感觉差不多是这个样子吧。
参考 http://my.oschina.net/u/2340880/blog/511509(有在模拟器上测试的需求可以看原博主的内容)
peek and pop
实现peek和pop手势:
1、遵守协议 UIViewControllerPreviewingDelegate
2、注册 [self registerForPreviewingWithDelegate:self sourceView:self.view];
3、实现代理方法
具体代码:(与Home Screen Quick Action相互独立)
先写主页面的内容RootView
#import "ViewController.h"
#import "DetailViewController.h"

#define _ScreenWidth [UIScreen mainScreen].bounds.size.width
#define _ScreenHeight [UIScreen mainScreen].bounds.size.height

@interface ViewController ()<UITableViewDelegate,UITableViewDataSource,UIViewControllerPreviewingDelegate>

@property (strong,nonatomic) UITableView *tableView;

@property (copy, nonatomic) NSArray *items;

@property (assign, nonatomic) CGRect sourceRect; //用户手势点

@property (strong, nonatomic) NSIndexPath *indexPath; //用户手势点

@end

@implementation ViewController

/*
 实现peek和pop手势:
 1、遵守协议 UIViewControllerPreviewingDelegate
 2、注册    [self registerForPreviewingWithDelegate:self sourceView:self.view];
 3、实现代理方法
 */


- (void)viewDidLoad
{
    [super viewDidLoad];

    [self loadTableview];

    //注册Peek和Pop
    if (self.traitCollection.forceTouchCapability == UIForceTouchCapabilityAvailable)
    {
        /**
         *  这个判断的作用是检测当前设备是否支持 3D Touch
         */
        [self registerForPreviewingWithDelegate:self sourceView:self.view];
    }

}

//加载tableview
-(void)loadTableview
{
    self.tableView = [[UITableView alloc]initWithFrame:CGRectMake(0, 0, _ScreenWidth, _ScreenHeight) style:UITableViewStylePlain];
    self.tableView.rowHeight = 50;
    self.tableView.delegate= self;
    self.tableView.dataSource = self;
    [self.view addSubview:self.tableView];
}

-(NSArray *)items
{
    if (_items == nil)
    {
        _items = [[NSArray alloc]initWithObjects:@"第一条",@"第二条",@"第三条",@"第四条",@"第五条",@"第六条",nil];
    }
    return _items;
}

#pragma mark - tableViewDelage
-(NSInteger)tableView:(UITableView *)tableView numberOfRowsInSection:(NSInteger)section
{
    return self.items.count;
}

-(UITableViewCell *)tableView:(UITableView *)tableView cellForRowAtIndexPath:(NSIndexPath *)indexPath
{
    static NSString *cellID = @"cell";
    UITableViewCell *cell = [tableView dequeueReusableCellWithIdentifier:cellID];

    if (cell == nil)
    {
        cell = [[UITableViewCell alloc]initWithStyle:UITableViewCellStyleDefault reuseIdentifier:cellID];
    }
    cell.textLabel.text = self.items[indexPath.row];
    return cell;
}

-(void)tableView:(UITableView *)tableView didSelectRowAtIndexPath:(NSIndexPath *)indexPath
{
    NSLog(@"点击了/pop第%zdcell",indexPath.row+1);
}

#pragma mark - peek&& pop代理
/** peek手势  */
-(nullable UIViewController *)previewingContext:(id<UIViewControllerPreviewing>)previewingContext viewControllerForLocation:(CGPoint)location
{
    //获取用户手势点的Cell的下标,同时判断手势点是否超出tableview的响应范围
    if (![self getShouldShowRectAndIndexPathWithLocation:location]) return nil;
    previewingContext.sourceRect = self.sourceRect;


    NSIndexPath *index =  [_tableView indexPathForRowAtPoint:location];

    UITableViewCell *cell = [_tableView cellForRowAtIndexPath:index];

    if(cell != nil ){

        DetailViewController *detailViewController = [[DetailViewController alloc] init];

        detailViewController.text = [NSString stringWithFormat:@"点击了第%zd个cell,预览图层,再用力按调用pop手势的代理方法", index.row+1];

        return detailViewController;

    }

    return nil;
}

/** pop手势  */
- (void)previewingContext:(id <UIViewControllerPreviewing>)previewingContext commitViewController:(UIViewController *)viewControllerToCommit {
//    [self tableView:self.tableView didSelectRowAtIndexPath:self.indexPath];
    [self showViewController:viewControllerToCommit sender:self];
}

/** 获取用户手势点所在cell的下标。同时判断手势点是否超出tableView响应范围。*/
-(BOOL)getShouldShowRectAndIndexPathWithLocation:(CGPoint)location
{
    NSInteger row = (location.y - 20)/50;
    self.sourceRect = CGRectMake(0, row * 50 , _ScreenWidth, 50);
    self.indexPath = [NSIndexPath indexPathForItem:row inSection:0];
    // 如果row越界了,返回NO 不处理peek手势
    return row >= self.items.count ? NO : YES;
}

- (void)didReceiveMemoryWarning {
    [super didReceiveMemoryWarning];
    // Dispose of any resources that can be recreated.
}

@end
然后是预览的那个DetailVC
//
//  DetailViewController.h
//  3DTouchPreviewDemo
//
//  Created by apple on 16/4/14.
//  Copyright © 2016年 apple. All rights reserved.
//

#import <UIKit/UIKit.h>

@interface DetailViewController : UIViewController

@property (nonatomic, strong) NSString *text;

@end
//
//  DetailViewController.m
//  3DTouchPreviewDemo
//
//  Created by apple on 16/4/14.
//  Copyright © 2016年 apple. All rights reserved.
//

#import "DetailViewController.h"

@interface DetailViewController ()


@end

@implementation DetailViewController

- (void)viewDidLoad {
    [super viewDidLoad];

    UIView *bgView = [[UIView alloc]initWithFrame:CGRectMake(0, 0, self.view.frame.size.width, self.view.frame.size.height)];
    bgView.backgroundColor = [UIColor whiteColor];
    [self.view addSubview:bgView];

    UIButton *btn = [[UIButton alloc]initWithFrame:CGRectMake(20, 64, 50, 50)];
    btn.backgroundColor = [UIColor redColor];
    [btn setTitle:@"返回" forState:UIControlStateNormal];
    [btn setTitleColor:[UIColor whiteColor] forState:UIControlStateNormal];
    [btn addTarget:self action:@selector(getHome) forControlEvents:UIControlEventTouchUpInside];
    [bgView addSubview:btn];

    UITextView *textView = [[UITextView alloc] initWithFrame:CGRectMake(0, 120, self.view.frame.size.width, self.view.frame.size.height)];
    textView.font = [UIFont systemFontOfSize:24];
    textView.text = self.text;
    [bgView addSubview:textView];

}

-(void)getHome
{
    [self dismissViewControllerAnimated:YES completion:nil];
}

- (NSArray<id<UIPreviewActionItem>> *)previewActionItems {

    UIPreviewAction *itemShare = [UIPreviewAction actionWithTitle:@"分享" style:UIPreviewActionStyleDefault handler:^(UIPreviewAction * _Nonnull action, UIViewController * _Nonnull previewViewController) {

        UIAlertView *alertView = [[UIAlertView alloc] initWithTitle:@"分享" message:@"分享内容" delegate:nil cancelButtonTitle:@"确定" otherButtonTitles: nil];

        [alertView show];

    }];

    return @[itemShare];

}

@end
运行结果:


