一、开发前准备工作:
官方文档地址:https://cloud.spring.io/spring-cloud-static/spring-cloud-netflix/2.1.0.RELEASE/multi/multi_spring-cloud-eureka-server.html
不同的spring cloud版本的接口地址也是不一样的,可以通过(https://spring.io/projects/spring-cloud-netflix#learn)进行不同版本的文档选择
1.添加Eureka依赖:
To include Eureka Server in your project, use the starter with a group ID of org.springframework.cloud and an artifact ID of spring-cloud-starter-netflix-eureka-server. See the Spring Cloud Project page for details on setting up your build system with the current Spring Cloud Release Train.
        <dependency>
            <groupId>org.springframework.cloud</groupId>
            <artifactId>spring-cloud-starter-netflix-eureka-server</artifactId>
        </dependency>
2.运行Eureka Server
1 @SpringBootApplication
2 @EnableEurekaServer
3 public class EurekaApplication {
4
5     public static void main(String[] args) {
6         SpringApplication.run(EurekaApplication.class, args);
7     }
8 }
2.项目实现:
pom文件:
 1 <?xml version="1.0" encoding="UTF-8"?>
 2 <project xmlns="http://maven.apache.org/POM/4.0.0" xmlns:xsi="http://www.w3.org/2001/XMLSchema-instance"
 3          xsi:schemaLocation="http://maven.apache.org/POM/4.0.0 http://maven.apache.org/xsd/maven-4.0.0.xsd">
 4     <modelVersion>4.0.0</modelVersion>
 5
 6     <parent>
 7         <groupId>com.zwjk.cloud</groupId>
 8         <artifactId>microservice-spring-cloud</artifactId>
 9         <version>0.0.1-SNAPSHOT</version>
10     </parent>
11
12     <artifactId>microservice-doscovey-eureka</artifactId>
13     <version>0.0.1-SNAPSHOT</version>
14     <name>microservice-doscovey-eureka</name>
15     <description>Demo project for Spring Boot</description>
16
17     <properties>
18         <project.build.sourceEncoding>UTF-8</project.build.sourceEncoding>
19     </properties>
20
21     <dependencies>
22         <dependency>
23             <groupId>org.springframework.cloud</groupId>
24             <artifactId>spring-cloud-starter-netflix-eureka-server</artifactId>
25         </dependency>
26     </dependencies>
27
28
29 </project>
application.yml
server:
  port: 8761
eureka:
  client:
    register-with-eureka: false
    fetch-registry: false
    service-url:
      defaultZone: http://localhost:8761/eureka
EurekaApplication.java
 1 package com.zwjk.cloud;
 2
 3 import org.springframework.boot.SpringApplication;
 4 import org.springframework.boot.autoconfigure.SpringBootApplication;
 5 import org.springframework.cloud.netflix.eureka.server.EnableEurekaServer;
 6
 7 @SpringBootApplication
 8 @EnableEurekaServer
 9 public class EurekaApplication {
10
11     public static void main(String[] args) {
12         SpringApplication.run(EurekaApplication.class, args);
13     }
14 }
启动项目:
http://localhost:8761/

打开地址后,直接就进入了页面。缺少账号密码验证,
如何在控制台增加账号密码控制呢?
首先,需要在pom文件中,增加权限认证的依赖:
<dependency>
    <groupId>org.springframework.boot</groupId>
    <artifactId>spring-boot-starter-security</artifactId>
</dependency>
接着修改 application.yml
spring:
  security:
    user:
      name: user
      password: password123

server:
  port: 8761
eureka:
  client:
    register-with-eureka: false
    fetch-registry: false
    service-url:
      defaultZone: http://user:password123@localhost:8761/eureka
同时启动类里面也需要加入一下修改,不然,其他服务来Eureka中注册是,会出现权限认证失败的问题
修改后的启动类如下:
package com.zwjk.cloud;

import org.springframework.boot.SpringApplication;
import org.springframework.boot.autoconfigure.SpringBootApplication;
import org.springframework.cloud.netflix.eureka.server.EnableEurekaServer;
import org.springframework.security.config.annotation.web.builders.HttpSecurity;
import org.springframework.security.config.annotation.web.configuration.EnableWebSecurity;
import org.springframework.security.config.annotation.web.configuration.WebSecurityConfigurerAdapter;

@SpringBootApplication
@EnableEurekaServer
public class EurekaApplication {

    public static void main(String[] args) {
        SpringApplication.run(EurekaApplication.class, args);
    }

    @EnableWebSecurity
    static class WebSecurityConfig extends WebSecurityConfigurerAdapter {
        @Override
        protected void configure(HttpSecurity http) throws Exception {

            //Howard 2019-03-20,错误的做法:
            //http.csrf().disable();//这样会直接取消验证账号密码了

            //Howard 2019-03-20,注意 正确的做法是这样:
            http.csrf().disable().authorizeRequests()
                .anyRequest()
                .authenticated()
                .and()
                .httpBasic();
        }
    }
}
启动项目,然后通过浏览器访问http://localhost:8761/
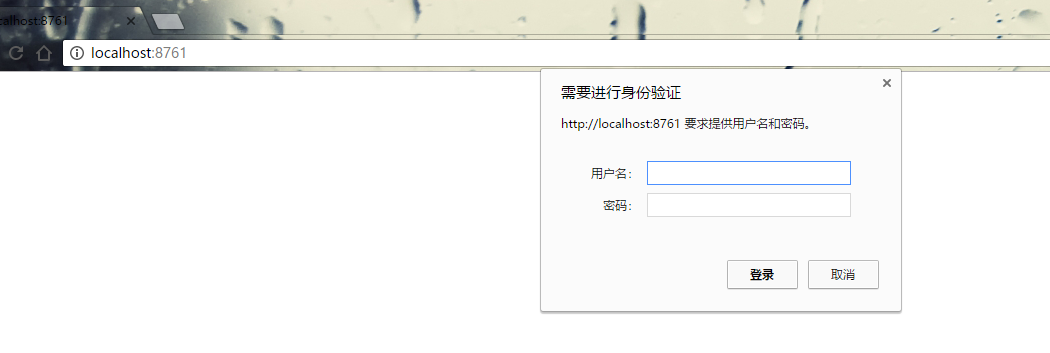
输入密码后,进入Eureka管理后台界面。
二、将服务注册到Eureka上
1.user服务注册到Eureka上,
首先,需要使用Eureka Client将服务注册到Eureka上,需要添加如下的依赖
        <dependency>
            <groupId>org.springframework.cloud</groupId>
            <artifactId>spring-cloud-starter-netflix-eureka-client</artifactId>
        </dependency>
修改配置文件,将Eureka的服务地址及认证,添加到配置文件中
eureka:
  client:
    healthcheck:
      enabled: true
    serviceUrl:
      defaultZone: http://user:password123@localhost:8761/eureka
  instance:
    prefer-ip-address: true
    instance-id: ${spring.application.name}:${spring.application.instance_id:${server.port}}
    metadata-map:
      zone: ABC      # eureka可以理解的元数据
      lilizhou: BBC  # 不会影响客户端行为
    lease-renewal-interval-in-seconds: 5
这个时候,启动user服务,会发现启动失败,
提示健康检查的错误,是因为还需要添加一个依赖
<dependency>
    <groupId>org.springframework.boot</groupId>
    <artifactId>spring-boot-starter-actuator</artifactId>
</dependency>
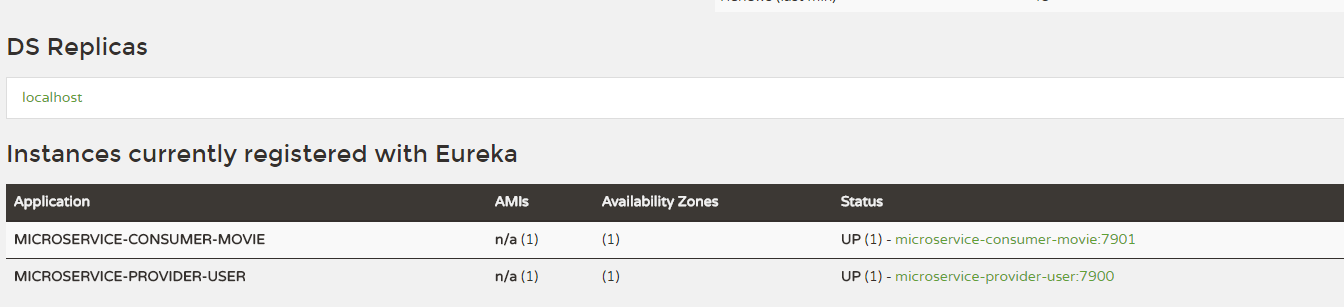
重启项目,访问Eureka控制台,

会看到服务已经注册到Eureka上,服务的名字配置文件中applocation.name Status 是Eureka.instance.instance-id
下面我们将movie也注册到Eureka上
到此,已经将服务都注册到Eureka上了