因为同时学习python crawler,所以临时决定把asp.net app的部分先拿出来,顺便学习和熟练DoucmentDB相关知识.
本节教程参考:
| ASP.NET MVC 教程:使用 DocumentDB 开发 Web 应用程序 来自 <https://www.azure.cn/documentation/articles/documentdb-dotnet-application/> |
准备工作包括:
- 确保你已经有了Azure账户;
- 在你的Azure上已经有可供使用的DocumentDB账户;
- VS已加载用于连接Azure的 Azure .NET SDK for VS 2017;
- 新建Asp.Net MVC项目;
- Nuget添加NewtonSoft.Json包和Azure DocumentDB Client包;
一点小插曲,VS2017目前还不支持世纪互联的账号,解决办法
| VS2017 直接使用账户登录 Azure 来自 <https://www.azure.cn/documentation/articles/aog-portal-management-qa-vs2017-login/> |
正题:
添加Model
- 添加Item.cs
这个很简单了,按照教程上直接Copy都可以
- 添加DocumentRepository.cs
下边是教程中给出的代码
其中where语句参见:泛型约束语句where T:class
而ConfigurationManager.AppSettings["KeyIndex"]其实就是一个KeyValueCollection,指向的是Web.config文件中的<AppSettings>
public static class DocumentDBRepository<T> where T : class { private static readonly string DatabaseId = ConfigurationManager.AppSettings["database"]; private static readonly string CollectionId = ConfigurationManager.AppSettings["collection"]; private static DocumentClient client;
public static void Initialize() { client = new DocumentClient(new Uri(ConfigurationManager.AppSettings["endpoint"]), ConfigurationManager.AppSettings["authKey"]); CreateDatabaseIfNotExistsAsync().Wait(); CreateCollectionIfNotExistsAsync().Wait(); }
private static async Task CreateDatabaseIfNotExistsAsync() { try { await client.ReadDatabaseAsync(UriFactory.CreateDatabaseUri(DatabaseId)); } catch (DocumentClientException e) { if (e.StatusCode == System.Net.HttpStatusCode.NotFound) { await client.CreateDatabaseAsync(new Database { Id = DatabaseId }); } else { throw; } } }
private static async Task CreateCollectionIfNotExistsAsync() { try { await client.ReadDocumentCollectionAsync(UriFactory.CreateDocumentCollectionUri(DatabaseId, CollectionId)); } catch (DocumentClientException e) { if (e.StatusCode == System.Net.HttpStatusCode.NotFound) { await client.CreateDocumentCollectionAsync( UriFactory.CreateDatabaseUri(DatabaseId), new DocumentCollection { Id = CollectionId }, new RequestOptions { OfferThroughput = 1000 }); } else { throw; } } } } |
之后还要陆续为DocumentDBRepository添加增改删查的方法,教程里都有.
哦,删除没有,但原理同改的方法,只不过调用的是client.DeleteDocumentAsync()方法.
添加Controller
上一次第一次搞MongoDB时,不知道该添加哪个mode的controller,这次教程发现直接添加空的最合适.如下:
|
里边无外乎就是UI的逻辑代码,跟xaml.cs文件一个性质,返回的都是ActionResult类型,当然要异步的化就Task<ActionResult>.
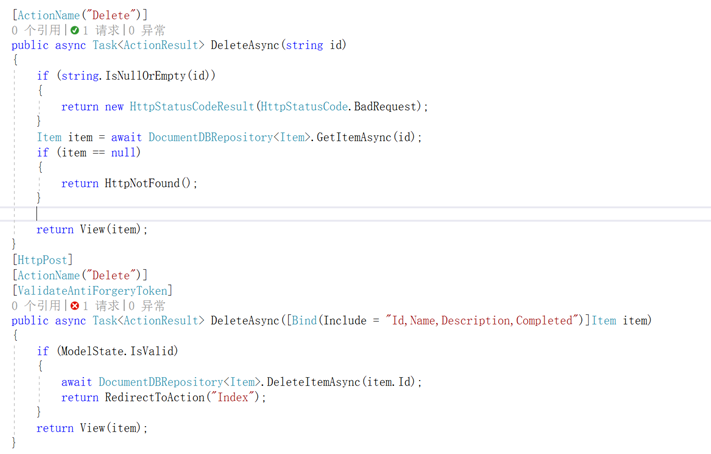
通常情况下,返回值都时View.而且有特定View的(如Create,Edit,Detail,Delete),那么方法都是成对出现的,应对的时2个请求,Request①应对的时页面跳转,Request②对应的是操作提交(HttpPost),示例如下:(注意,尽管[HttpType]Attribute提供了[HttpDelete]选项,但对应的不是我们默认的删除操作,误用的话会无法调用方法,还是使用[HttpPost])
|
添加View
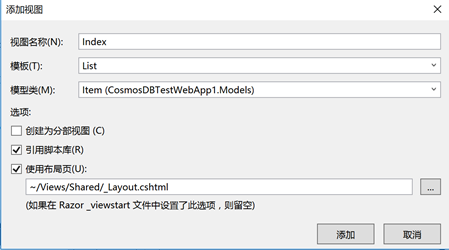
逐步添加Index,Create,Edit.Deleted 4个View,方法如下:
如果你跟我一样对Asp.net不慎熟悉的化,这里一定要注意,添加View的配置如下(尤其是使用布局页:对Views/shared/_layout.cshtml的引用,同时不要创建分部视图--虽然我不知道它是个啥)
|
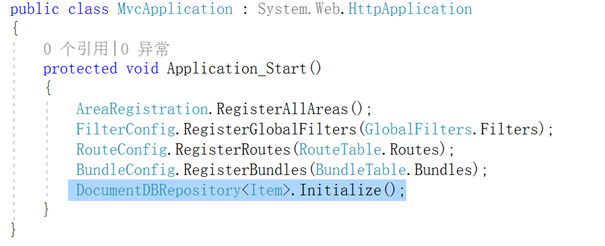
在Application_Start方法里添加DocumentDBRepository初始化:
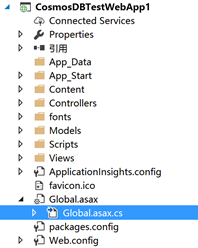
注意是在Global.asax.cs文件中,相当于UWP的app.cs文件吧
|
|
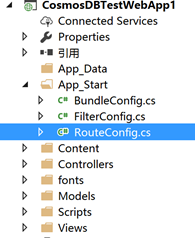
改变默认首页
|
原来默认的是controller="Home",打开的是Asp.Net介绍的网页. |
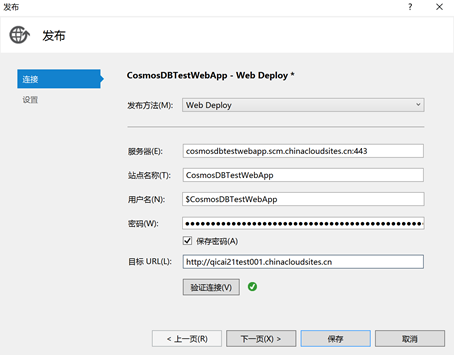
发布到Azure
直接点发布就可以(不知道为什么我的Url没有被重新定义成功,还是当初的http://cosmosdbtestwebapp.chinacloudsites.cn)
|
发布成功后在DashBoard上就能看到:
|
|
这个项目暂今天就到这了,明天试试如何用自己的Python写个小爬虫,来爬这个网页!!
这个教程中给的static DocumentDBRepository<T> Model 非常 优雅,值得保存下来,以后都以此为准.

