官网:https://www.elastic.co/cn/products/beats
Beats系列产品:

机器角色:
|
主机名 |
ip |
服务 |
|
elk1 |
192.168.1.223 |
jdk1.8,es7.2,logstash, |
|
elk2 |
192.168.1.224 |
jdk1.8,es7.2,elasticsearch-head, kibana,cerebro |
|
elk3 |
192.168.1.225 |
jdk1.8,es7.2,redis2+keepalived |
|
elk4 |
192.168.1.226 |
jdk1.8,redis1+keepalived+vip, filebeat,metricbeat,rabbitmq, Packbeat;heartbeat |
1 Filebeat 部署
1. Filebeat工作原理
Filebeat由两个主要组件组成:prospector 和 harvester。
(1)harvester:
负责读取单个文件的内容。
如果文件在读取时被删除或重命名,Filebeat将继续读取文件。
(2)prospector
prospector 负责管理harvester并找到所有要读取的文件来源。
如果输入类型为日志,则查找器将查找路径匹配的所有文件,并为每个文件启动一个harvester。
Filebeat目前支持两种prospector类型:log和stdin。
2.Filebeat如何保持文件的状态
Filebeat 保存每个文件的状态并经常将状态刷新到磁盘上的注册文件中。
该状态用于记住harvester正在读取的最后偏移量,并确保发送所有日志行。
如果输出(例如Elasticsearch或Logstash)无法访问,Filebeat会跟踪最后发送的行,并在输出再次可用时继续读取文件。
3.安装nginx
在elk4(192.168.1.226)上安装nginx;
#yum -y install pcre-devel zlib-devel
#tar -xvf nginx-1.11.6.tar.gz
#cd /home/nginx-1.11.6
#./configure --prefix=/usr/local/nginx --with-http_stub_status_module
#make
#make install
#/usr/local/nginx/sbin/nginx -V

#配置nginx
#cp -apr /usr/local/nginx/conf/nginx.conf  /usr/local/nginx/conf/nginx.conf.bak
#vi  /usr/local/nginx/conf/nginx.conf   修改内容
location /nginx-status {
            stub_status on;
            access_log off;
          }

#启动nginx
#/usr/local/nginx/sbin/nginx

#测试
#curl http://192.168.1.226/nginx-status

结果说明:
Active connections:正在处理的活动连接数
server accepts handled requests
第一个 server 表示Nginx启动到现在共处理的连接
第二个 accepts 表示Nginx启动到现在共成功创建的握手
第三个 handled requests 表示总共处理了的请求
请求丢失数 = 握手数 - 连接数 ,可以看出目前为止没有丢失请求
Reading: 0 Writing: 1 Waiting: 1
Reading:Nginx 读取到客户端的 Header 信息数
Writing:Nginx 返回给客户端 Header 信息数
Waiting:Nginx 已经处理完正在等候下一次请求指令的驻留链接(开启keepalive的情况下,这个值等于
Active - (Reading+Writing))
4.读取Nginx日志文件
#安装filebeat,已经下载好了rpm包,直接安装即可
#yum install -y filebeat
#cd /etc/filebeat
#cat itcast4.yml
filebeat.inputs:
- type: log
  enabled: true
  paths:
    -  /usr/local/nginx/logs/*.log
  tags: ["nginx"]            #添加自定义tag,便于后续的处理
  fields:                    #添加自定义字段
    from: elk4
  fields_under_root: false    #true为添加到根节点,false为添加到子节点中
setup.template.settings:
  index.number_of_shards: 3  #指定索引的分区数
output.elasticsearch:        #指定ES集群的配置
  hosts: ["192.168.1.223:9200","192.168.1.224:9200","192.168.1.225:9200"]

#运行filebeat
#filebeat -e -c itcast5.yml
#参数说明
-e: 输出到标准输出,默认输出到syslog和logs下
-c: 指定配置文件
-d: 输出debug信息

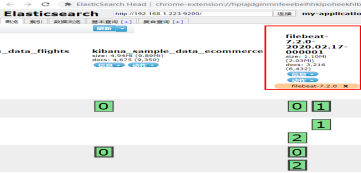
#启动后,可以在Elasticsearch中看到索引以及查看数据:
2 Filebeat Module
1.使用elasticsearch-head查看索引的原始数据,在message行中已经获取到了nginx的日志,但是,内容并没有经过处理,只是读取到原数据。上一步日志数据的读取以及处理都是自己手动配置的,但其实在Filebeat中,有大量的Module,可以简化我们的配置,直接就可以使用;如下:
#filebeat modules list
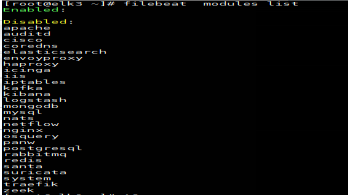
可以看到,内置了很多的module,但是都没有启用,如果需要启用需要进行enable操作:
#启用nginx模块
#filebeat modules enable nginx
#禁用nginx模块
#filebeat modules disable nginx
# filebeat modules list
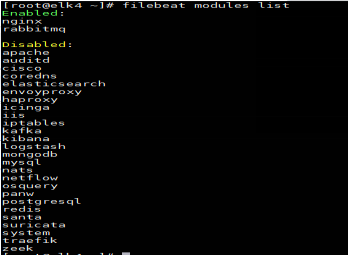
2.nginx module 配置
#cd /etc/filebeat/modules.d
#cat nginx.yml

3.配置filebeat
#cd /etc/filebeat
#cat itcast5.yml       //名字可以随便取,后缀一样就行
filebeat.inputs:
setup.template.settings:
  index.number_of_shards: 3
output.elasticsearch:
  hosts: ["192.168.1.223:9200","192.168.1.224:9200","192.168.1.225:9200"]
filebeat.config.modules:
  path: ${path.config}/modules.d/*.yml
  reload.enabled: false

#启动
#filebeat -e -c itcast5.yml
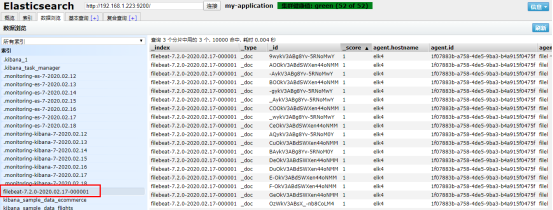
#可以在Elasticsearch-head中看到索引以及查看数据

其他的Module的用法参加官方文档:
https://www.elastic.co/guide/en/beats/filebeat/current/filebeat-modules.html
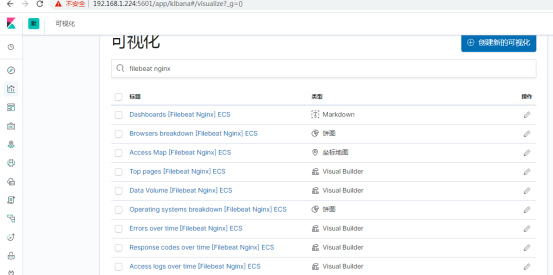
3 Filebeat日志仪表板
#cd /etc/filebeat
#cat  itcast6.yml

# filebeat  -c  itcast6.yml setup
或
#filebeat setup --dashboards (此命令会读取默认的配置文件,这里未使用默认配置文件,故使用如上命令)
4 在windows安装上filebeat收集日志
登录官方网站下载filebeat的windows客户端
https://www.elastic.co/cn/downloads/beats/filebeat
1.解压安装包到C:Program Filesfilebeat,右键,选择使用PowerShell运行;如此便注册成系统服务;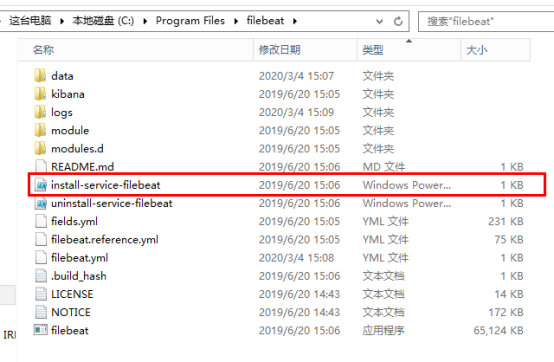

2.修改配置文件filebeat.yml

3.启动索引管理
打开cmd
#cd C:Program Filesfilebeat
#filebeat setup --index-management
