利用虚拟主机功能,可以把一台处于运行状态的物理服务器分割成多个“虚拟的服务器”。
Apache的虚拟主机功能是服务器基于用户请求的不同IP地址、主机域名或端口号,实现一台服务器提供多个网站同时为外部提供访问服务的技术。
可以基于三种方式实现:
- 基于IP地址
- 基于域名
- 基于端口号
基于IP地址实现同时提供多个网站服务:
如果一台服务器有多个IP地址,而且每个IP地址与服务器上部署的每个网站一一对应,这样当用户请求访问不同的IP地址时, 会访问到不同网站的页面资源。
1、给虚拟机配置多个IP地址:
[root@PC1linuxprobe html]# nmtui
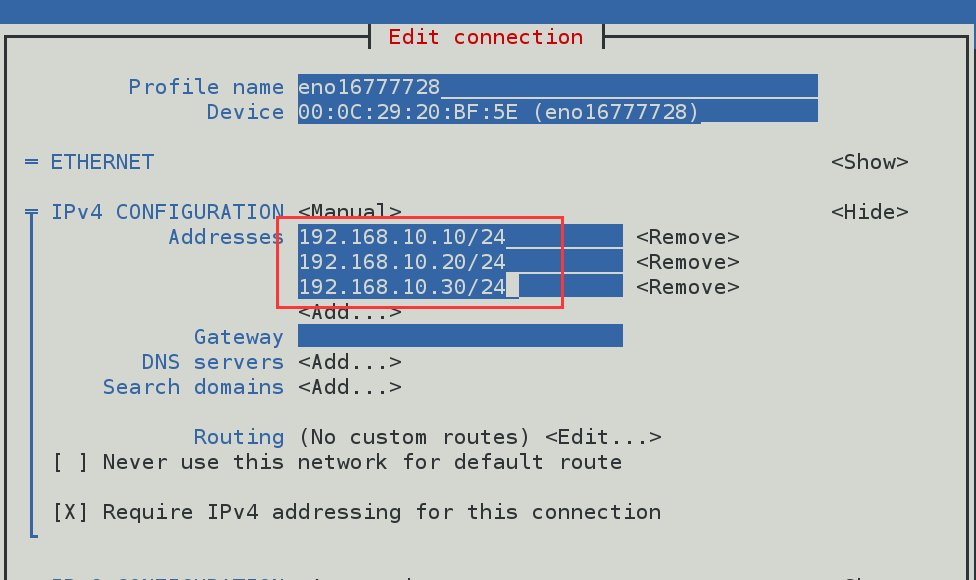
2、重启网卡,测试三个IP地址的联通性
[root@PC1linuxprobe html]# systemctl restart network
[root@PC1linuxprobe html]# ping -c 2 192.168.10.10
PING 192.168.10.10 (192.168.10.10) 56(84) bytes of data.
64 bytes from 192.168.10.10: icmp_seq=1 ttl=64 time=0.054 ms
64 bytes from 192.168.10.10: icmp_seq=2 ttl=64 time=0.041 ms

--- 192.168.10.10 ping statistics ---
2 packets transmitted, 2 received, 0% packet loss, time 999ms
rtt min/avg/max/mdev = 0.041/0.047/0.054/0.009 ms
[root@PC1linuxprobe html]# ping -c 2 192.168.10.20
PING 192.168.10.20 (192.168.10.20) 56(84) bytes of data.
64 bytes from 192.168.10.20: icmp_seq=1 ttl=64 time=0.033 ms
64 bytes from 192.168.10.20: icmp_seq=2 ttl=64 time=0.041 ms

--- 192.168.10.20 ping statistics ---
2 packets transmitted, 2 received, 0% packet loss, time 999ms
rtt min/avg/max/mdev = 0.033/0.037/0.041/0.004 ms
[root@PC1linuxprobe html]# ping -c 2 192.168.10.30
PING 192.168.10.30 (192.168.10.30) 56(84) bytes of data.
64 bytes from 192.168.10.30: icmp_seq=1 ttl=64 time=0.031 ms
64 bytes from 192.168.10.30: icmp_seq=2 ttl=64 time=0.039 ms

--- 192.168.10.30 ping statistics ---
2 packets transmitted, 2 received, 0% packet loss, time 999ms
rtt min/avg/max/mdev = 0.031/0.035/0.039/0.004 ms
3、创建网站数据目录以及网站首页数据
[root@PC1linuxprobe html]# mkdir -p /home/wwwroot/10
[root@PC1linuxprobe html]# mkdir -p /home/wwwroot/20
[root@PC1linuxprobe html]# mkdir -p /home/wwwroot/30
[root@PC1linuxprobe html]# echo 11111 > /home/wwwroot/10/index.html
[root@PC1linuxprobe html]# echo 22222 > /home/wwwroot/20/index.html
[root@PC1linuxprobe html]# echo 33333 > /home/wwwroot/30/index.html
4、修改httpd服务主配置文件,即写入三个基于IP地址的虚拟主机网站参数。
…………
111 # below.
112 #
113 <VirtualHost 192.168.10.10>
114 DocumentRoot /home/wwwroot/10
115 ServerName www.linuxprobe.com
116 <Directory /home/wwwroot/10 >
117 AllowOverride None
118 Require all granted
119 </Directory>
120 </VirtualHost>
121 ###############
122 <VirtualHost 192.168.10.20>
123 DocumentRoot /home/wwwroot/20
124 ServerName bbs.linuxprobe.com
125 <Directory /home/wwwroot/20 >
126 AllowOverride None
127 Require all granted
128 </Directory>
129 </VirtualHost>
130 ###############
131 <VirtualHost 192.168.10.30>
132 DocumentRoot /home/wwwroot/30
133 ServerName tech.linuxprobe.com
134 <Directory /home/wwwroot/30 >
135 AllowOverride None
136 Require all granted
137 </Directory>
138 </VirtualHost>
139 #
…………
5、重启httpd服务
[root@PC1linuxprobe html]# systemctl restart httpd
6、测试访问网站(均不能查看到首页数据)


7、查看并修改网站数据目录的SElinux上下文
[root@PC1linuxprobe html]# ls -ldZ /var/www/html/  (默认路径的SElinux上下文值)
drwxr-xr-x. root root system_u:object_r:httpd_sys_content_t:s0 /var/www/html/
[root@PC1linuxprobe html]# ls -ldZ /home/wwwroot/ ## 网站数据目录的SElinux上下文值
drwxr-xr-x. root root unconfined_u:object_r:home_root_t:s0 /home/wwwroot/
[root@PC1linuxprobe html]# ls -ldZ /home/wwwroot/10
drwxr-xr-x. root root unconfined_u:object_r:home_root_t:s0 /home/wwwroot/10
[root@PC1linuxprobe html]# semanage fcontext -a -t httpd_sys_content_t /home/wwwroot   ## 修改上下文值
[root@PC1linuxprobe html]# semanage fcontext -a -t httpd_sys_content_t /home/wwwroot/10
[root@PC1linuxprobe html]# semanage fcontext -a -t httpd_sys_content_t /home/wwwroot/10/*
[root@PC1linuxprobe html]# semanage fcontext -a -t httpd_sys_content_t /home/wwwroot/20
[root@PC1linuxprobe html]# semanage fcontext -a -t httpd_sys_content_t /home/wwwroot/20/*
[root@PC1linuxprobe html]# semanage fcontext -a -t httpd_sys_content_t /home/wwwroot/30
[root@PC1linuxprobe html]# semanage fcontext -a -t httpd_sys_content_t /home/wwwroot/30/*
[root@PC1linuxprobe html]# restorecon -Rv /home/wwwroot/  ## 立即生效
restorecon reset /home/wwwroot context unconfined_u:object_r:home_root_t:s0->unconfined_u:object_r:httpd_sys_content_t:s0
restorecon reset /home/wwwroot/10 context unconfined_u:object_r:home_root_t:s0->unconfined_u:object_r:httpd_sys_content_t:s0
restorecon reset /home/wwwroot/10/index.html context unconfined_u:object_r:home_root_t:s0->unconfined_u:object_r:httpd_sys_content_t:s0
restorecon reset /home/wwwroot/20 context unconfined_u:object_r:home_root_t:s0->unconfined_u:object_r:httpd_sys_content_t:s0
restorecon reset /home/wwwroot/20/index.html context unconfined_u:object_r:home_root_t:s0->unconfined_u:object_r:httpd_sys_content_t:s0
restorecon reset /home/wwwroot/30 context unconfined_u:object_r:home_root_t:s0->unconfined_u:object_r:httpd_sys_content_t:s0
restorecon reset /home/wwwroot/30/index.html context unconfined_u:object_r:home_root_t:s0->unconfined_u:object_r:httpd_sys_content_t:s0
[root@PC1linuxprobe html]# ls -ldZ /home/wwwroot/10  ## 再次查看
drwxr-xr-x. root root unconfined_u:object_r:httpd_sys_content_t:s0 /home/wwwroot/10
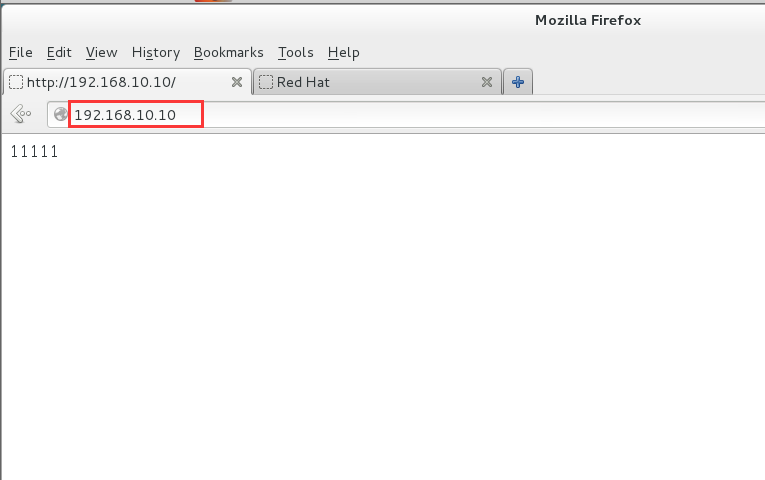
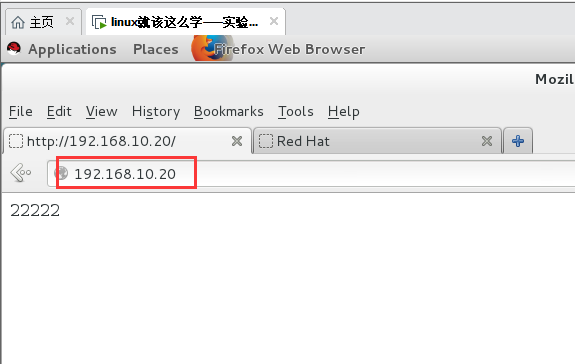
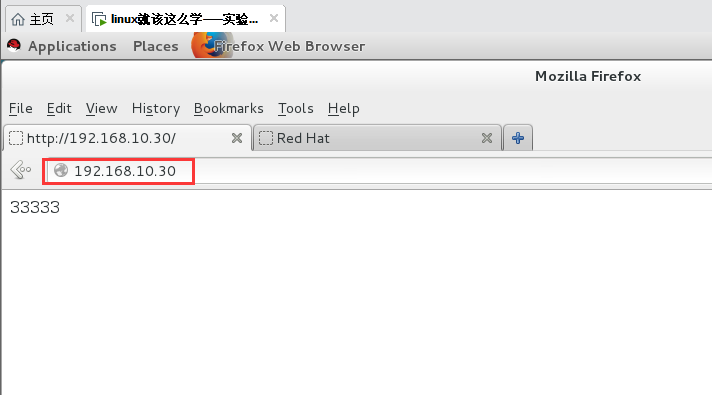
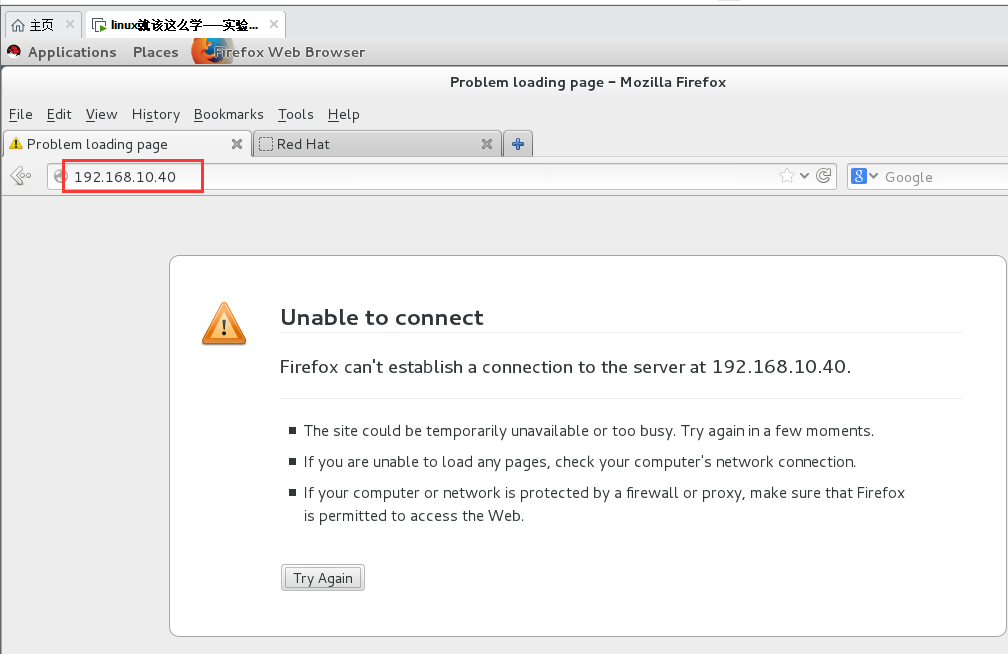
8、测试效果
