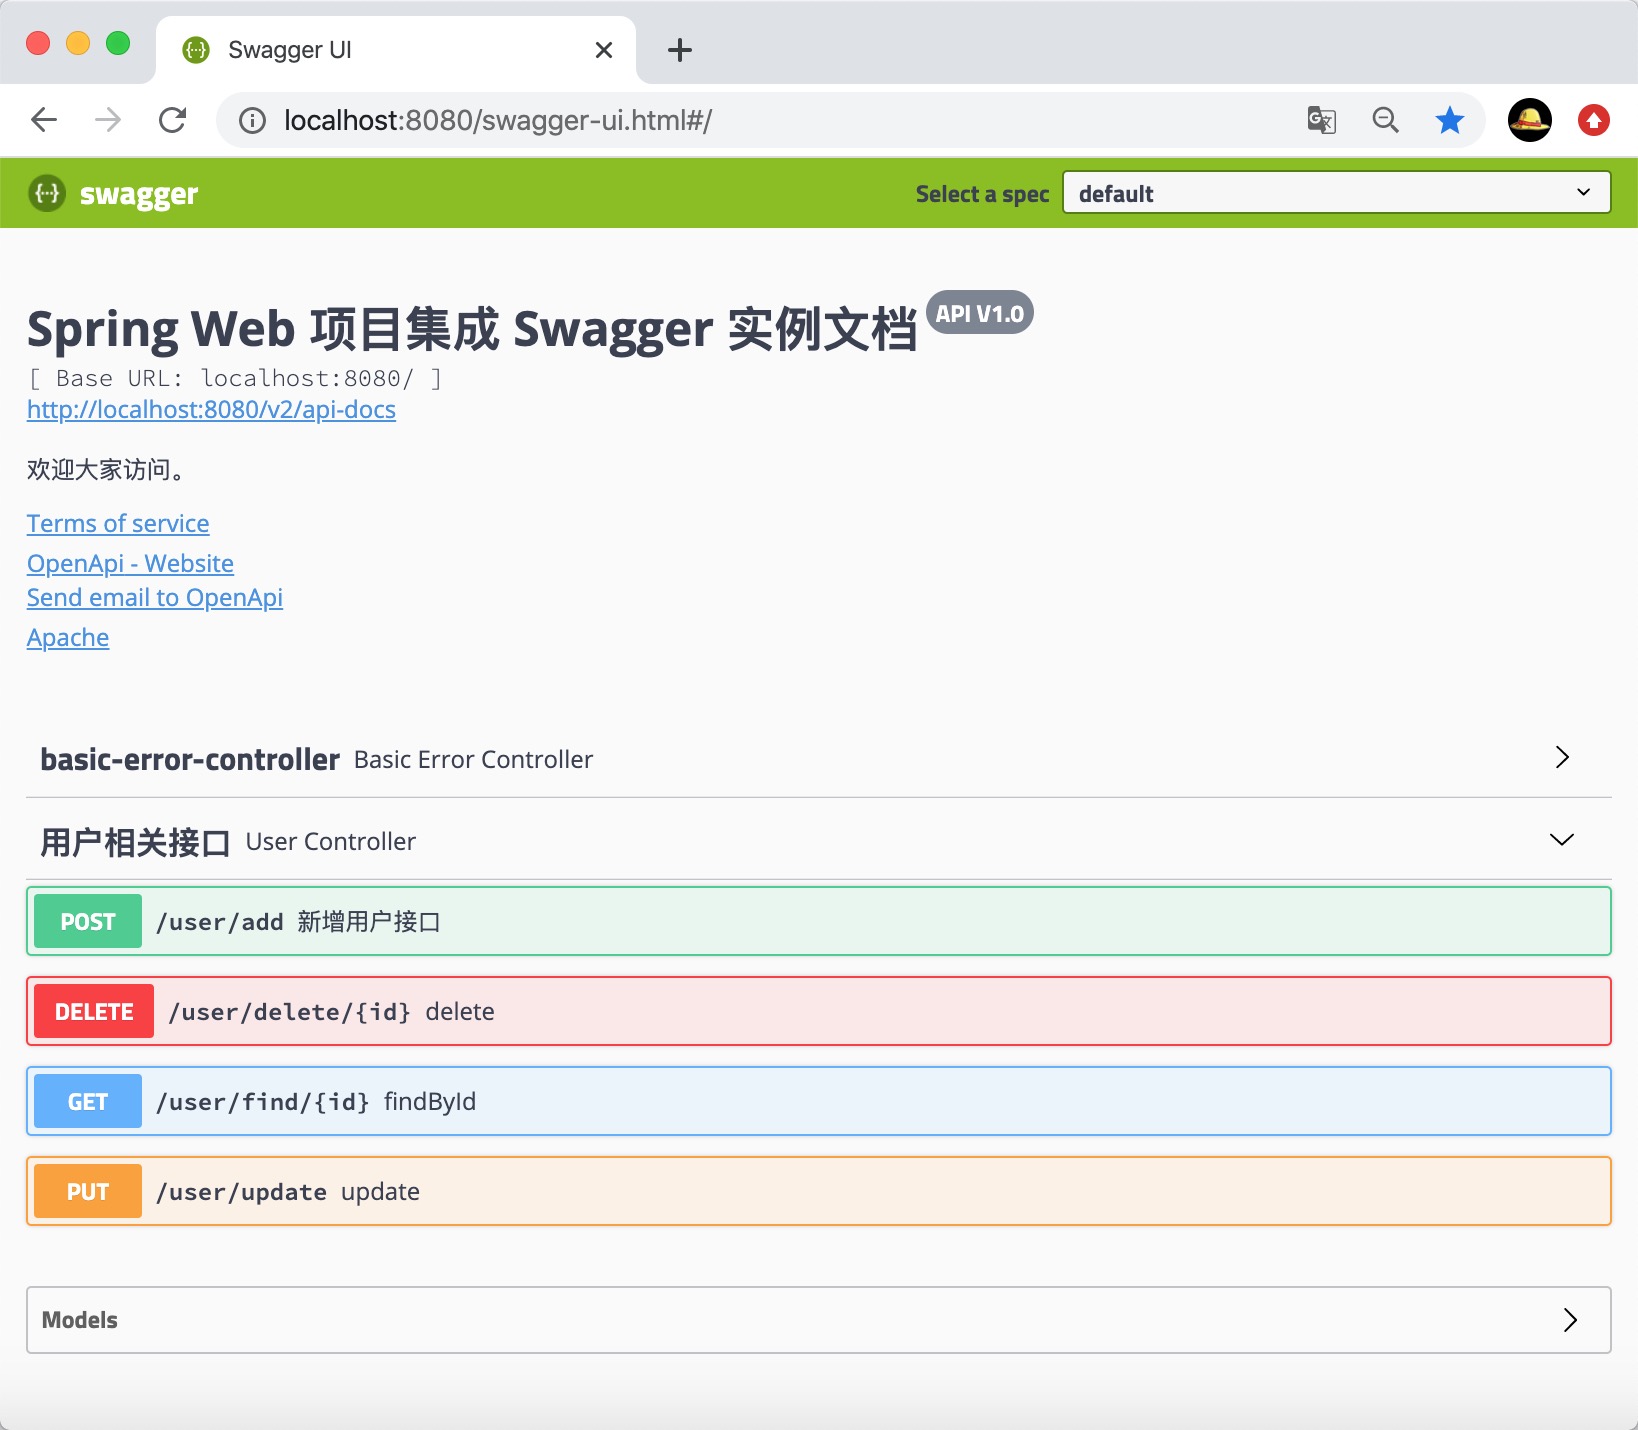
本章介绍SpringBoot 与 Swagger整合,对Swagger不了解的,可以参考【Java】Swagger快速入门
Swagger整合
1、新建一个SpringBoot Web项目,引入swagger依赖,如下:
 1 <!-- swagger -->
 2 <dependency>
 3     <groupId>io.springfox</groupId>
 4     <artifactId>springfox-swagger2</artifactId>
 5     <version>2.9.2</version>
 6 </dependency>
 7
 8 <dependency>
 9     <groupId>io.springfox</groupId>
10     <artifactId>springfox-swagger-ui</artifactId>
11     <version>2.9.2</version>
12 </dependency>
完整pom.xml文件如下:

 1 <?xml version="1.0" encoding="UTF-8"?>
 2 <project xmlns="http://maven.apache.org/POM/4.0.0"
 3          xmlns:xsi="http://www.w3.org/2001/XMLSchema-instance"
 4          xsi:schemaLocation="http://maven.apache.org/POM/4.0.0 http://maven.apache.org/xsd/maven-4.0.0.xsd">
 5     <modelVersion>4.0.0</modelVersion>
 6
 7     <groupId>com.test</groupId>
 8     <artifactId>test-springboot-swagger</artifactId>
 9     <version>1.0-SNAPSHOT</version>
10
11     <parent>
12         <groupId>org.springframework.boot</groupId>
13         <artifactId>spring-boot-starter-parent</artifactId>
14         <version>2.1.8.RELEASE</version>
15     </parent>
16
17     <properties>
18
19         <project.build.sourceEncoding>UTF-8</project.build.sourceEncoding>
20         <project.reporting.outputEncoding>UTF-8</project.reporting.outputEncoding>
21         <java.version>1.8</java.version>
22     </properties>
23
24     <dependencies>
25
26         <dependency>
27             <groupId>org.springframework.boot</groupId>
28             <artifactId>spring-boot-starter-web</artifactId>
29         </dependency>
30
31         <!-- swagger -->
32         <dependency>
33             <groupId>io.springfox</groupId>
34             <artifactId>springfox-swagger2</artifactId>
35             <version>2.9.2</version>
36         </dependency>
37
38         <dependency>
39             <groupId>io.springfox</groupId>
40             <artifactId>springfox-swagger-ui</artifactId>
41             <version>2.9.2</version>
42         </dependency>
43
44         <dependency>
45             <groupId>org.springframework.boot</groupId>
46             <artifactId>spring-boot-starter-test</artifactId>
47             <scope>test</scope>
48         </dependency>
49
50     </dependencies>
51
52
53     <!-- SpringBoot打包插件,可以将代码打包成一个可执行的jar包 -->
54     <build>
55         <plugins>
56             <plugin>
57                 <groupId>org.springframework.boot</groupId>
58                 <artifactId>spring-boot-maven-plugin</artifactId>
59             </plugin>
60         </plugins>
61     </build>
62
63 </project>
2、编辑swagger配置类
 1 package com.test.springboot.swagger.config;
 2
 3 import org.springframework.context.annotation.Bean;
 4 import org.springframework.context.annotation.Configuration;
 5
 6 import springfox.documentation.builders.PathSelectors;
 7 import springfox.documentation.builders.RequestHandlerSelectors;
 8 import springfox.documentation.service.ApiInfo;
 9 import springfox.documentation.service.Contact;
10 import springfox.documentation.spi.DocumentationType;
11 import springfox.documentation.spring.web.plugins.Docket;
12 import springfox.documentation.swagger2.annotations.EnableSwagger2;
13
14 import java.util.Collections;
15
16 @Configuration
17 @EnableSwagger2 // 作用是启用Swagger2相关功能。
18 public class SwaggerConfig {
19
20     @Bean
21     public Docket api() {
22         return new Docket(DocumentationType.SWAGGER_2).select().apis(RequestHandlerSelectors.any())
23                 .paths(PathSelectors.any()).build().apiInfo(apiInfo());
24     }
25
26     private ApiInfo apiInfo() {
27         return new ApiInfo("Spring Web 项目集成 Swagger 实例文档", "欢迎大家访问。", "API V1.0",
28                 "Terms of service", new Contact("OpenApi", "http://127.0.0.1", "123456@163.com"), "Apache",
29                 "http://www.apache.org/", Collections.emptyList());
30     }
31 }
3、编写实体类User
 1 package com.test.springboot.swagger.model;
 2
 3 import io.swagger.annotations.ApiModel;
 4 import io.swagger.annotations.ApiModelProperty;
 5
 6 @ApiModel("用户实体")
 7 public class User {
 8
 9     @ApiModelProperty("用户 ID")
10     private Integer id;
11
12     @ApiModelProperty("用户 名称")
13     private String name;
14
15     public Integer getId() {
16         return id;
17     }
18
19     public void setId(Integer id) {
20         this.id = id;
21     }
22
23     public String getName() {
24         return name;
25     }
26
27     public void setName(String name) {
28         this.name = name;
29     }
30
31
32 }
4、编写controller
 1 package com.test.springboot.swagger.controller;
 2
 3 import com.test.springboot.swagger.model.User;
 4 import io.swagger.annotations.Api;
 5 import io.swagger.annotations.ApiOperation;
 6 import org.springframework.web.bind.annotation.*;
 7
 8 @Api(tags = "用户相关接口")
 9 @RestController
10 @RequestMapping("/user")
11 public class UserController {
12
13     @ApiOperation("新增用户接口")
14     @PostMapping("/add")
15     public boolean addUser(@RequestBody User user) {
16         return false;
17     }
18
19     @GetMapping("/find/{id}")
20     public User findById(@PathVariable("id") int id) {
21         return new User();
22     }
23
24     @PutMapping("/update")
25     public boolean update(@RequestBody User user) {
26         return true;
27     }
28
29     @DeleteMapping("/delete/{id}")
30     public boolean delete(@PathVariable("id") int id) {
31         return true;
32     }
33 }
5、启动项目,使用地址 http://localhost:8080/swagger-ui.html,进行访问,效果如下:

