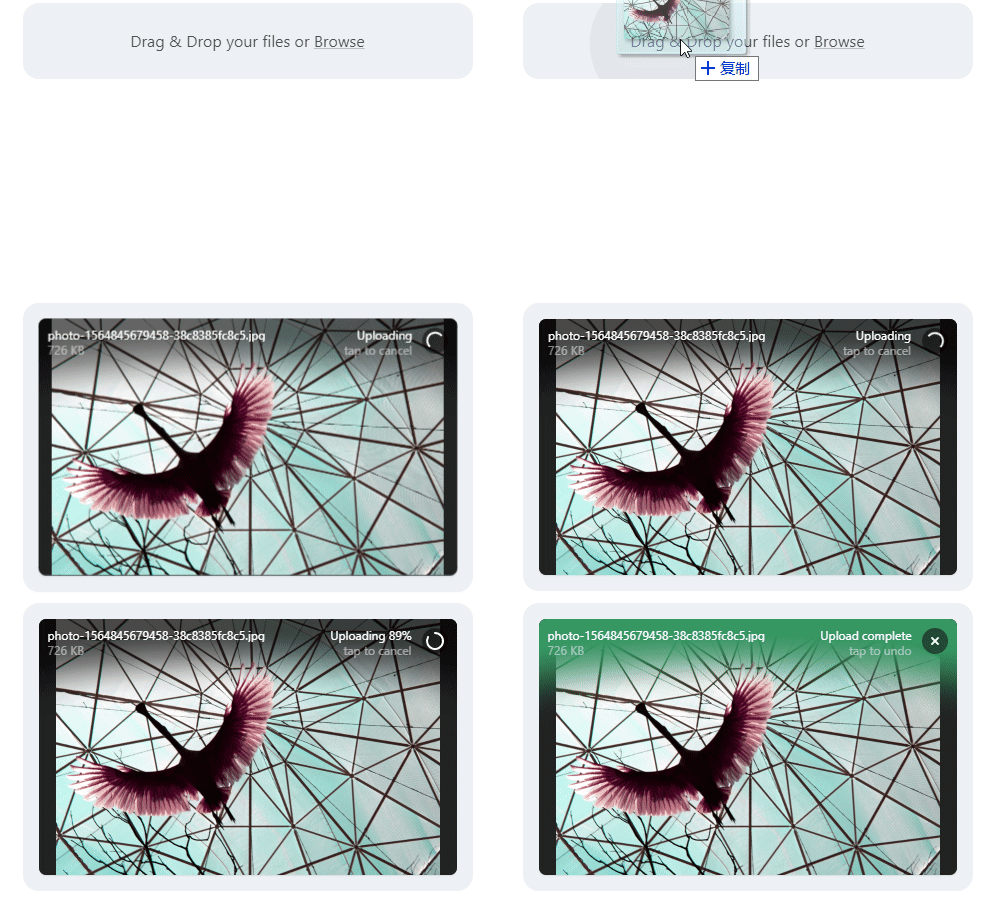
最近发现了一个高颜值的前端上传组件Uppy.js,立即上手体验了一波,感觉还不错。然后又看到同类型的Filepond以及Dropzone.js,对比体验了一下,感觉都很优秀,但是在体验过程中,都遇到了一点点问题,所以记录一下。
uppy.js
组件引用有两种方式,npm包引入或者引用cdn地址。github上的简单示例:
<!-- 1. Add CSS to `<head>` -->
<link href="https://transloadit.edgly.net/releases/uppy/v1.5.0/uppy.min.css" rel="stylesheet">

<!-- 2. Add JS before the closing `</body>` -->
<script src="https://transloadit.edgly.net/releases/uppy/v1.5.0/uppy.min.js"></script>

<!-- 3. Initialize -->
<div class="UppyDragDrop"></div>
<script>
  var uppy = Uppy.Core()
  uppy.use(Uppy.DragDrop, { target: '.UppyDragDrop' })
  uppy.use(Uppy.Tus, { endpoint: '//master.tus.io/files/' })
</script>
官方网站的示例很详细,查看文档后,改动成使用dashboard,endpoint是后端接收文件的方法,后端是aspnetcore创建的MVC示例项目。

  1 <!doctype html>
  2 <html>
  3 <head>
  4     <meta charset="utf-8">
  5     <title>Uppy</title>
  6     <!-- 1. Add CSS to `<head>` -->
  7     <link href="https://transloadit.edgly.net/releases/uppy/v1.5.0/uppy.min.css" rel="stylesheet">
  8 </head>
  9 <body>
 10     <div id="uppy-dashboard-area"></div>
 11     <!-- 2. Add JS before the closing `</body>` -->
 12     <script src="https://transloadit.edgly.net/releases/uppy/v1.5.0/uppy.min.js"></script>
 13     <script>
 14         var zhcn = {
 15             strings: {
 16                 // When `inline: false`, used as the screen reader label for the button that closes the modal.
 17                 closeModal: '关闭弹框',
 18                 // Used as the screen reader label for the plus (+) button that shows the “Add more files” screen
 19                 addMoreFiles: '添加更多文件',
 20                 // Used as the header for import panels, e.g., “Import from Google Drive”.
 21                 importFrom: '从 %{name} 导入',
 22                 // When `inline: false`, used as the screen reader label for the dashboard modal.
 23                 dashboardWindowTitle: 'Uppy Dashboard Window (Press escape to close)',
 24                 // When `inline: true`, used as the screen reader label for the dashboard area.
 25                 dashboardTitle: 'Uppy Dashboard',
 26                 // Shown in the Informer when a link to a file was copied to the clipboard.
 27                 copyLinkToClipboardSuccess: '链接已复制',
 28                 // Used when a link cannot be copied automatically — the user has to select the text from the
 29                 // input element below this string.
 30                 copyLinkToClipboardFallback: '复制下面的链接',
 31                 // Used as the hover title and screen reader label for buttons that copy a file link.
 32                 copyLink: '复制链接',
 33                 // Used as the hover title and screen reader label for file source icons, e.g., “File source: Dropbox”.
 34                 fileSource: '文件来源: %{name}',
 35                 // Used as the label for buttons that accept and close panels (remote providers or metadata editor)
 36                 done: '完成',
 37                 // Used as the screen reader label for buttons that remove a file.
 38                 removeFile: '移除文件',
 39                 // Used as the screen reader label for buttons that open the metadata editor panel for a file.
 40                 editFile: '编辑文件',
 41                 // Shown in the panel header for the metadata editor. Rendered as “Editing image.png”.
 42                 editing: '正在编辑 %{file}',
 43                 // Text for a button shown on the file preview, used to edit file metadata
 44                 edit: '编辑',
 45                 // Used as the screen reader label for the button that saves metadata edits and returns to the
 46                 // file list view.
 47                 finishEditingFile: '结束编辑文件',
 48                 // Used as the label for the tab button that opens the system file selection dialog.
 49                 myDevice: '我的设备',
 50                 // Shown in the main dashboard area when no files have been selected, and one or more
 51                 // remote provider plugins are in use. %{browse} is replaced with a link that opens the system
 52                 // file selection dialog.
 53                 dropPasteImport: 'Drop files here, paste, %{browse} or import from',
 54                 // Shown in the main dashboard area when no files have been selected, and no provider
 55                 // plugins are in use. %{browse} is replaced with a link that opens the system
 56                 // file selection dialog.
 57                 dropPaste: '拖拽文件到这里 or %{browse}',
 58                 // This string is clickable and opens the system file selection dialog.
 59                 browse: '浏览本地文件',
 60                 // Used as the hover text and screen reader label for file progress indicators when
 61                 // they have been fully uploaded.
 62                 uploadComplete: '上传完成',
 63                 // Used as the hover text and screen reader label for the buttons to resume paused uploads.
 64                 resumeUpload: '继续',
 65                 // Used as the hover text and screen reader label for the buttons to pause uploads.
 66                 pauseUpload: '暂停',
 67                 // Used as the hover text and screen reader label for the buttons to retry failed uploads.
 68                 retryUpload: '重试',
 69
 70                 // Used in a title, how many files are currently selected
 71                 xFilesSelected: {
 72                     0: '%{smart_count} 个文件已选择',
 73                     1: '%{smart_count} 个文件已选择'
 74                 },
 75
 76                 // uppy/status-bar strings:
 77                 uploading: '上传中...',
 78                 complete: '完成'
 79                 // ...etc
 80             }
 81         };
 82         var uppy = Uppy.Core({
 83             autoProceed: false,
 84             allowMultipleUploads: true, // 上传完成之后,是否可继续添加文件上传
 85             restrictions: {
 86                 maxFileSize: 1024 * 1024 * 1024 * 4, // 以字节为单位
 87                 maxNumberOfFiles: 100,
 88                 minNumberOfFiles: 1,
 89                 allowedFileTypes: ['image/*', 'video/*'] // mime类型(image/png)或者文件后缀名(.jpg)
 90             }
 91         })
 92             .use(Uppy.Dashboard, {
 93                 id: 'Dashboard',
 94                 metaFields: [
 95                     { id: 'name', name: 'Name', placeholder: 'file name' }
 96                 ],
 97                 target: '#uppy-dashboard-area',
 98                 note: 'image and video only',
 99                 inline: true,
100                 showLinkToFileUploadResult: true,
101                 showProgressDetails: true,
102                 hideUploadButton: false,
103                 hideRetryButton: false,
104                 hidePauseResumeButton: false,
105                 hideCancelButton: false,
106                 hideProgressAfterFinish: false,
107                 closeModalOnClickOutside: false,
108                 closeAfterFinish: false,
109                 disableStatusBar: false,
110                 disableInformer: false,
111                 disableThumbnailGenerator: false,
112                 disablePageScrollWhenModalOpen: true,
113                 animateOpenClose: true,
114                 proudlyDisplayPoweredByUppy: true,
115                 onRequestCloseModal: () => this.closeModal(),
116                 showSelectedFiles: true,
117                 locale: zhcn,
118                 browserBackButtonClose: false
119             })
120             .use(Uppy.Tus, {
121                 endpoint: '/FileUpload/Upload'
122             })
123
124
125         uppy.on('file-added', (file) => {
126             uppy.setFileMeta(file)
127         })
128         uppy.on('file-removed', (file) => {
129             console.log('Removed file', file)
130         })
131         uppy.on('upload-success', (file, response) => {
132
133         })
134         uppy.on('complete', (result) => {
135             console.log('Upload complete! We’ve uploaded these files:', result.successful)
136         })
137     </script>
138 </body>
139 </html>
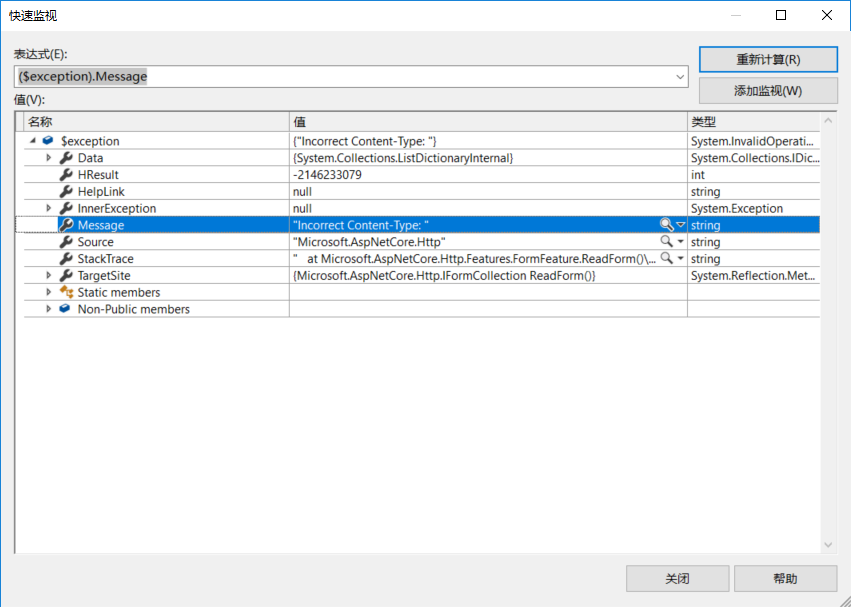
运行项目,拖拽图片,上传,然后后端却怎么也接收不到文件。用IFormFile和IFormFileCollection类型都接收不到参数,改用Request.Form接收文件报错,而且会连续5次请求。查看异常请求,没有ContentType,ContentLength=0,说明这是一个空请求?

看看前端请求,发现有点不一样,Upload-Length刚好就是上传图片的大小,那么这个Upload-Metadata应该就是上传的图片了。
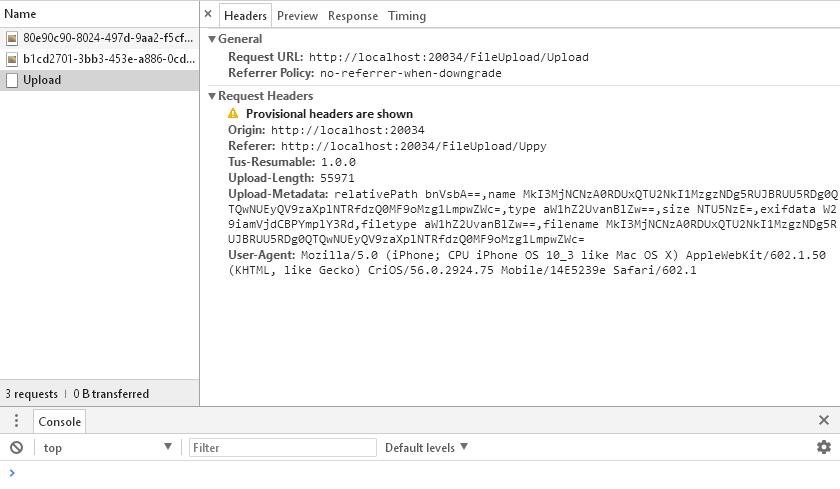
看到有relativePath,name,type,size,exifdata,filetype,filename属性,然而可能是我太弱鸡了,不知道如何取出文件。( ̄□ ̄||)
继续翻官方文档,好在uppy支持XHR方式,然后也发现了uppy的本地化js,上传方式改为使用XHRUpload,Dashboard的locale属性改为引入的js,所以就变成了这样:

<!doctype html>
<html>
<head>
    <meta charset="utf-8">
    <title>Uppy</title>
    <!-- 1. Add CSS to `<head>` -->
    <link href="https://transloadit.edgly.net/releases/uppy/v1.5.0/uppy.min.css"
          asp-fallback-href="~/css/uppy/Uppy.min.css"
          asp-fallback-test-class="uppy-Root"
          rel="stylesheet">
</head>
<body>
    <div id="drag-drop-area"></div>
    <!-- 2. Add JS before the closing `</body>` -->
    <script src="https://transloadit.edgly.net/releases/uppy/v1.5.0/uppy.min.js"
            asp-fallback-src="~/js/uppy/Uppy.min.js"
            asp-fallback-test="window.Uppy"></script>
    <script src="https://transloadit.edgly.net/releases/uppy/locales/v1.7.0/zh_CN.min.js"
            asp-fallback-src="~/js/uppy/zh_CN.min.js"></script>
    <script>
        var uppy = Uppy.Core({
            autoProceed: false,
            allowMultipleUploads: true, // 上传完成之后,是否可继续添加文件上传
            restrictions: {
                maxFileSize: 1024 * 1024 * 1024 * 4, // 以字节为单位
                maxNumberOfFiles: 100,
                minNumberOfFiles: 1,
                allowedFileTypes: ['image/*', 'video/*'] // mime类型(image/png)或者文件后缀名(.jpg)
            }
        })
            .use(Uppy.Dashboard, {
                id: 'Dashboard',
                metaFields: [
                    // 重命名文件
                    { id: 'name', name: 'Name', placeholder: 'file name' }
                ],
                //trigger: '#uppy-select-files',
                target: '#drag-drop-area',
                note: 'image and video only',
                inline: true,
                // 750,
                //height: 550,
                //thumbnailWidth: 280,
                showLinkToFileUploadResult: true,
                showProgressDetails: true,
                hideUploadButton: false,
                hideRetryButton: false,
                hidePauseResumeButton: false,
                hideCancelButton: false,
                hideProgressAfterFinish: false,
                closeModalOnClickOutside: false,
                closeAfterFinish: false,
                disableStatusBar: false,
                disableInformer: false,
                disableThumbnailGenerator: false,
                disablePageScrollWhenModalOpen: true,
                animateOpenClose: true,
                proudlyDisplayPoweredByUppy: true,
                onRequestCloseModal: () => this.closeModal(),
                showSelectedFiles: true,
                locale: Uppy.locales.zh_CN,
                browserBackButtonClose: false
            })
            .use(Uppy.XHRUpload, {
                id: 'XHRUpload',
                endpoint: '/FileUpload/Upload',
                method: 'post',
                formData: true,
                fieldName: 'files[]',
                metaFields: null,
                bundle: true,
                getResponseData(responseText, response) {
                    //debugger
                    console.log(response)
                },
                getResponseError(responseText, xhr) {
                    //debugger
                },
                timeout: 30 * 1000, // default 30s
                limit: 0, // Limit the amount of uploads going on at the same time.
                responseType: '', // only '','text','arraybuffer','blob','document'
                locale: {
                    strings: {
                        timeOut: 'upload stalled for %{seconds} seconds, aborting..'
                    }
                }
            })

        uppy.on('file-added', (file) => {
            //uppy.setFileMeta(file)
            uppy.setFileMeta(file.id, {
                size: file.size
            })
        })
        uppy.on('file-removed', (file) => {
            console.log('Removed file', file)
        })
        uppy.on('upload-success', (file, response) => {
            //debugger
        })
        uppy.on('complete', (result) => {
            console.log('Upload complete! We’ve uploaded these files:', result.successful)
        })
    </script>
</body>
</html>

Filepond
Filepond支持多个前端框架,Angular,React,Vue和jQuery。并且Filepond有非常多的插件,首先看看filepond的官方示例,
<!--
The classic file input element we'll enhance
to a file pond, configured with attributes
-->
<input type="file"
    class="filepond"
    name="filepond"
    multiple
    data-max-file-size="3MB"
    data-max-files="3">

// We want to preview images, so we register
// the Image Preview plugin, We also register
// exif orientation (to correct mobile image
// orientation) and size validation, to prevent
// large files from being added
FilePond.registerPlugin(
  FilePondPluginImagePreview,
  FilePondPluginImageExifOrientation,
  FilePondPluginFileValidateSize
);

// Select the file input and use
// create() to turn it into a pond
FilePond.create(
    document.querySelector('input')
);
改造一下:

<!DOCTYPE html>
<html>
<head>
    <title>FilePond CDN</title>

    <!-- Filepond 样式文件 -->
    <link href="https://unpkg.com/filepond/dist/filepond.css" rel="stylesheet">

    <!-- 引入图像预览插件的css文件 -->
    <link href="https://unpkg.com/filepond-plugin-image-preview/dist/filepond-plugin-image-preview.css" rel="stylesheet">

</head>
<body>

    <input type="file" class="filepond" name="filepond">

    <!-- FilePond js文件 -->
    <script src="https://unpkg.com/filepond/dist/filepond.js"></script>

    <!-- FilePondPluginImagePreview 图像预览 -->
    <script src="https://unpkg.com/filepond-plugin-image-preview/dist/filepond-plugin-image-preview.js"></script>
    <!--FilePondPluginFileValidateSize 大小限制-->
    <script src="https://unpkg.com/filepond-plugin-file-validate-size/dist/filepond-plugin-file-validate-size.js"></script>
    <!--FilePondPluginFileValidateType 类型验证-->
    <script src="https://unpkg.com/filepond-plugin-file-validate-type/dist/filepond-plugin-file-validate-type.js"></script>


    <!-- 将所有输入元素转换为 ponds -->
    <script>
        //FilePond.parse(document.body);

        /*
         * 注册插件
         */
        FilePond.registerPlugin(
            FilePondPluginFileValidateSize, // 文件大小限制
            FilePondPluginFileValidateType, // 文件类型验证
            FilePondPluginImagePreview // 图片预览
        );

        FilePond.setOptions({
            // endpoint,后端地址
            server: '/FileUpload/Upload',
            allowImagePreview: true,
            imagePreviewMinHeight: 44,
            imagePreviewMaxHeight: 256,

            allowFileTypeValidation: true, // 文件类型验证
            acceptedFileTypes: ['image/jpeg', 'image/png'], // 支持的文件类型

        })

        FilePond.create(document.querySelector("input"), {
            allowFileSizeValidation: true, // 启用文件大小限制
            maxFileSize: '1000KB', // 单个文件大小限制
            maxTotalFileSize: '5MB',// 所有文件的总大小限制
            labelMaxFileSize: 'Maximum file size is {filesize}'

        });
    </script>

</body>
</html>
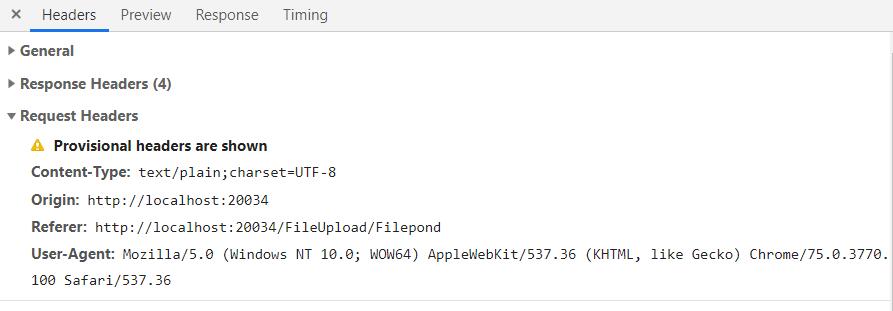
右上角有一个删除icon,点击之后发现发送了一个DELETE请求到后端,然而我并知道如何处理这个DELETE请求, ╮(╯▽╰)╭

看前台请求也没有什么有用的参数。如果是要处理HTTP DELETE请求的话,应该是要有参数的,可能文档有说明,有空再仔细研究。
Dropzonejs
直接贴上目前已经看过文档的部分代码吧。

<link type="text/css" rel="stylesheet" href="~/css/dropzone/Dropzone.css" />
<script type="text/javascript" src="~/js/dropzone/Dropzone.js"></script>
<h1>Dropzone</h1>
<div class="dropzone" id="dropzoneArea">
    <div class="am-text-success dz-message">
        将文件拖拽到此处<br>或者点此打开文件管理器选择文件
    </div>
</div>

<script type="text/javascript">
    Dropzone.autoDiscover = false;
    var dzone = new Dropzone("#dropzoneArea", {
        url: "/FileUpload/Upload",
        autoProcessQueue: true,
        addRemoveLinks: true,
        dictRemoveFile : "删除",
        dictCancelUpload: "取消",
        acceptedFiles: ".jpg,.jpeg,.png,.gif",//支持的格式
        maxFiles: 10,//最多上传几个图片
        maxFilesize: 5,//图片的大小,单位是M
        method: 'post',
        filesizeBase: 1024,
        init: function () {
            this.on("success", function (file, xhr) {
                console.log(xhr);
            })
            this.on("removedfile", function (file) {
                console.log("File " + file.name + " removed");
            })
        },
        sending: function(file, xhr, formData) {
            formData.append("filesize", file.size);
        },
        success: function (file, response, e) {
            //debugger
            alert(response.message);
        }
    });
</script>
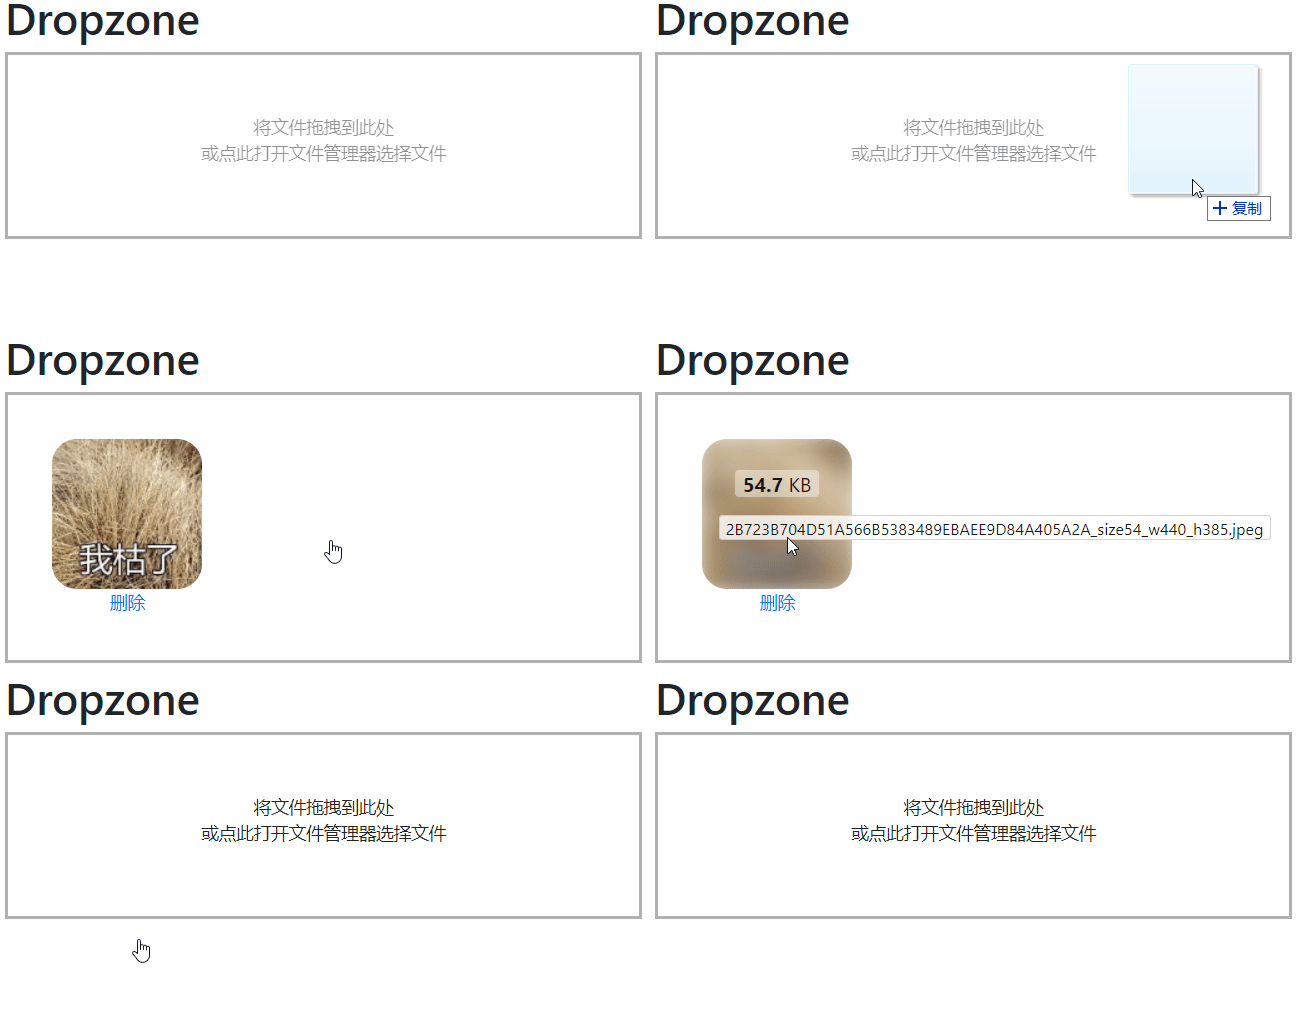
Dropzone也是默认自动上传,看了文档有禁止自动上传的选项,自己加一个上传按钮,然后绑定事件。目前没有很深入的看文档,不太清楚在哪一步来处理processQueue。Dropzone默认样式也比较一般,需要重新写样式。不过上传后的预览有毛玻璃效果,看起来还不错。
Enqueuing file uploads
When a file gets added to the dropzone, its status gets set to Dropzone.QUEUED(after the accept function check passes) which means that the file is now in the queue.

If you have the option autoProcessQueue set to true then the queue is immediately processed, after a file is dropped or an upload finished, by calling.processQueue() which checks how many files are currently uploading, and if it’s less than options.parallelUploads, .processFile(file) is called.

If you set autoProcessQueue to false, then .processQueue() is never called implicitly. This means that you have to call it yourself when you want to upload all files currently queued.
三款产品各有特点,界面都很美观,除了Dropzone需要额外写一些样式。总结一下目前遇到的待解决的问题:
Uppy - 使用Uppy.Tus方式上传文件
Filepond - 前端删除文件的http delete请求
Dropzone - 自动上传文件的处理事件

