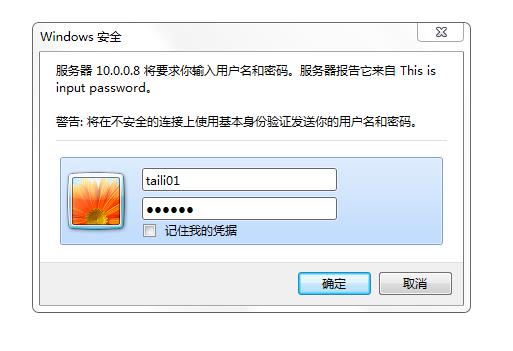
在nginx配置服务中,创建访问网站密码认证。
1)需要ngx_http_auth_basic_module模块
语法:
Syntax:    auth_basic string | off;
Default:
auth_basic off;
Context:    http, server, location, limit_except
默认是关闭的,使用位置在http,server,location标签。
2)例子:
location / {
    auth_basic           "closed site";
    auth_basic_user_file conf/htpasswd;
}
3)首先配置出保存用户和密码的文件htpasswd
使用htpasswd命令进行创建登录用户和密码
参数:
1 -c:创建一个加密文件;
2 -n:不更新加密文件,只将加密后的用户名密码显示在屏幕上;
3 -m:默认采用MD5算法对密码进行加密;
4 -d:采用CRYPT算法对密码进行加密;
5 -p:不对密码进行进行加密,即明文密码;
6 -s:采用SHA算法对密码进行加密;
7 -b:在命令行中一并输入用户名和密码而不是根据提示输入密码;
8 -D:删除指定的用户。
a、查看系统是否安装了htpasswd命令
1 root@oldboy nginx]# which htpasswd
2 /usr/bin/which: no htpasswd in (/usr/local/sbin:/usr/local/bin:/sbin:/bin:/usr/sbin:/usr/bin:/root/bin)
b、安装htpasswd命令
[root@oldboy nginx]# yum install http -y
c、使用htpasswd命令创建密码文件htpasswd
1 [root@oldboy nginx]# htpasswd -cb /application/nginx/conf/htpasswd taili01 123456
2 Adding password for user taili01
d、在原文件htpasswd中增加新的用户
1 [root@oldboy nginx]# htpasswd -b ./htpasswd taili02 123456
2 Adding password for user taili02
e、查看htpasswd文件内容
1 [root@oldboy nginx]# cat ./htpasswd
2 taili01:ZCN8EXnjt3OYY
3 taili02:lDJrLzZuwxh/g
4)配置nginx.conf文件
 1 [root@oldboy conf]# vim nginx.conf
 2 worker_processes  1;
 3 events {
 4     worker_connections  1024;
 5 }
 6 error_log logs/error.log;
 7 http {
 8     include       mime.types;
 9     default_type  application/octet-stream;
10     sendfile        on;
11     log_format  main  '$remote_addr - $remote_user [$time_local] "$request" '
12                       '$status $body_bytes_sent "$http_referer" '
13                       '"$http_user_agent" "$http_x_forwarded_for"';
14     keepalive_timeout  65;
15     server {
16         listen       80;
17         server_name  www.sandy.com;
18         location / {
19             root   html/www;
20             index  index.html index.htm;
21             auth_basic "This is input password";
22             auth_basic_user_file conf/htpasswd;
23         }
24         access_log  logs/host.access.log  main;
25         error_page   500 502 503 504  /50x.html;
26         location = /50x.html {
27             root   html;
28         }
29     }
30 }
5)访问网站
