一、下载cxf文件
http://cxf.apache.org/download.html
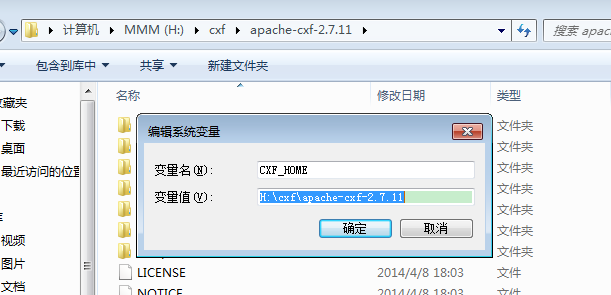
二、将下载好的文件解压,之后配置
CXF_HOME,配置方式与jdk环境类似;
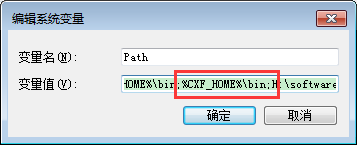
在path中添加。


三、服务器搭建
1.导入jar包
a.将apache-cxf-2.7.11lib 路径下的jar包放入MyEclipse
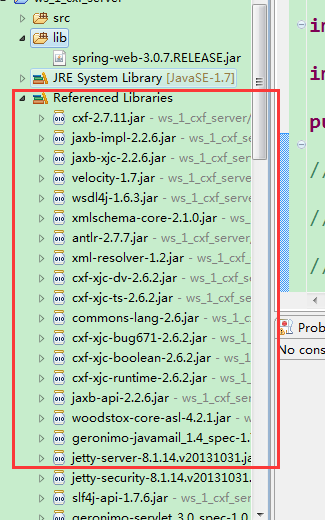
b.右键-->buildpath-->configure Build Path --> Libraries --> Add JARs --> 选择导入"cxf-manifest.jar"一个包即可。之后Referenced Libiries出现下列N多jar包

2.创建SEI接口
package ws.cxf.service;

import javax.jws.WebService;
import javax.xml.ws.BindingType;
import javax.xml.ws.soap.SOAPBinding;

//@BindingType 发布soap1.2的服务端
@WebService
@BindingType(SOAPBinding.SOAP12HTTP_BINDING)
public interface WeatherInterface {
	public String queryWeather(String cityName);
}
3。创建实现类
package ws.cxf.service;

public class WeatherInterfaceImpl implements WeatherInterface{

	@Override
	public String queryWeather(String cityName) {
		// TODO Auto-generated method stub
		System.out.println("from cilent..."+cityName);

		return "晴";
	}

}
4.使用JaxWsServerFactoryBean发布服务。
package ws.cxf.service;

import org.apache.cxf.jaxws.JaxWsServerFactoryBean;


public class WeatherServer {
	public static void main(String[] args) {
//		JaxWsClientFactoryBean发布服务
		JaxWsServerFactoryBean factoryBean = new JaxWsServerFactoryBean();
//		设置服务接口
		factoryBean.setServiceClass(WeatherInterface.class);
//		设置实现类
		factoryBean.setServiceBean(new WeatherInterfaceImpl());
//		设置服务地址
		factoryBean.setAddress("http://127.0.0.1:12345/weather");
//		发布
		factoryBean.create();
	}
}
四、客户端搭建
1.使用命令导入wsdl
cmd进入项目根目录-->
wsdl2java -p ws.cxf.server -d . http://127.0.0.1:12345/weather?wsdl
2.调用生成的服务端代码
package ws.cxf.cilent;

import org.apache.cxf.jaxws.JaxWsProxyFactoryBean;

import ws.cxf.server.WeatherInterface;

public class cilent {
	public static void main(String[] args) {
//		调用服务端
		JaxWsProxyFactoryBean factory = new JaxWsProxyFactoryBean();
//		设置服务端接口
		factory.setServiceClass(WeatherInterface.class);
//		设置服务地址
		factory.setAddress("http://127.0.0.1:12345/weather");
//		获取服务接口实例
		WeatherInterface create = factory.create(WeatherInterface.class);
		String queryWeather = create.queryWeather("sh");
		System.out.println(queryWeather);

	}
}
控制台:
客户端控制台输出:晴
服务器控制台输出:from cilent...sh