在动画基类的基础上,再实现各种动画效果,只需专注于各种逻辑实现,倒也不是太难的事。
今天实现第二个动画效果-飞入。
-
飞入效果
代码很少,因为只需要确定不同时间的位置,故只重载BuildDisplayRect:
头文件
/**
* @class TCbwAnimationEffect_ FlyIn
* @brief 动画基类
*
* 处理飞入动画效果
* @author 陈斌文
* @version 1.0
* @date 2015-03-04
* @QQ: 282397369
*/
class TCbwAnimationEffect_FlyIn : public TCbwAnimationEffect { // 飞入
typedef TCbwAnimationEffect inherited;
virtual TRect __fastcall BuildDisplayRect(OBJECTMAT * m);
public:
__fastcall TCbwAnimationEffect_FlyIn();
static TCbwAnimationEffect * Build();
};
然后实现:
// ***************************** 飞入效果 **************************************
__fastcall TCbwAnimationEffect_FlyIn::TCbwAnimationEffect_FlyIn()
: TCbwAnimationEffect() {
EffectType = cetFlyIn;
}
TCbwAnimationEffect * TCbwAnimationEffect_FlyIn::Build() {
return new TCbwAnimationEffect_FlyIn;
}
// BuildDisplayRect是根据索引确定相应位置
TRect __fastcall TCbwAnimationEffect_FlyIn::BuildDisplayRect(OBJECTMAT * m) {
TPoint startPos(m->LeftTopPosition.x, m->LeftTopPosition.y),
endPos(m->LeftTopPosition.x, m->LeftTopPosition.y);
if (cedFromBottom == EffectOptionType || cedFromLeftBottom == EffectOptionType ||
cedFromRightBottom == EffectOptionType) // 自底部
startPos.y = FHeight;
if (cedFromTop == EffectOptionType || cedFromLeftTop == EffectOptionType ||
cedFromRightTop == EffectOptionType) // 自顶部
startPos.y = -m->Mat.rows;
if (cedFromLeft == EffectOptionType || cedFromLeftBottom == EffectOptionType ||
cedFromLeftTop == EffectOptionType) // 自左侧
startPos.x = -m->Mat.cols;
if (cedFromRight == EffectOptionType || cedFromRightBottom == EffectOptionType ||
cedFromRightTop == EffectOptionType) // 自右侧
startPos.x = FWidth;
int x = startPos.x + (endPos.x - startPos.x) * (FCurrentIndex + 1)
/ FPeriodLength;
int y = startPos.y + (endPos.y - startPos.y) * (FCurrentIndex + 1)
/ FPeriodLength;
TRect result(x, y, x + m->Mat.cols, y + m->Mat.rows);
return result;
}
// ***************************** 飞入效果 **************************************
-
界面处理
现在到了处理界面的时候,因为在飞入效果中,还需要再设定效果选项。
在选择对象的时候,可以再顺带判断是否有动画项,简化处理,当只有一个动画项的时候再进行编辑处理。
TCbwAnimationEffect * FCurrentEffectItem;
vector<TCbwAnimationEffect *> FAllAnimationEffects;
vector<TCbwAnimationEffect *> __fastcall GetSelectEffectItems();
////////////////////////////////////////////////////////////////////////////////////////
vector<TCbwAnimationEffect *> __fastcall TForm::GetSelectEffectItems() {
vector<TCbwAnimationEffect *> selectedEffectItems;
FCurrentEffectItem = NULL;
for (int i = 0; i < cSelectedObjects->MetaNumber; ++i) {
TCbwObject * object = cSelectedObjects->Meta(i);
CBW_ITERATOR(vector<TCbwAnimationEffect *>, FAllAnimationEffects)
if((*it)->ContainsObject(object)) {
selectedEffectItems.push_back(*it);
break;
}
}
if(selectedEffectItems.size() == 1)
FCurrentEffectItem = selectedEffectItems[0];
return selectedEffectItems;
}
再通过SelectAnimationEffect(FCurrentEffectItem)完成界面按钮的控制。
再深入研究下PPT中的动画项效果选项,发现其有两部分:固定的序列项,即作为一个对象、整批发送、按段落三个选项,其余为各动画项相应的属性项。


因此,在基类中加入效果选项属性,100以内为相应选项,100: 作为一个对象,101:整批发送,102:按段落
int EffectOptionType; // 效果选项,
这样可以兼容所有效果选项(应该不会超过100项的吧)
而各个类型的效果选项,可以硬编码实现,也可以配置实现。从灵活角度,当然是配置实现了,后续也有利于国际化语言包。
void __fastcall TForm::SelectAnimationEffect(TCbwAnimationEffect * effectItem) {
int index = -1;
if(effectItem)
index = effectItem->EffectType - 1;
for (int i = 0; i < Gallery_FlashEffect->GalleryGroups->Count; ++i) { // 确保只添加一次
TdxRibbonGalleryGroup * group = Gallery_FlashEffect->GalleryGroups->Items[i];
for (int j = group->Items->Count - 1; j >= 0; --j) {
TdxRibbonGalleryGroupItem * item = group->Items->Items[j];
bool shouldBeSelected = (item->ImageIndex == index);
if(item->Selected != shouldBeSelected)
item->Selected = shouldBeSelected;
}
}
bool hasItemFlag = (effectItem != NULL);
Button_Flash_Preview->Enabled = hasItemFlag;
Button_Flash_Effect->Enabled = hasItemFlag;
Button_Flash_Effect->ItemLinks->Clear();
if(!TGlobalVariables::XmlForStringResource || !effectItem)
return;
CbwXmlNode * effectNode = TGlobalVariables::XmlForStringResource->RootNode->NodeByName("Effect", true);
if(!effectNode)
return;
UnicodeString basePath = THelper::File::GetApplicationPath() + effectNode->AttributeValueByName("path");
UnicodeString cn = effectItem->ClassName();
UnicodeString prefix = "TCbwAnimationEffect_";
cn.Delete(1, prefix.Length());
CbwXmlNode * destNode = effectNode->NodeByAttribute("name", cn);
if(destNode) {
for(int optionIndex = 0; optionIndex < destNode->ElementNumber; ++optionIndex) {
CbwXmlNode * optionNode = destNode->Elements(optionIndex);
TdxBarSeparator * sep = new TdxBarSeparator(Application->MainForm);
Button_Flash_Effect->ItemLinks->Add()->Item = sep;
sep->Caption = optionNode->AttributeValueByName("caption");
for(int i = 0; i < optionNode->ElementNumber; ++i) {
CbwXmlNode * itemNode = optionNode->Elements(i);
TdxBarButton * button = TCbwDevExp::CreateMenuItem(Button_Flash_Effect,
actEffect, itemNode->AttributeValueByName("caption"), i, true, false,
basePath + itemNode->AttributeValueByName("glyph"));
}
}
}
CbwXmlNode * baseNode = effectNode->NodeByName("optionItem");
if(baseNode) {
TdxBarSeparator * sep = new TdxBarSeparator(Application->MainForm);
Button_Flash_Effect->ItemLinks->Add()->Item = sep;
sep->Caption = baseNode->AttributeValueByName("caption");
for(int i = 0; i < baseNode->ElementNumber; ++i) {
if(i && effectItem->RelativeObjectNumber() == 1) // 单个对象,只有一项
break;
CbwXmlNode * itemNode = baseNode->Elements(i);
TdxBarButton * button = TCbwDevExp::CreateMenuItem(Button_Flash_Effect,
actEffect, itemNode->AttributeValueByName("caption"), 100 + i, true, false,
basePath + itemNode->AttributeValueByName("glyph"));
}
}
}
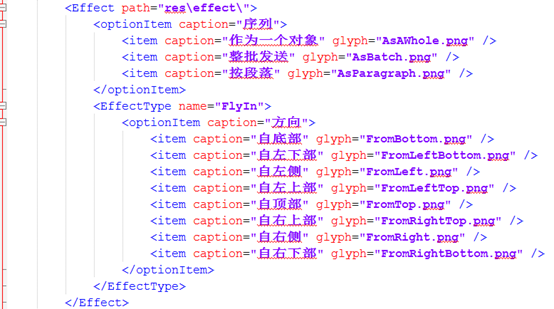
配置文件大体如下,实现到哪个效果,再相应添加配置项:

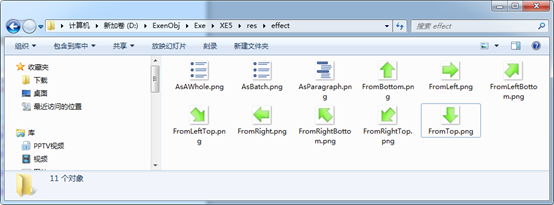
从网上再找相应的图标,放到reseffect目录下

再加上相应的按钮处理
void __fastcall TForm::Button_Flash_PreviewClick(TObject *Sender)
{
PreviewCurrentEffect();
}
//---------------------------------------------------------------------------
void __fastcall TForm::actEffectExecute(TObject *Sender)
{
int tag = THelper::Util::GetActionTag(Sender);
ChangeCurrentEffect(tag);
}
//---------------------------------------------------------------------------
void __fastcall TForm::ChangeCurrentEffect(int type) {
if(!FCurrentEffectItem)
return;
FCurrentEffectItem->EffectOptionType = type;
PreviewCurrentEffect();
}
void __fastcall TForm::PreviewCurrentEffect() {
if(!FCurrentEffectItem)
return;
FCurrentEffectItem->RefreshAllObjects();
FCurrentEffectItem->SetBounds(ScrollBox->Width, ScrollBox->Height);
Graphics::TBitmap * bitmap = new Graphics::TBitmap; // bitmap将用于显示
bitmap->PixelFormat = pf24bit;
bitmap->Width = ScrollBox->Width;
bitmap->Height = ScrollBox->Height;
RECT displayRect = Rect(ScrollBox->HorzScrollBar->Position,
ScrollBox->VertScrollBar->Position, ScrollBox->HorzScrollBar->Position +
ScrollBox->Width, ScrollBox->VertScrollBar->Position +
ScrollBox->Height);
Graphics::TBitmap * FPreviewBitmap = new Graphics::TBitmap;
FPreviewBitmap->PixelFormat = pf24bit;
FPreviewBitmap->Width = PaintBox->Width;
FPreviewBitmap->Height = PaintBox->Height;
TCanvas * canvas = FPreviewBitmap->Canvas;
canvas->Rectangle(0, 0, 10000, 10000);
CBW_ITERATOR(CbwObjects, Objects)(*it)->Canvas = canvas;
CBW_ITERATOR(CbwObjects, Objects) {
TCbwObject * object = *it;
if (!CanObjectBeVisible(object) || !object->CanContinueWithRect
(displayRect, CBW_CONTINUE_DRAW) || object->Selected)
continue;
object->Draw();
}
PostPaint(canvas);
bitmap->Canvas->CopyRect(Rect(0, 0, bitmap->Width, bitmap->Height), canvas,
displayRect);
CBW_ITERATOR(CbwObjects, Objects)(*it)->Canvas = PaintBox->Canvas;
TRestore ApplicationCurrentStatus(TGraphApp::CurrentStatus, cfsAnimation);
BYTE * backData = THelper::Graphics::GetBitmapData(bitmap);
FCurrentEffectItem->First();
while(!FCurrentEffectItem->Eof) {
FCurrentEffectItem->Draw(ScrollBox->Handle, backData, bitmap->Width, bitmap->Height);
FCurrentEffectItem->Next();
// THelper::Util::Delay(40);
Sleep(10);
}
delete backData;
delete FPreviewBitmap;
delete bitmap;
}
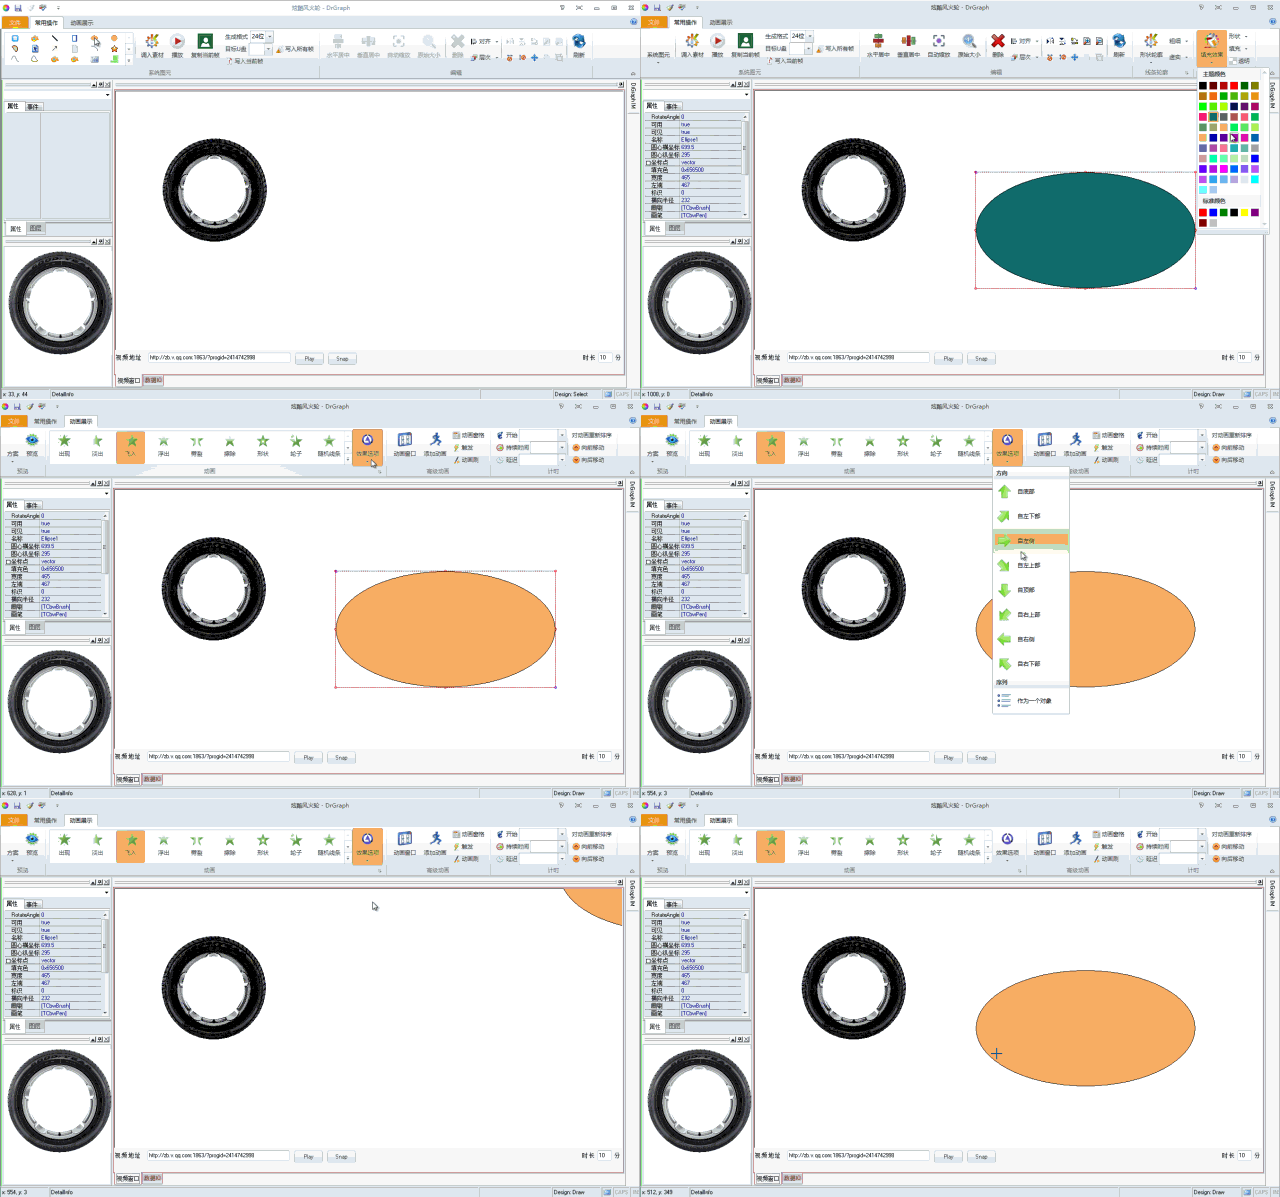
这下可以看到效果:

发现一个小小问题,点击各效果选项,效果选项的按钮图标没有相应改变。再花2分钟应该能解决。
以后每天没事的时候,实现一两个PPT动画效果,貌似一个月能实现完成。
在这之后,再实现潮流、跑马灯等效果,可以控制LED屏了,值得搞下。