django异步请求:
Django从一个http请求发起,到获得响应返回html页面的流程大致如下:http请求发起 -- http handling(request解析) -- url mapping(url正则匹配找到对应的View) -- 在View中进行逻辑的处理、数据计算(包括调用Model类进行数据库的增删改查)--将数据推送到template,返回对应的template/response。
同步请求与异步请求的区别:
同步请求:所有逻辑处理、数据计算任务在View中处理完毕后返回response。在View处理任务时用户处于等待状态,直到页面返回结果。
异步请求:View中先返回response,再在后台处理任务。用户无需等待,可以继续浏览网站。当任务处理完成时,我们可以再告知用户。
celery安装包:
pip install celery
pip install celery-with-redis
pip install django-celery
celery执行命令:
celery -A myproject beat -l info 定时任务
celery -A mymac worker -l info 异步任务
开两个黑窗口,黑窗口下先执行异步任务,在执行定时任务
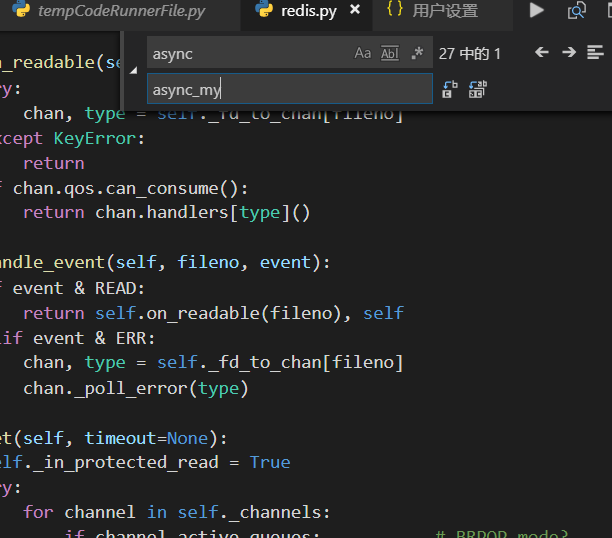
在第一次运行异步任务时会报asymc错,此时我们需要改celery的源代码。
把async改成async_my.
所需要需改的文件:
C:Python37Libsite-packagesceleryutils路径 (必须先修改)
celery/utils/timer2.py
/concurrency/asynpool.py
kombu/transport/redis.py
celery/worker/auto_scale.py,components,consumer,strategy
例:

也可能会出现库不匹配,这时我们需要降版本处理:
先删除/:
pip uninstall redis
指定版本号
pip install redis==2.10.6
Celery是基于Python开发的一个分布式任务队列框架,支持使用任务队列的方式在分布的机器/进程/线程上执行任务调度。
配置文件
INSTALLED_APPS = [
'django.contrib.admin',
'django.contrib.auth',
'django.contrib.contenttypes',
'django.contrib.sessions',
'django.contrib.messages',
'django.contrib.staticfiles',
'mymac',
'myapp',
'corsheaders',
'djcelery',
]
#配置celery
import djcelery
djcelery.setup_loader()
BROKER_URL = 'redis://127.0.0.1:6379'
CELERY_IMPORTS = ('mymac.tasks')
Celery.py
#导包
import os
import django
from celery import Celery
from django.conf import settings
os.environ.setdefault('DJANGO_SETTINGS_MODULE', 'mymac.settings')
django.setup()
app = Celery('mymac')
app.config_from_object('django.conf:settings')
app.autodiscover_tasks(lambda: settings.INSTALLED_APPS)
@app.task(bind=True)
def debug_task(self):
print('Request: {0!r}'.format(self.request))
tasks.py
