一、SpringBoot简介
SpringBoot是整个Spring技术栈的整合,来简化Spring应用开发,约定大于配置,去繁从简,just run 就能创建一个独立的,产品级别的应用。
背景:
J2EE笨重的开发、繁多的配置、底下的开发效率、复杂的部署流程、第三方技术集成难度大。
解决:
"Spring全家桶"时代。
Spring Boot ——> J2EE一站式解决方案
Spring Cloud ——>分布式整体解决问题
优点:
-
- 快速创建独立运行的Spring项目以及与主流框架集成
- 嵌入的Tomcat,无需打包成WAR包
- starters自动依赖与版本控制
- 大量自动配置,简化开发,也可修改默认值
- 无需配置xml,无代码生成,开箱即用
- 准生产环境的运行时应用监控
- 与云计算天然集成
二、微服务
2014年,martin fowler
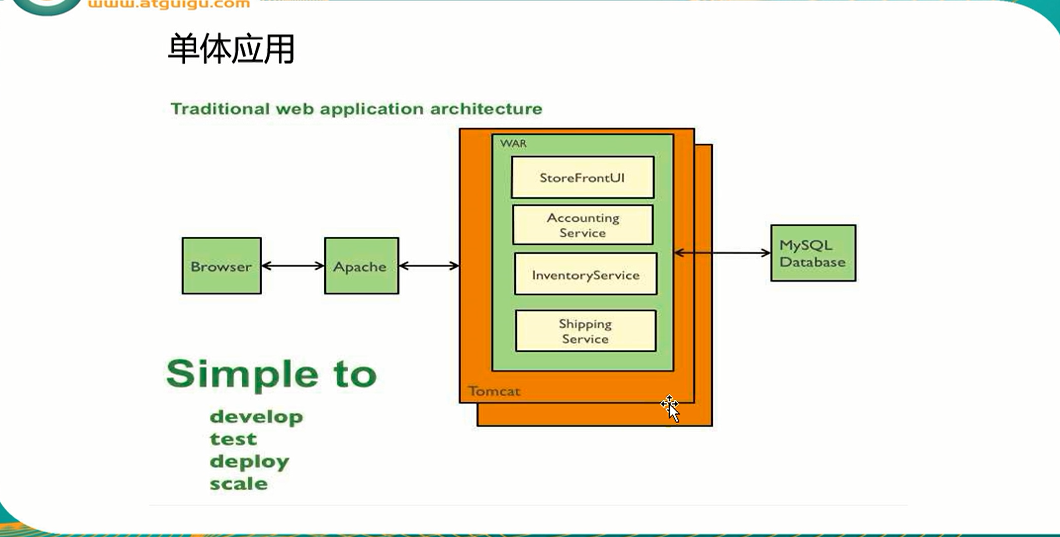
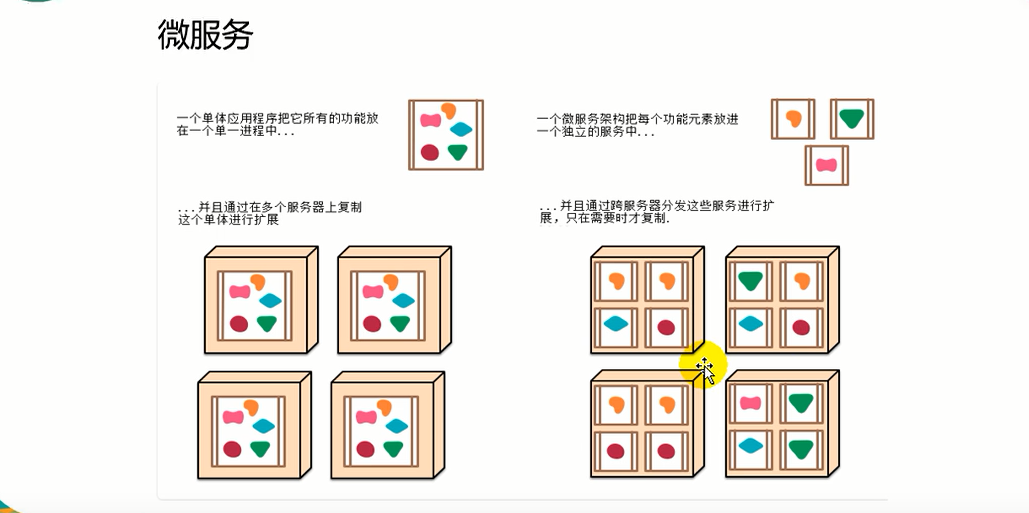
微服务:一种架构风格。一个应用应该是一组小型服务,可以通过HTTP的方式进行互通;每一个功能元素最终都是一个可替换和独立升级的软件单元
单体应用:All in one
三、环境配置
环境约束:
-jdk1.8:Spring Boot 建议jdk1.7以上;java -version java version "1.8.0_131"
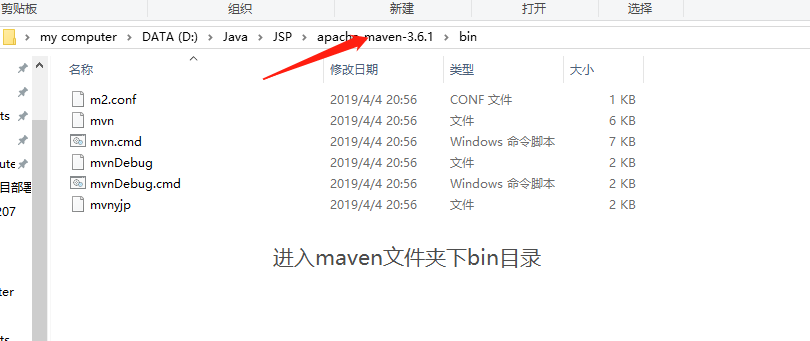
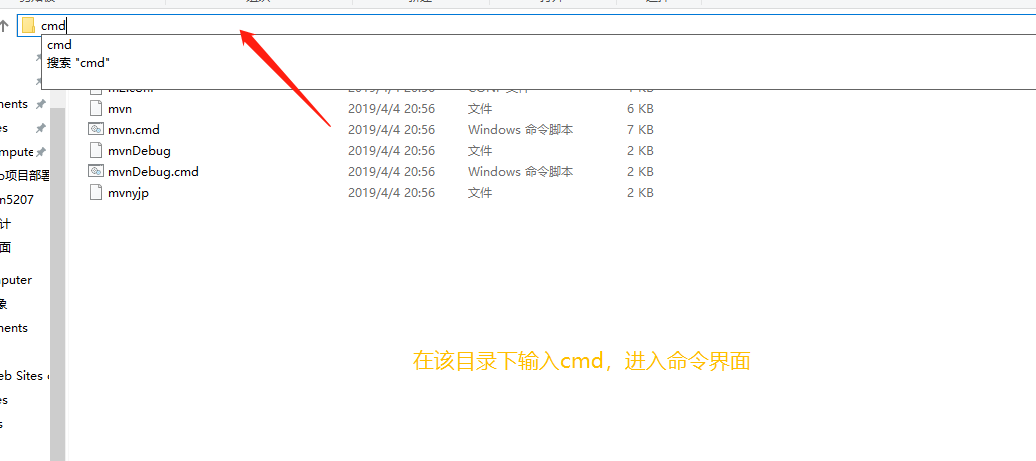
-maven3.x:maven3.3以上版本;Apache Maven 3.6.1
查询方法:

-IDEA
-SpringBoot 1.5.9版本(稳定版本)
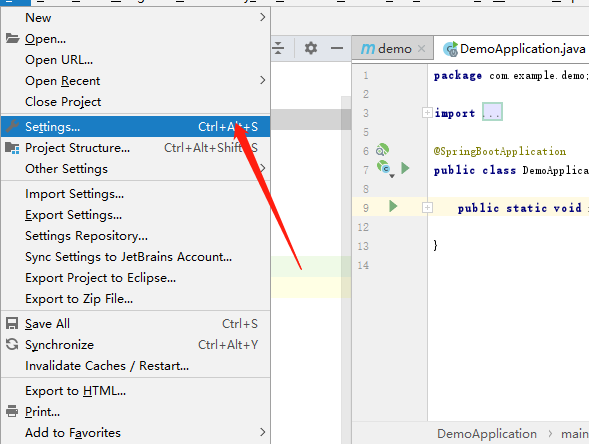
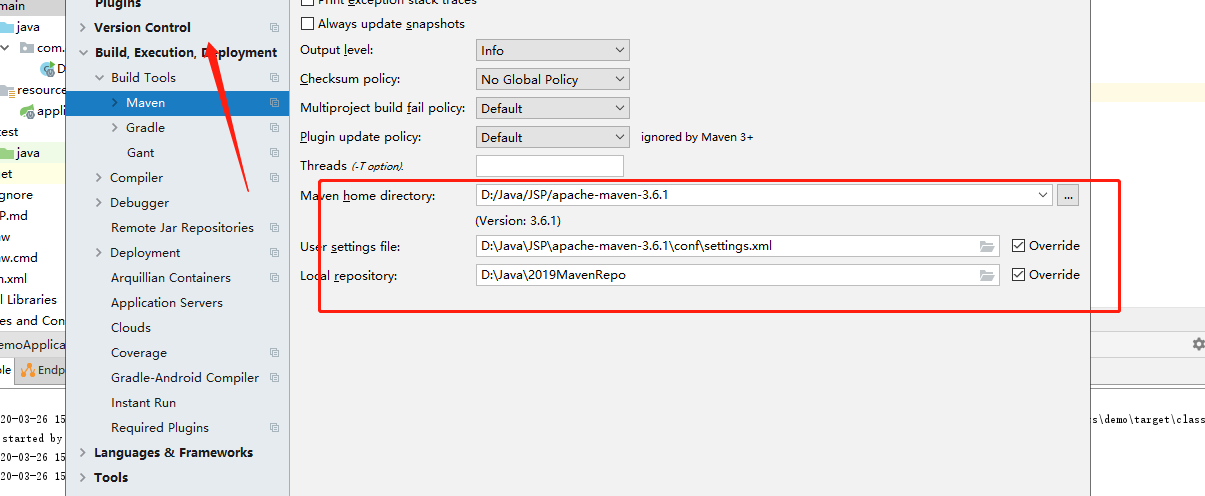
一、IDEA配置
四、SpringBoot HelloWorld
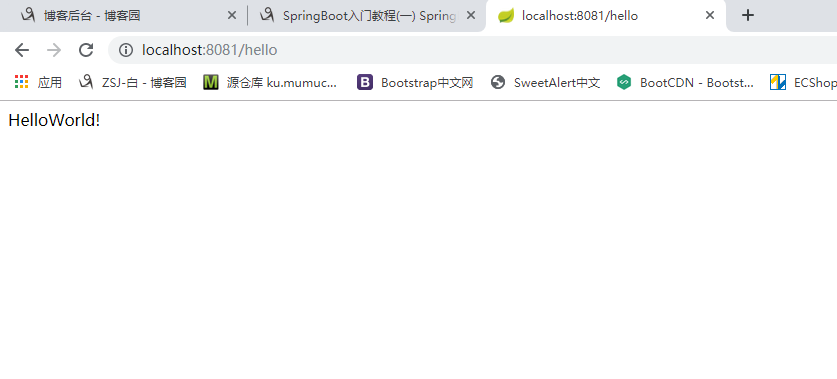
一个功能:浏览器发送hello请求,服务器接收请求并相应,响应Hello World 字符串;
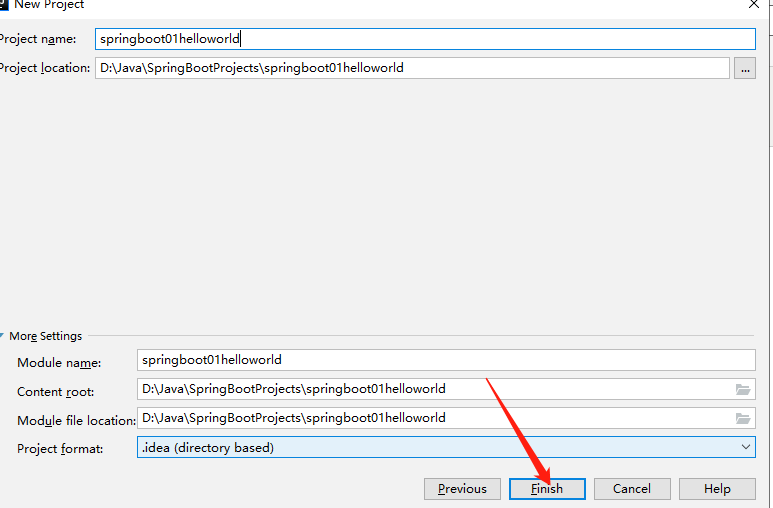
1、创建一个maven工程;(jar)
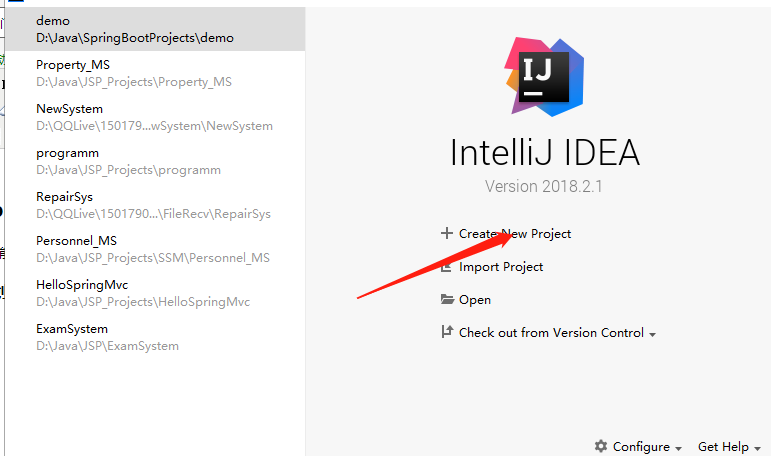
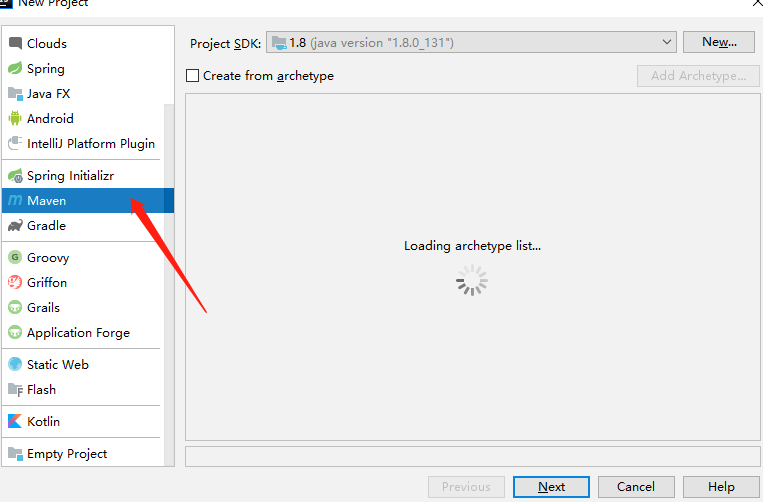
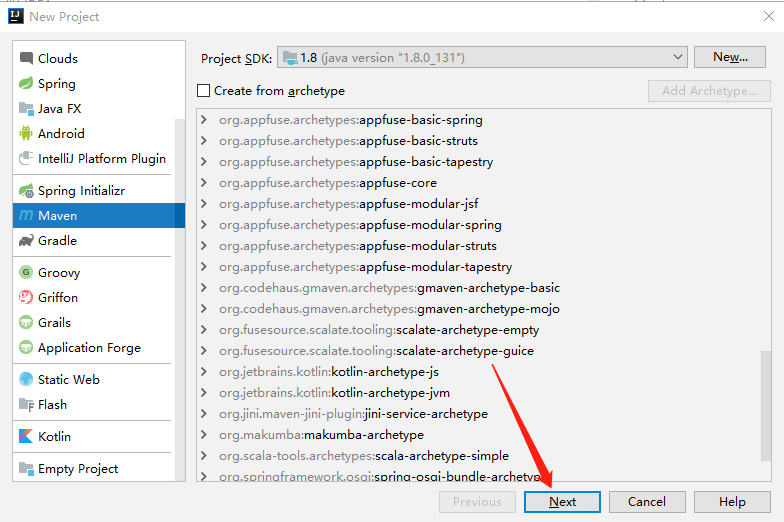
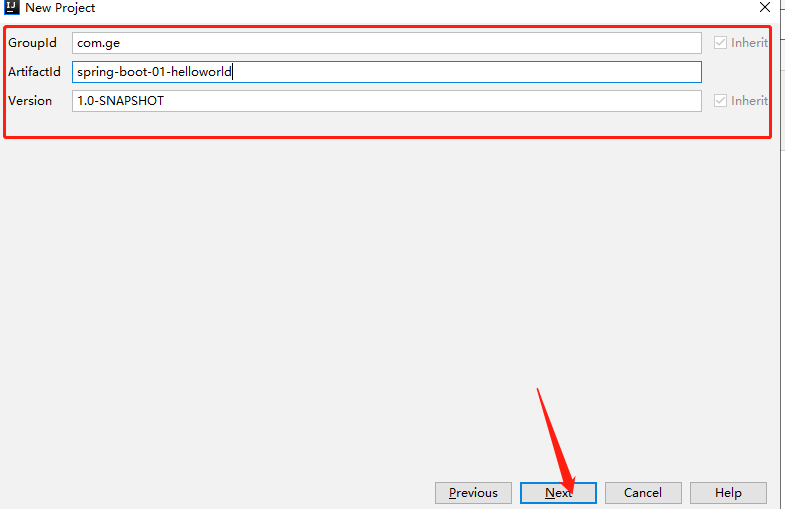
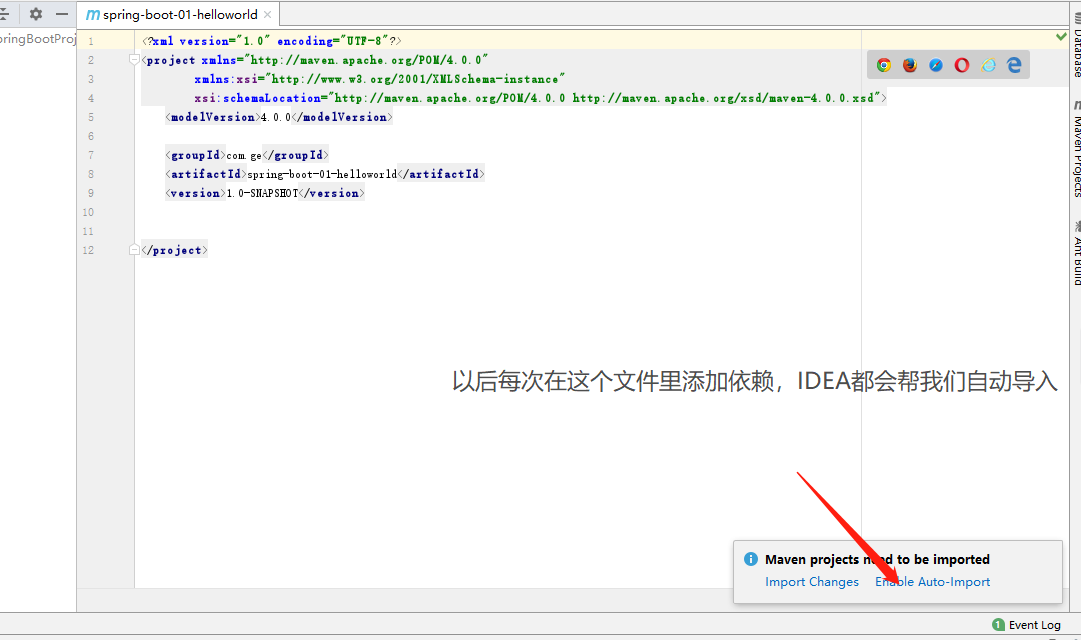
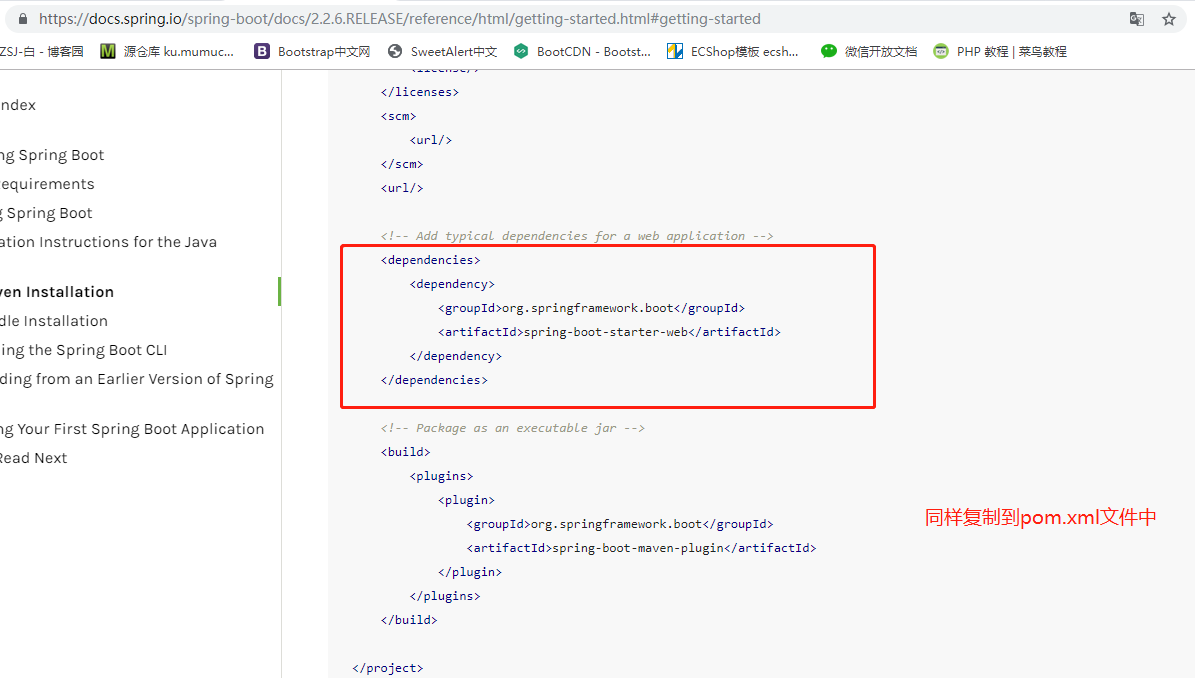
2、导入依赖springboot相关的依赖
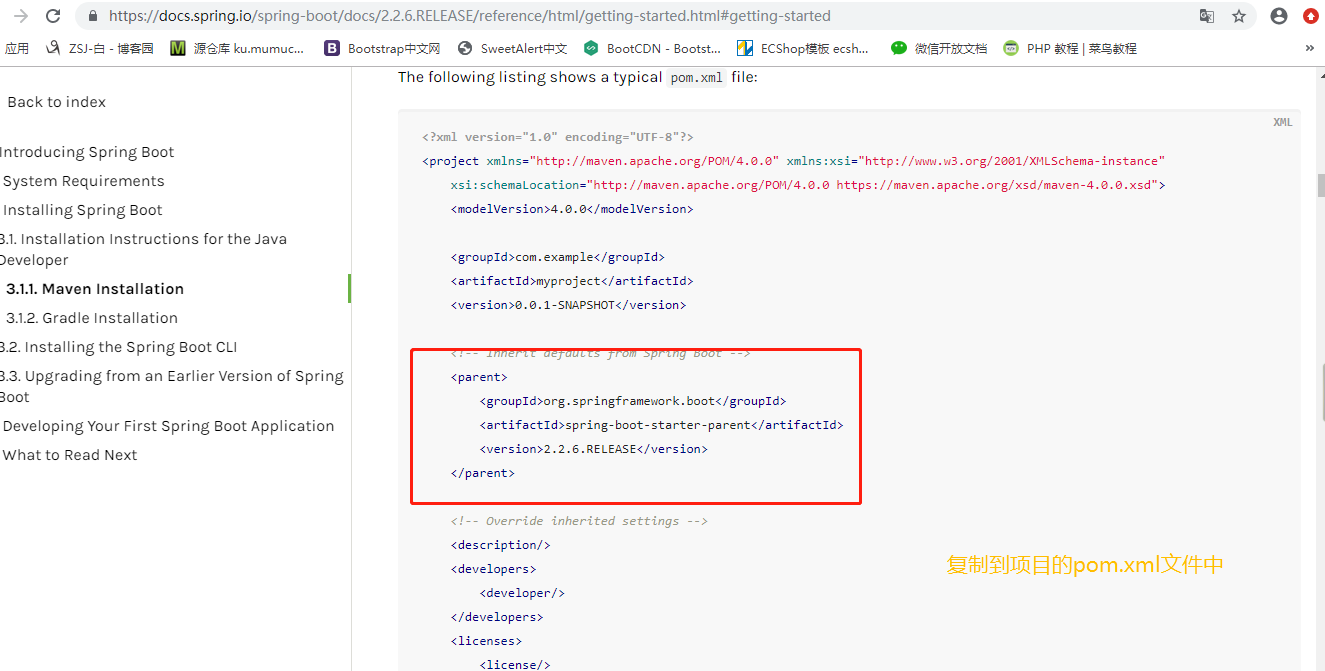
 <!-- Inherit defaults from Spring Boot -->
    <parent>
        <groupId>org.springframework.boot</groupId>
        <artifactId>spring-boot-starter-parent</artifactId>
        <version>2.1.13.RELEASE</version>
    </parent>

    <!-- Add typical dependencies for a web application -->
    <dependencies>
        <dependency>
            <groupId>org.springframework.boot</groupId>
            <artifactId>spring-boot-starter-web</artifactId>
        </dependency>
    </dependencies>
3、编写一个主程序,启动springboot应用
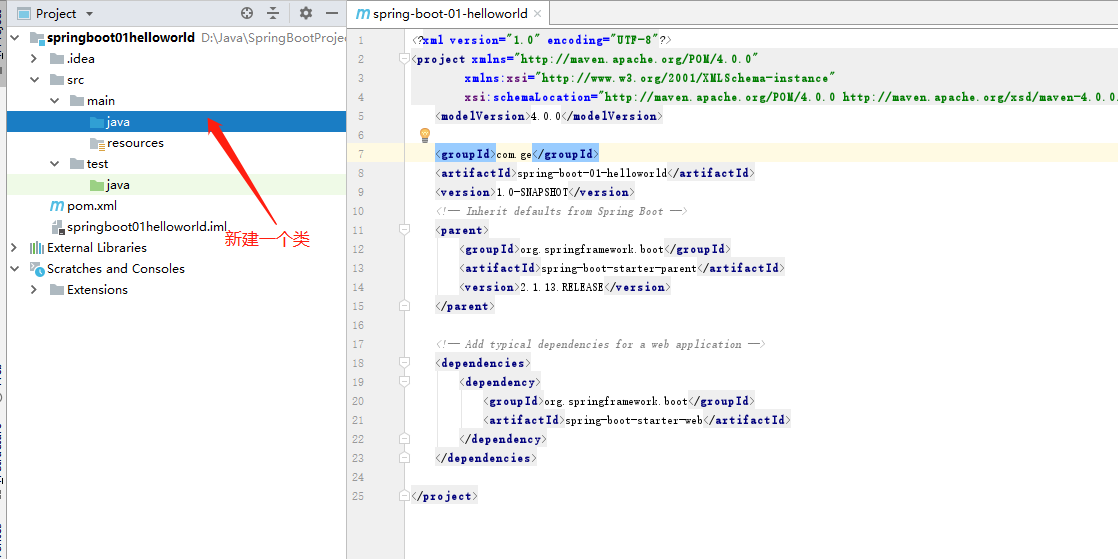

类中代码如下:
package com.ge;

import org.springframework.boot.SpringApplication;
import org.springframework.boot.autoconfigure.SpringBootApplication;

/**
 * @SpringBootApplication 来标注一个主程序类,说明这是一个Spring Boot应用
 */
@SpringBootApplication
public class HelloWorldMainApplication {
    //快捷键是psvm + Tab键
    public static void main(String[] args) {
        //spring应用启动起来
        SpringApplication.run(HelloWorldMainApplication.class,args);
    }
}
4、编写相关的Controller、Service
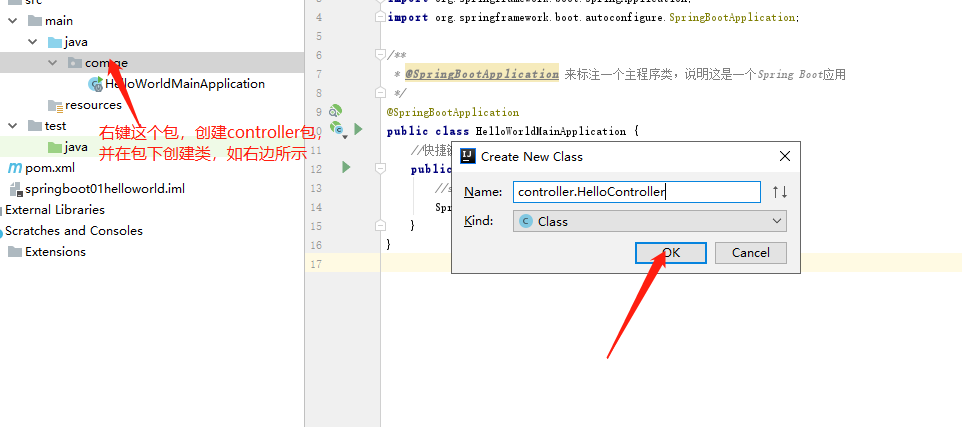
该类中代码如下
package com.ge.controller;

import org.springframework.stereotype.Controller;
import org.springframework.web.bind.annotation.RequestMapping;
import org.springframework.web.bind.annotation.ResponseBody;

/**
 * @Controller 处理请求
 */
@Controller
public class HelloController {
    /**
     * 接收来自浏览器的hello请求
     * @return
     */
    @ResponseBody
    @RequestMapping("/hello")
    public String hello(){
        return "HelloWorld!";
    }
}
5、运行主程序测试
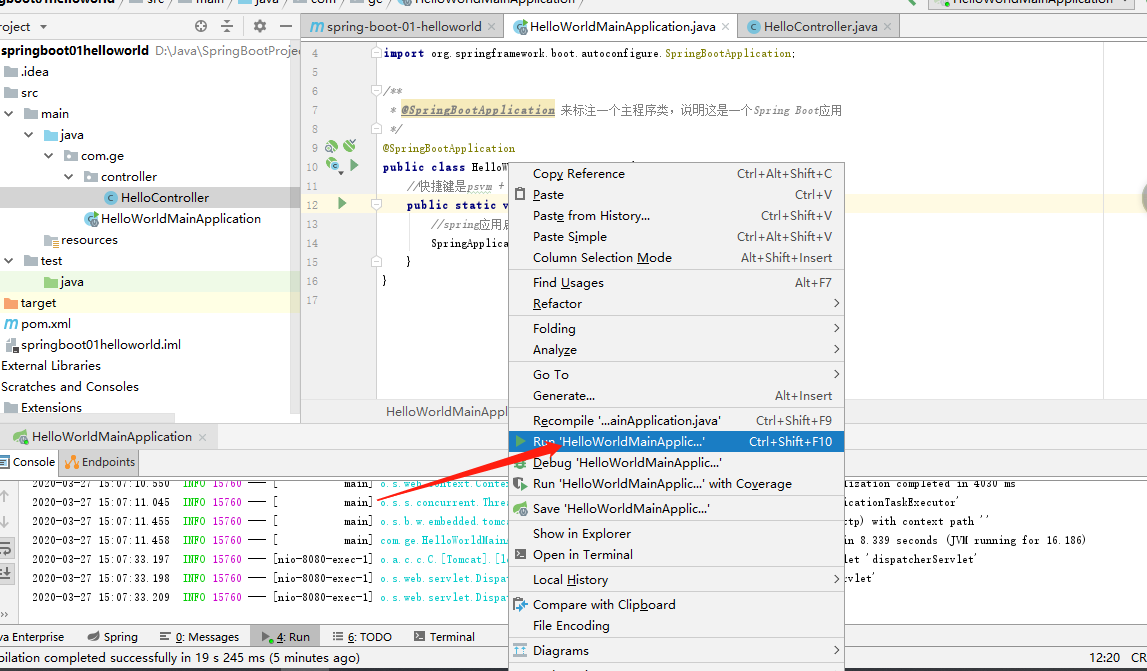
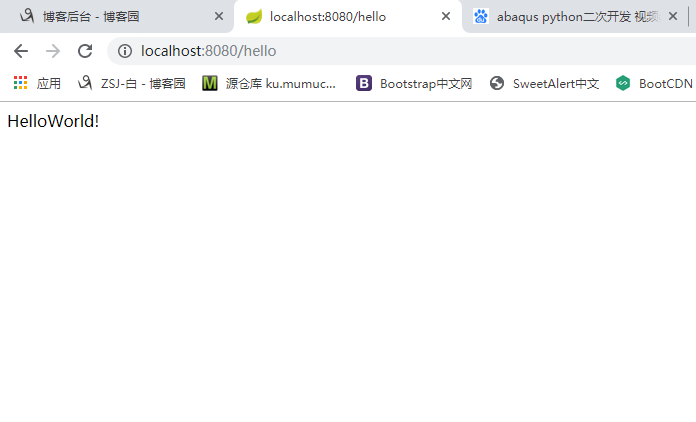
6、简化项目部署
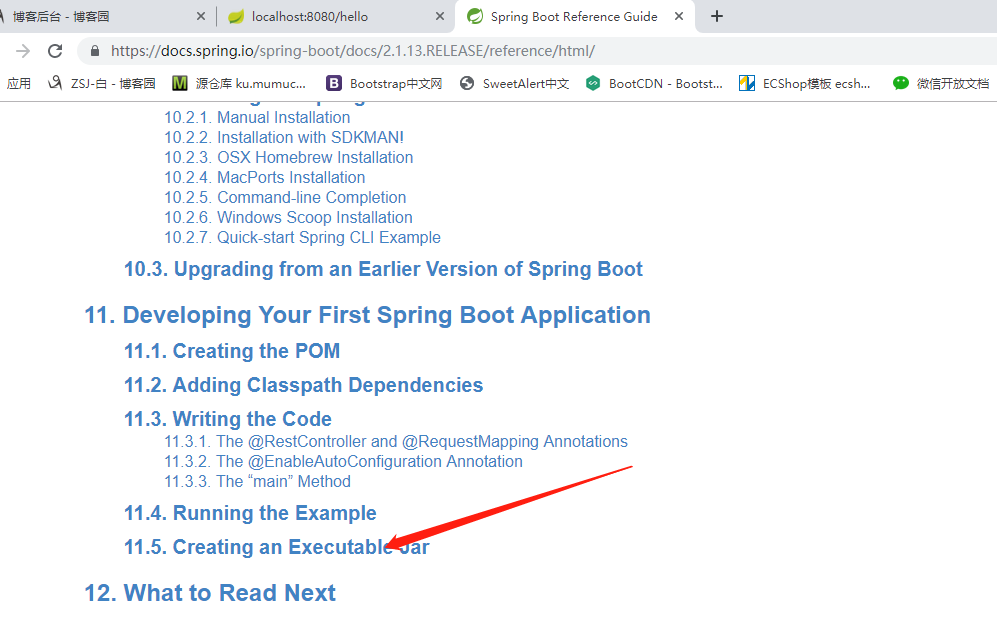
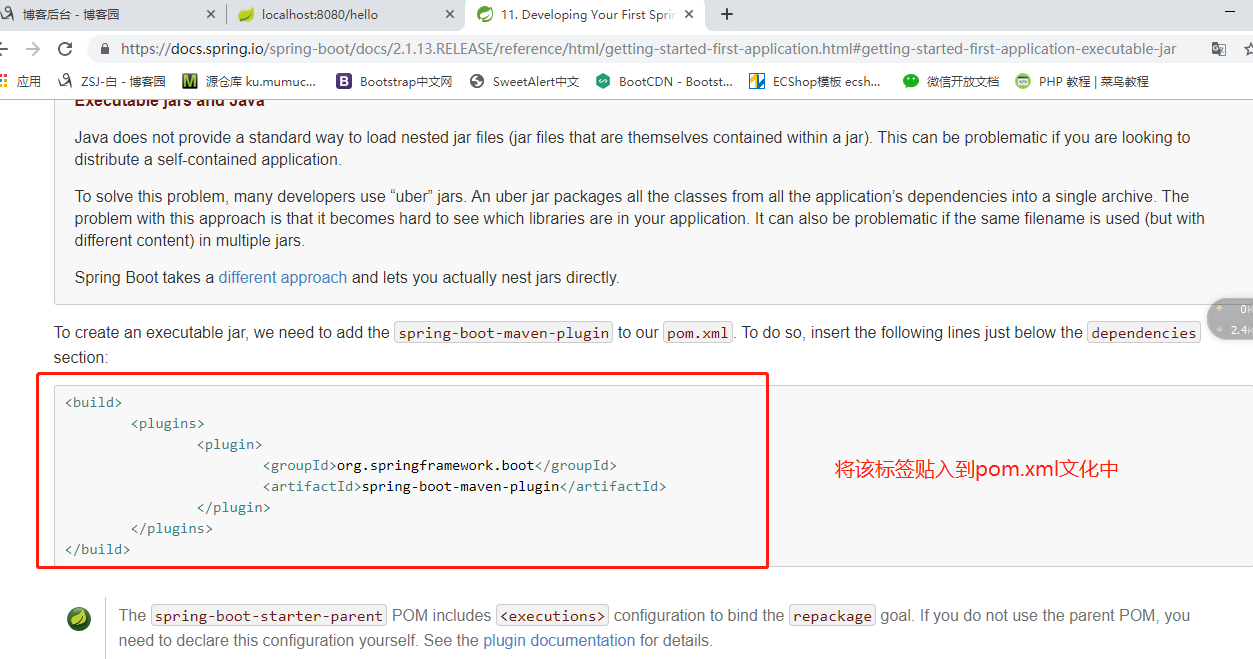
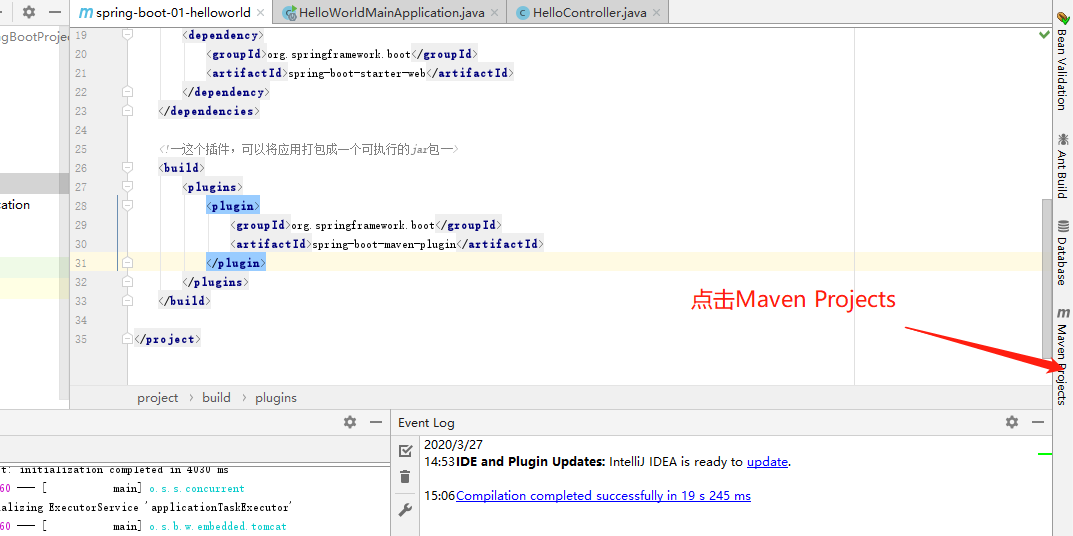
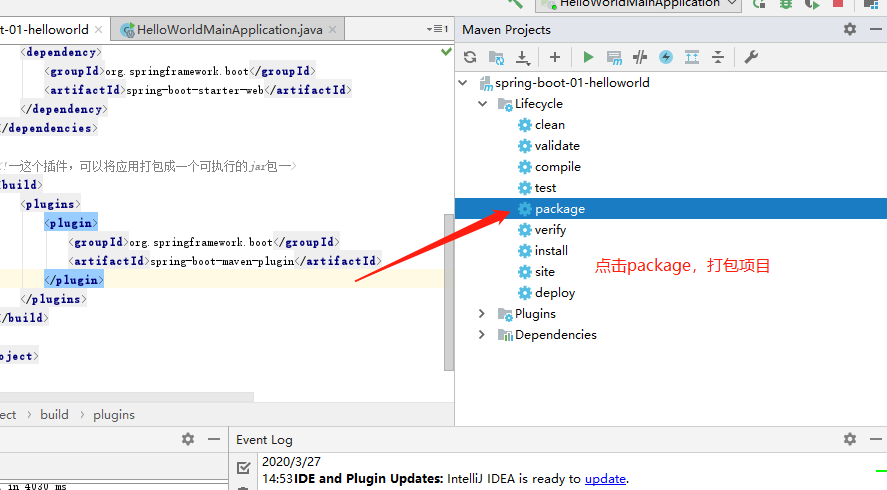
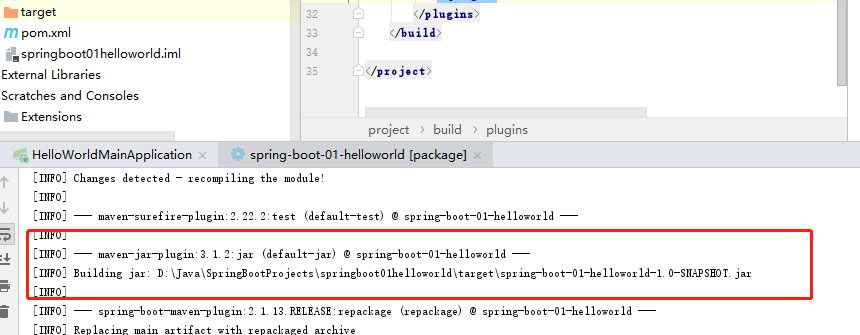
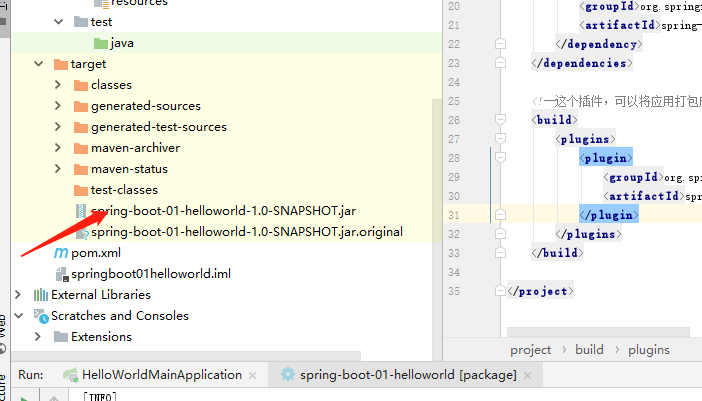
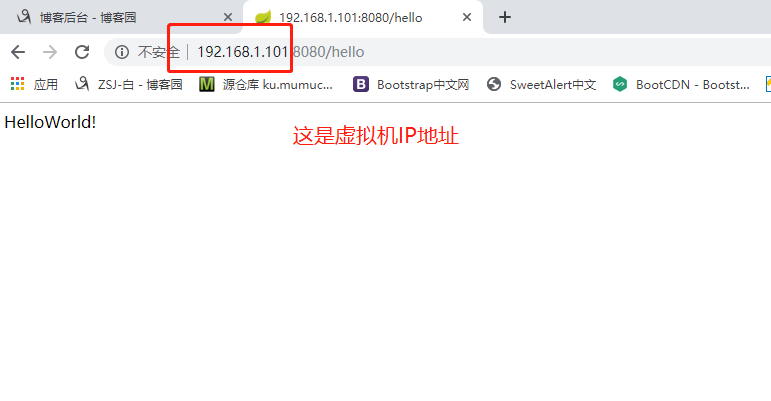
可以复制到我的虚拟机里,然后运行测试:(关于连接问题,可以查看这篇博客https://blog.csdn.net/qq_43054210/article/details/100942898)


五、项目探究
1、POM文件
    <!-- Inherit defaults from Spring Boot -->
    <parent>
        <groupId>org.springframework.boot</groupId>
        <artifactId>spring-boot-starter-parent</artifactId>
        <version>2.1.13.RELEASE</version>
    </parent>
;
2、导入的依赖
<!-- Add typical dependencies for a web application -->
    <dependencies>
        <dependency>
            <groupId>org.springframework.boot</groupId>
            <artifactId>spring-boot-starter-web</artifactId>
        </dependency>
    </dependencies>
spring-boot-starter-web

spring-boot-starter:spring-boot场景启动器;帮我们导入了web模块正常运行所依赖的组件
Spring Boot 将所有的功能场景都抽取出来,做成一个个的starter(启动器),只需要在项目里面引入这些starter相关场景的所有依赖都会导入进来。
要什么功能就导入什么场景启动器
2、主程序类,主入口类
/**
 * @SpringBootApplication 来标注一个主程序类,说明这是一个Spring Boot应用
 */
@SpringBootApplication
public class HelloWorldMainApplication {
    //快捷键是psvm + Tab键
    public static void main(String[] args) {
        //spring应用启动起来
        SpringApplication.run(HelloWorldMainApplication.class,args);
    }
}
@java.lang.annotation.Target({java.lang.annotation.ElementType.TYPE})
@java.lang.annotation.Retention(java.lang.annotation.RetentionPolicy.RUNTIME)
@java.lang.annotation.Documented
@java.lang.annotation.Inherited
@org.springframework.boot.SpringBootConfiguration
@org.springframework.boot.autoconfigure.EnableAutoConfiguration
@org.springframework.context.annotation.ComponentScan(excludeFilters = {@org.springframework.context.annotation.ComponentScan.Filter(type = org.springframework.context.annotation.FilterType.CUSTOM, classes = {org.springframework.boot.context.TypeExcludeFilter.class}), @org.springframework.context.annotation.ComponentScan.Filter(type = org.springframework.context.annotation.FilterType.CUSTOM, classes = {org.springframework.boot.autoconfigure.AutoConfigurationExcludeFilter.class})})
public @interface SpringBootApplication {
    @org.springframework.core.annotation.AliasFor(annotation = org.springframework.boot.autoconfigure.EnableAutoConfiguration.class)
    java.lang.Class<?>[] exclude() default {};

    @org.springframework.core.annotation.AliasFor(annotation = org.springframework.boot.autoconfigure.EnableAutoConfiguration.class)
    java.lang.String[] excludeName() default {};

    @org.springframework.core.annotation.AliasFor(annotation = org.springframework.context.annotation.ComponentScan.class, attribute = "basePackages")
    java.lang.String[] scanBasePackages() default {};

    @org.springframework.core.annotation.AliasFor(annotation = org.springframework.context.annotation.ComponentScan.class, attribute = "basePackageClasses")
    java.lang.Class<?>[] scanBasePackageClasses() default {};
@SpringBootApplication:SpringBoot应用标注在某个类上,说明这个类时SpringBoot的主配置类,SpringBoot就应该运行这个类的main方法来启动SpringBoot应用
@SpringBootConfiguration:Spring Boot得配置类;
标注在某个类上,表示这是一个Spring Boot的配置类;
@Configuration:配置类上来注解这个配置
配置类 ----- 配置文件;配置类也是容器的一个组件;@Component
@EnableAutoConfiguration:开启自动配置功能;以前我们要配置的东西,Spring Boot帮我们自动配置; @EnableAutoConfiguration
告诉SpingBoot开启自动配置功能;这样自动配置才能生效
@org.springframework.boot.autoconfigure.AutoConfigurationPackage
@org.springframework.context.annotation.Import({org.springframework.boot.autoconfigure.AutoConfigurationImportSelector.class})
public @interface EnableAutoConfiguration {
@AutoConfigurationPackage:自动配置包
@org.springframework.context.annotation.Import({org.springframework.boot.autoconfigure.AutoConfigurationPackages.Registrar.class}):spring的底层注解
@import给容器中导入一个组件;导入的组件由AutoConfigurationPackages.Registrar.class指定
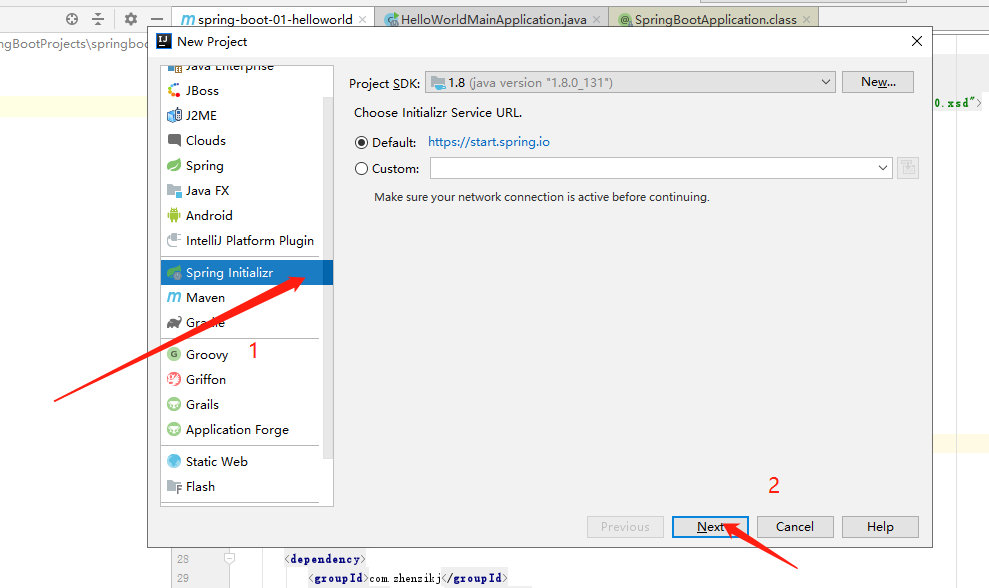
六、使用Spring Initializer 快速创建Spring Boot项目
IDEA都支持使用Spring的项目创建向导快速创建一个Spring Boot项目;
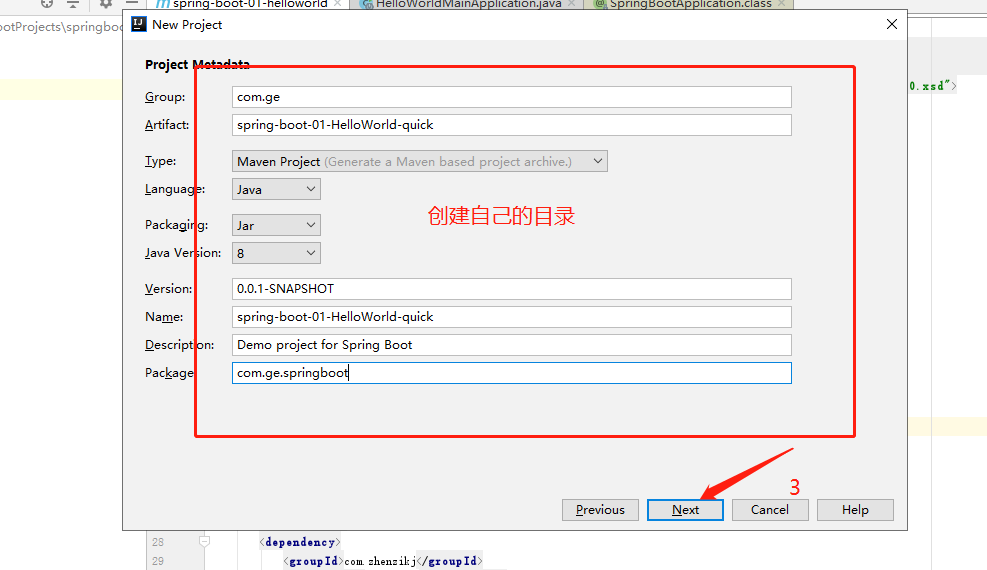
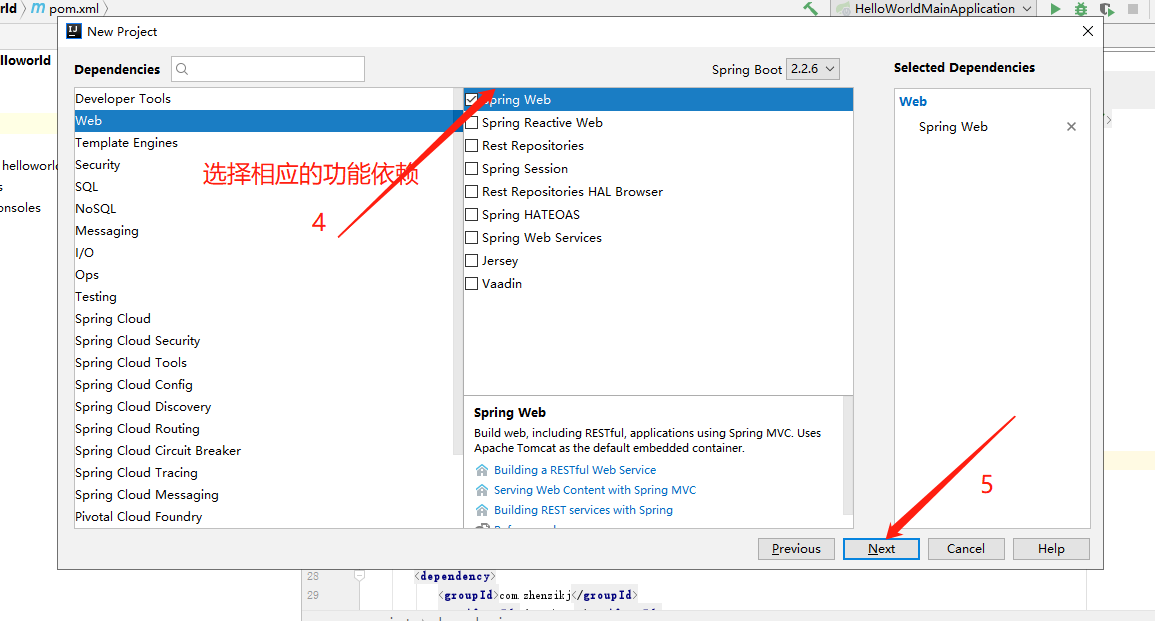
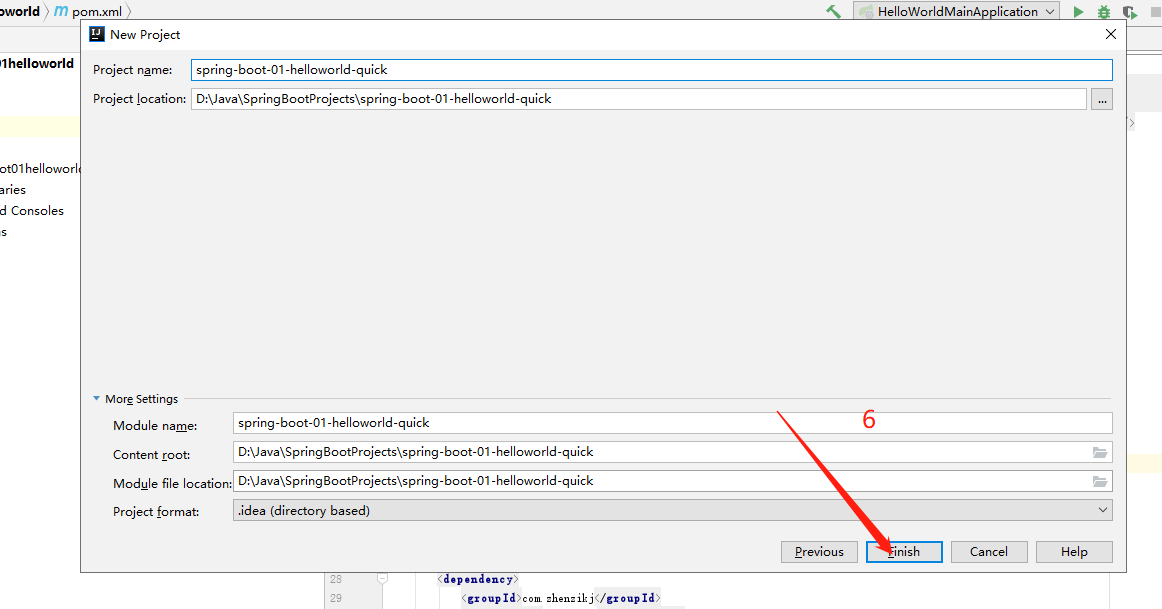
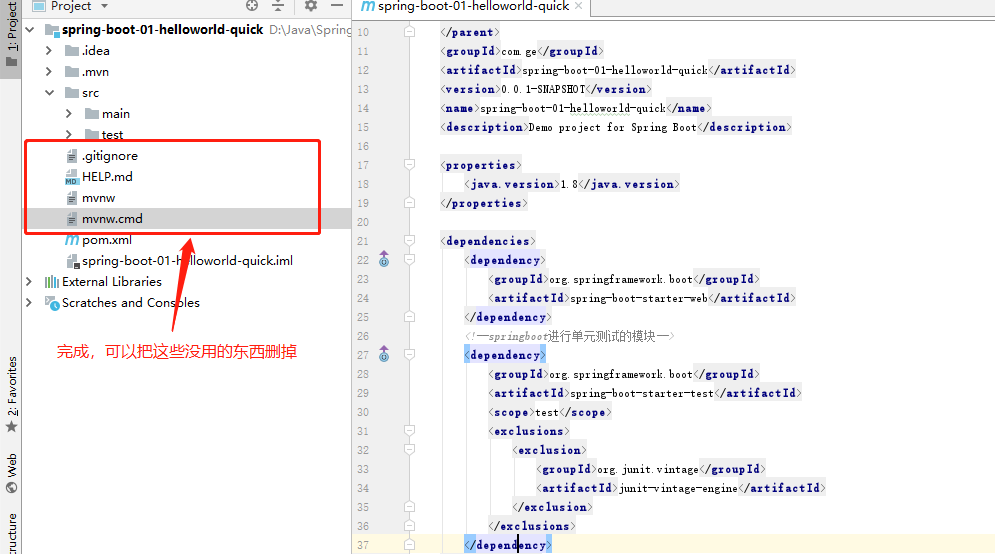
默认生成的Spring Boot项目的特点:
- 主程序已经生成好了,只需要编写自己的业务逻辑就好了
- resources文件夹目录结构
- static:保存所有的静态资源;js css img
- templates:保存所有的模板页面;(Spring Boot 默认jar 包使用嵌入式的Tomcat,默认不支持JSP页面);可以使用模板引擎(freemaker,thymeleaf);
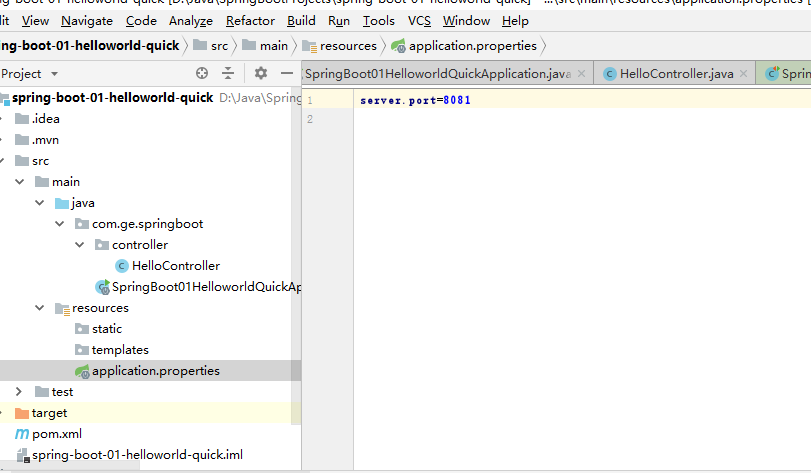
- application.properties:Spring Boot应用的配置文件;可以修改默认配置
