Swagger2配置与使用
Swagger2介绍
前后端分离开发模式中,api文档是最好的沟通方式。
Swagger 是一个规范和完整的框架,用于生成、描述、调用和可视化 RESTful 风格的 Web 服务。
- 及时性 (接口变更后,能够及时准确地通知相关前后端开发人员)
- 规范性 (并且保证接口的规范性,如接口的地址,请求方式,参数及响应格式和错误信息)
- 一致性 (接口信息一致,不会出现因开发人员拿到的文档版本不一致,而出现分歧)
- 可测性 (直接在接口文档上进行测试,以方便理解业务)
写完后端代码需要调试,swagger很方便解决了这一点:

配置过程:
1、建Module
在ParentProject下创建一个module
2、引入POM
<dependencies>
        <!--swagger-->
        <dependency>
            <groupId>io.springfox</groupId>
            <artifactId>springfox-swagger2</artifactId>
            <scope>provided </scope>
        </dependency>

        <dependency>
            <groupId>io.springfox</groupId>
            <artifactId>springfox-swagger-ui</artifactId>
            <scope>provided </scope>
        </dependency>
    </dependencies>
3、创建swagger的配置类
创建包com.courage.servicebase.config,创建类SwaggerConfig,注解Configuration告诉springboot这是一个配置类,EnableSwagger2启用Swagger2.
@Configuration
@EnableSwagger2
public class SwaggerConfig {

    @Bean
    public Docket webApiConfig(){

        return new Docket(DocumentationType.SWAGGER_2)
                .groupName("webApi")
                .apiInfo(webApiInfo())
                .select()
                .paths(Predicates.not(PathSelectors.regex("/admin/.*")))
                .paths(Predicates.not(PathSelectors.regex("/error.*")))
                .build();

    }

    private ApiInfo webApiInfo(){

        return new ApiInfoBuilder()
                .title("网站-课程中心API文档")
                .description("本文档描述了课程中心微服务接口定义")
                .version("1.0")
                .contact(new Contact("Courage",
                                     "http://Courage.com",
                                     "Courage129@163.com"))
                .build();
    }
}
4、使用
在需要用swagger的模块中的pom文件以依赖的形式引入swagger这个module
            <!--swagger ui-->
            <dependency>
                <groupId>io.springfox</groupId>
                <artifactId>springfox-swagger-ui</artifactId>
                <version>${swagger.version}</version>
            </dependency>
常用API
Api注解
可以用来标记当前Controller的功能。

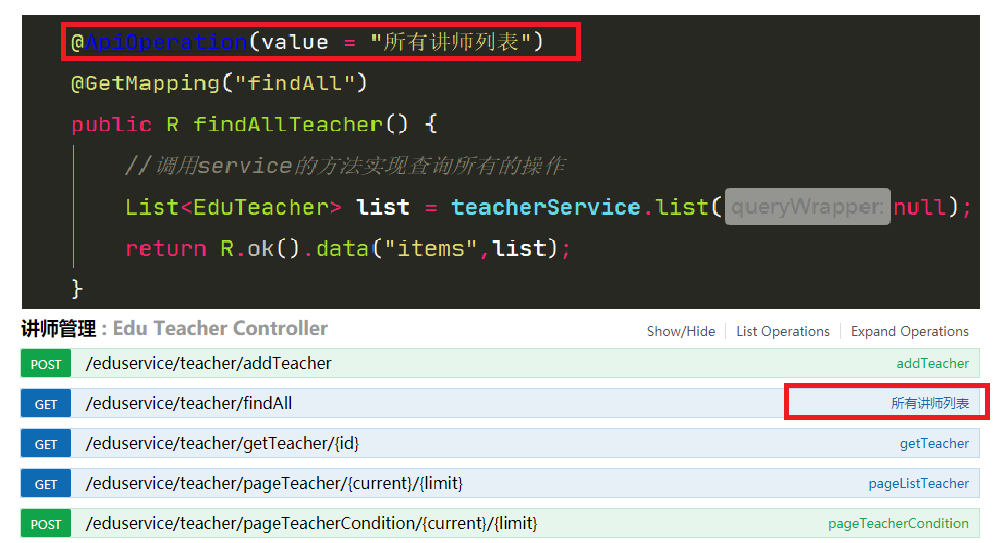
ApiOperation注解
用来标记一个方法的作用。

ApiImplicitParam注解
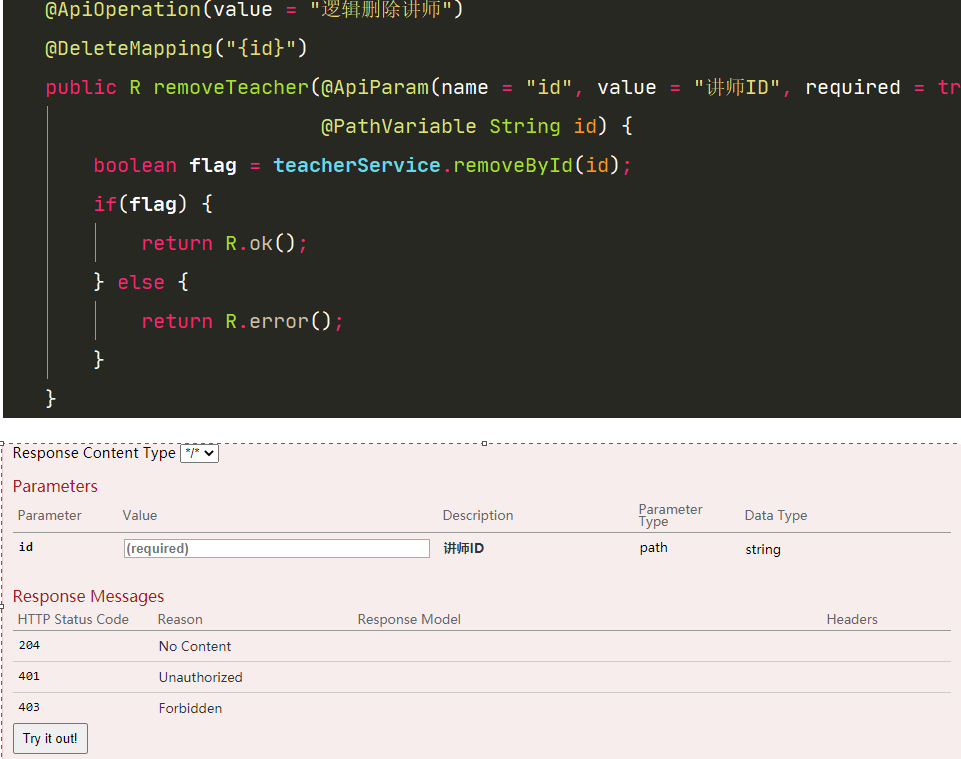
用来描述一个参数,可以配置参数的中文含义,也可以给参数设置默认值,这样在接口测试的时候可以避免手动输入。
如果有多个参数,则需要使用多个@ApiImplicitParam注解来描述,多个@ApiImplicitParam注解需要放在一
ApiImplicitParams注解中。
需要注意的是,@ApiImplicitParam注解中虽然可以指定参数是必填的,但是却不能代替

RequestParam(required = true),
前者的必填只是在Swagger2框架内必填,抛弃了Swagger2,这个限制就没用了,所以假如开发者需要指定一个参数必填,@RequestParam(required = true)注解还是不能省略。
如果参数是一个对象(例如上文的更新接口),对于参数的描述也可以放在实体类中。例如下面一段代码: